Advertisement
Advertisement
Table of Contents

Summary of Contents for Excel Tire Gauge PNEUTRONIC PNT-4
- Page 1 PNEUTRONIC PNT-4 DIGITAL AUTOMATIC TIRE GAUGE INSTRUCTION MANUAL...
-
Page 2: Important Safety Instructions
IMPORTANT SAFETY INSTRUCTIONS When operating electrical equipment, basic precautions should always be followed, including the following: 1. Read all instructions before installing and using this product. 2. Care must be taken as burns can occur from touching hot parts. 3. Do not operate equipment and place out of service if machine is damaged. Do not return to service until equipment been examined by a qualified service person. -
Page 3: Technical Specifications
TECHNICAL SPECIFICATIONS 127 VAC +/- 10% ELECTRICAL REQUIREMENT 230 VAC +/- 10% 12 VDC +/- 10% ELECTRICAL FREQUENCY 50 / 60 Hz ELECTRICAL CONSUMPTION 10 W MAXIMUM PRE-SET PRESSURE 145 psi. - 10 Bar MAXIMUM SUPPLY PRESSURE 175 psi. - 12 Bar AVERAGE AIR FLOW 0.5 m /min - 17.7 ft... -
Page 4: Installation
INSTALLATION Before installing the inlet air supply hose, ensure that the airline is free of any contaminants by sufficiently blowing out the line prior to connection. A filtered air supply is recommended. The supply pressure should not exceed 175 psi. 2.2 Secure the inlet and outlet hoses to the connectors with hose clamps. 2.3 Fasten the gauge via the provided mounting holes to a suitable surface with appropiate anchors. 2.3 Connect the power cord to a suitable electrical receptacle. OUTLET INLET... -
Page 5: Maintenance
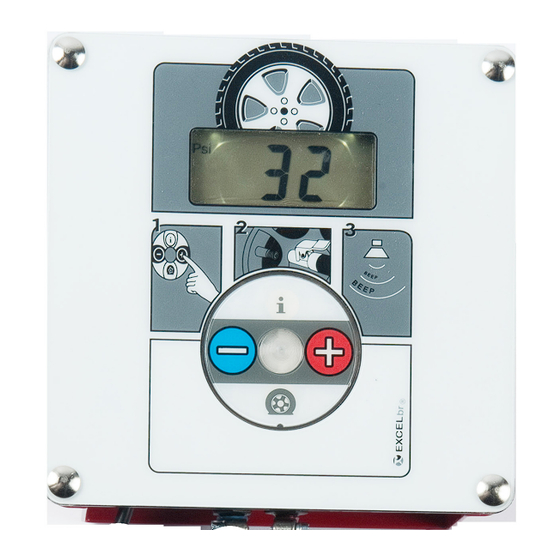
TECHNICAL SPECIFICATIONS Set pressure using the and buttons. Connect chuck to tire valve stem. 3.3 Wait for the tire gauge to “beep” indicating that set pressure has been reached. 3.4 In the event that the tire is flat, press the flat tire button to begin the infation process MAINTENANCE 4.1 Never allow inlet pressure to exceed 175 psi. Use only an “OPEN END” chuck. Ensure that the air supply is free of contaminants. 4.4 The PNT4 can be wiped down with soap and water. -
Page 6: Troubleshooting
TROUBLESHOOTING 5.1 Display reads Er1, Er2, Er4, or Er8 - Remove chuck from tire, reset the power. If the problem continues, contact service. 5.2 Blank display - check the power supply. 5.3 If a constant air leak is noticed during the initial start up of the unit, check to ensure that the inlet and outlet hoses were not reversed when connected to the gauge. 5.4 Display reads Er3 - Check the supply air for adequate pressure. If problem persists, clean the inlet filter located under the inlet hose connector. 5.5 Display reads Er5 - Verify that the power supply is the same as required by the equipment. 5.6 Display reads Er7 - Verify that the chuck is not clogged and that it is an “open end” chuck. Er7 will also appear if chuck stays connected to the tire for longer than 15 seconds after it is inflated. 5.7 If the gauge does not reach the desired pressure, and displays a higher or lower value, look for air leaks from the hose or connections. 5.8 If calibration time seems excessive, clean air filter and check air line for obstructions. 5.9 If the gauge does not perform calibration, push the “flat tire” button if the tire is deflated, or replace chuck. -
Page 7: Warranty
Note: Freight cost is not included when shipping the defected part back. . Important: Use of this product in any way not stated in this manual can compromise safety features of this product. Excel Tire Gauge, LLC. 215 Jefferson Blvd, Warwick, RI 02888 Tel: 401 732 8420 Fax: 401 384 6157 WWW.EXCELTIREGAUGE.COM...
Need help?
Do you have a question about the PNEUTRONIC PNT-4 and is the answer not in the manual?
Questions and answers