Table of Contents
Advertisement
Advertisement
Table of Contents

Related Manuals for CO-TRUST E10 Series

Summary of Contents for CO-TRUST E10 Series
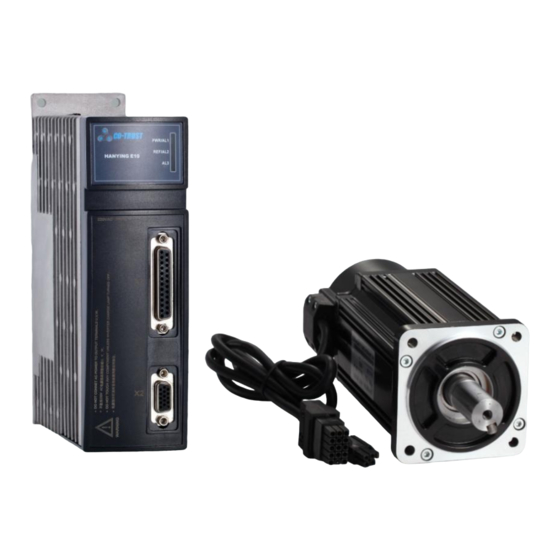
- Page 1 E10 Series AC Servo Driver User Manual V2.30...
-
Page 2: Table Of Contents
User Manual of E10 Series AC Servo Driver ontents 1 SAFETY ANNOUNCEMENT ..................4 2 SPECIFICATIONS ......................7 3 INSTALLING ....................... 11 3.1 Driver Installing Environment ..............11 3.2 Driver Environmental Condition ..............11 3.3 How to Install Driver .................. 11 3.4 Installation Direction and Intervals ............12 3.5 Motor Installation Environment .............. -
Page 3: Table Of Contents
10 PROTECTIVE FUNCTION ..................136 11 GAIN ADJUSTMENT ....................141 11.1 System Control Block Diagram of E10 Series Servo Driver ....141 11.2 Setup the Related Gain Parameters of Servo ........141 11.3 The Curve Graphic of Servo Upper Computer MagicWorks Tuner ..145 11.4 The Principles and Methods of Parameter Adjustment ...... -
Page 4: Safety Announcement
User Manual of E10 Series AC Servo Driver 1 Safety Announcement Please be sure to observe To avoid personal injury and possession damage, the matters which need attention will be explored in more detail below. Please read the following instructions or precautions carefully before using the servo driver, and must be complied with the installation and debugging preventive measures and operating procedures. - Page 5 User Manual of E10 Series AC Servo Driver DANGER Please do not dismantle after servo driver power-ON. May cause an electric shock. For a while after power off, the internal circuits of driver is kept at higher voltage, please perform the transportation and wiring May cause an electric shock.
- Page 6 User Manual of E10 Series AC Servo Driver CAUTION Avoid to block the ventilation holes of driver, and do not let May cause fire danger. foreign matter fall into the servo driver. Please comply with the requirements of installation method May cause personal injury and and direction.
-
Page 7: Specifications
User Manual of E10 Series AC Servo Driver 2 Specifications Technical Specifications for Driver E10 Servo driver Order No. 200W (Low inertia) CTSD E10-B2012-M000 400W (Low inertia) CTSD E10-B4012-M000 750W (Low inertia) CTSD E10-B7512-M000 1KW (Low inertia) CTSD E10-B1022-M000 1KW (Middle inertia) - Page 8 User Manual of E10 Series AC Servo Driver Load rate of 0 ~ 100%: 0.1% or less(Under rated revolution) change Speed rate Voltage rate of Rated voltage:±15%: 0%(Under rated revolution) change of change Temperaturer 25±25℃: ±0.1% or lower(Under rated revolution)
- Page 9 User Manual of E10 Series AC Servo Driver Voltage -10V ~ +10V(Resolution:12 bit ) Range Analog Input Input Resistance Sampling 1KHz Frequency External analog Command/8 internal speed command/32 Command Control Method communication register command Lowpass filtering, Smoothing time constant: 0~2500(x10us)
- Page 10 User Manual of E10 Series AC Servo Driver Model Description of Servo Driver C T S D E 1 0 - B 4 0 1 2 - M 0 0 0 CTSD CO-TRUST Driver products Supplement flag bit Support Modbus Protocol...
-
Page 11: Installing
User Manual of E10 Series AC Servo Driver 3 Installing Installing Driver and Motor Please properly install the servo driver and servo motor to avoid malfunctions or accidents. 3.1 Driver Installing Environment The storage and installation of products must satisfy the environmental requirements. -
Page 12: Installation Direction And Intervals
User Manual of E10 Series AC Servo Driver 1 4 3 .8 4 3 ±0 .3 2 7 .5 Figure 3.1 Base plate installation method of Servo driver 3.4 Installation Direction and Intervals In order to allow enough space surrounding for ventilation, please leave larger interval when in actual installation. -
Page 13: Motor Installation Environment
User Manual of E10 Series AC Servo Driver 3.5 Motor Installation Environment Avoid installing the motor in rain water and direct sunshine rooms. Avoid the place where the motor is subjected to dust, corrosive gases, conductive objects, liquids and flammable gases. - Page 14 User Manual of E10 Series AC Servo Driver Ф 1.5:1 - . 0 03 - . 0 1 Ф70 6 0 .5 2 0 0 W L =1 0 2 4 0 0 W L =1 2 2 Figure 3.3 200W/400W (Low inertia) type Motor installation dimension (Unit: mm) Φ90...
- Page 15 User Manual of E10 Series AC Servo Driver 3. Technology parameter of Motor Motor Rated Rated Rated Rated Rated Peak Back-Emf Rotor Feedback Poles Type Power Voltage revolution Torque Current Torque Constant (Ke) Inertia Encoder CTSD 2500ppr 0.637N· 1.911N· 0.17...
-
Page 16: Wring
User Manual of E10 Series AC Servo Driver 4 Wring General wiring diagram Those who are authorized for wiring or inspection must qualify to the job. To avoid electrical shock hazards, please perform the wiring and inspection at least 15 minutes after the power off. -
Page 17: The Main Power Input Terminal
750W/1.0KW Input Terminal 24VDC±15% The control power of E10 series servo adopt to 24VDC for power supply,avoid to switch-on 220V AC power supply. The rated current consumption of control power for a single servo is 450mA; 24V Caution DC control power recommends 2A as the rated current. - Page 18 User Manual of E10 Series AC Servo Driver The positive of direct current bus The positive bus inside the driver. Avoid to set P132 to 2 while using internal brake resistor. Please install the external braking resistance on incombustible matters such as metal etc, advise to set external protection like temperature insurance etc.
-
Page 19: Motor Power Cable Interface
User Manual of E10 Series AC Servo Driver 4.4 Motor power cable interface Terminal Symbol Name Description U phase of Motor Corresponds to the motor V phase of Motor Corresponds to the motor W phase of Motor Corresponds to the motor... -
Page 20: Encoder Input Interface Terminal
Please refer to Figure 4.4 or 4.5 for the wiring diagram. 4.6 Encoder Input Interface Terminal E10 series servo motor adopt to connect incremental encoder signal, which including encoder power, A、 B、 Z signal and shield layer(Contains Hall signal U、 V、 W), the specific... -
Page 21: Control Interface Terminal
User Manual of E10 Series AC Servo Driver 4.7 Control Interface Terminal PULS- Pulse negative input PULS+ Pulse positive input Direction negative input DIR- DIR+ Direction positive input The control signal input common terminal SRV-ON Servo-ON DIN1 Digital input 1... - Page 22 User Manual of E10 Series AC Servo Driver Figure 4.4 Wiring schematic diagram of External Position control mode...
- Page 23 User Manual of E10 Series AC Servo Driver Figure 4.5 Wiring schematic diagram of External Speed/Torque control mode...
-
Page 24: Communication Interface Terminal、Terminal Resistance And Restore Factory Default
Default Figure 4.6 The schematic diagram of servo top terminal The serial port Communication physical interface of E10 series servo are RJ45, which support Modbus protocol and CANopen protocol, both of the communication interfaces can be communicated, the specific wiring see below table:... - Page 25 User Manual of E10 Series AC Servo Driver wires.(The communication distance could reach to 500m while using twisted pair network cable, recommend 300m or shorter for general use.) Likewise, draw out orange and white-orange from the cable to make CANopen...
- Page 26 User Manual of E10 Series AC Servo Driver Connection between E10 Servo driver and PC Set terminal resistance Matching terminal resistance switch is used to eliminate the signal reflection in communication cable, to shield the signal reflection which caused by impedance discontinuity or mismatching.
- Page 27 User Manual of E10 Series AC Servo Driver In order to improve reliability of the communication data, both ends of the communication cable should be limited when building CANopen network, that is connecting a termination between CAN_L and CAN_H of the servo. The following figure indicates the termination method among E10 Servo Driver and CPU226M-CAN.
-
Page 28: Details Of Control And Given Signal
User Manual of E10 Series AC Servo Driver 5 Details of Control and given Signal General input/output signal, communication external command and its functions 5.1 Given Command Source... -
Page 29: Control Signal Definition And Multiplexing Choice
User Manual of E10 Series AC Servo Driver While under position control mode, there are two tips described as follows to be noted: ◆ Set pulse direction and form according to the type of input command pulse: Type Direction CCW(counterclockwise) -
Page 30: Selection Of Digital Input Multiplexing Functions
User Manual of E10 Series AC Servo Driver 5.2.1 Selection of Digital input multiplexing functions P73 decides the control command source and distribution mode of pins: Definition of Param value Name Value Remark Communication control External control mode mode From P281 Communication... - Page 31 User Manual of E10 Series AC Servo Driver When P73 is set to 1 or 2, the control commands of External control mode and communication control mode are from external DI signals, P281 Communication extended control word is invalid. If P73 sets to 1, the pin functions comply with default allocation method.
- Page 32 User Manual of E10 Series AC Servo Driver refer to following table. Example: Configure DIN1 pin to Homing command, you should write 16#07 to P78 bit 0~7; If DIN2 pin is configured to Original switch input, you need write 16#0B to P78 Bit8~15.
-
Page 33: Selection Of External Input Logic Level
User Manual of E10 Series AC Servo Driver <Note> 1) If multi-pins are allocated to the same function, the servo would report an alarm(P202 Alarm code: 16). 2) Set high bit or low bit of P75, 76, P77, P78 to 0 means assign no function for the relevant pin. -
Page 34: Selection Of Digital Output Multiplexing Functions
The pin functions marked in figure 4.4 and figure 4.5 are the default functions, you can configure other functions for DOUT1~DOUT4 by MagicWorks Tuner or CO-TRUST debugger. The DO has only one pin-allocation way which is different from DI, and the DO... -
Page 35: Pin Function Configuration & Simu Io
User Manual of E10 Series AC Servo Driver Digital output multiplexing functions Param Symbol Position mode Speed mode Torque mode 0: Servo-Ready 0: Servo-Ready 0: Servo-Ready Bit0~1 DOUT1 0: Servo Alarm output Servo Alarm output Servo Alarm output Bit2~3 DOUT2... - Page 36 User Manual of E10 Series AC Servo Driver P73: Definition of Param value Name Value Remark Communication control External control mode mode From P281 Communication It's related From external DI signal extended control word to control (Default allocation) (Default allocation) mode.
- Page 37 User Manual of E10 Series AC Servo Driver Tips ● Refer to “5.2.1 Selection of Digital input multiplexing functions“ for more info on configuring functions for DIN1~DIN6 pins. ● Refer to “ 5.2.3 Selection of Digital output multiplexing functions“ for more info on configuring functions for DOUT1~DOUT4 pins.
-
Page 38: Details Of Control Signal
Press “Write Servo” button, you can write the pin configuration to target device. 5.3 Details of Control Signal E10 series servo have two methods: External control and communication control, different control modes using different control signals, the specific control signal... - Page 39 User Manual of E10 Series AC Servo Driver Signal Symbol Function Status bit The overtravel inhibit of both External control mode and Communication control mode are controlled by external This signal is used to input Overtravel inhibit signal in counterclockwise direction.
- Page 40 User Manual of E10 Series AC Servo Driver Signal Symbol Function Status bit You can set the function of this signal by P60 (Gain switching action setup). Please refer to chapter “11.5 Gain Switching” for details. DI input / Bit9...
- Page 41 User Manual of E10 Series AC Servo Driver Signal Symbol Function Status bit If P01(control mode selection) is set to 3~5 or 9~11,you can switch between the two control modes by below table's description(when P73 defaults to 0): DI input is invalid...
- Page 42 User Manual of E10 Series AC Servo Driver Signal Symbol Function Status bit This signal is used to enter Homing mode. This signal is effective at rising edge, and the input is invalid before enabling. After the homing status is completed, the homing status...
- Page 43 User Manual of E10 Series AC Servo Driver Signal Symbol Function Status bit This signal is to select the input command direction of Speed mode. DI input / P281_Bit10 Function Selection of Speed direction is invalid. Selection of P281...
- Page 44 User Manual of E10 Series AC Servo Driver Signal Symbol Function Status bit Please set the motor mechanical brake action timing P130 and P131 before using this function. This output turns on when brake keeps releasing. <Note> Connect the control terminal of brake resistance via...
- Page 45 User Manual of E10 Series AC Servo Driver Signal Symbol Function Servo receives single-ended or differential pulses, input Command PULS+ under external speed or external torque mode is invalid. Pulse+ Input Caution Servo only receives 5V pulse, if need to use other pulses...
-
Page 46: Selection Of Internal Speed Switching Under External Speed Control Mode
User Manual of E10 Series AC Servo Driver 5.4 Selection of Internal Speed Switching Under External Speed Control Mode PIN X1 P04 (Internal/External speed selection) Internal command pin input Command Command Command 0 / 4 selection1 selection2 selection3 1st Internal... -
Page 47: Communication Command Selection Under Communication Control Mode (P4=4)
User Manual of E10 Series AC Servo Driver 5.5 Communication command selection under communication control mode (P4=4) PIN X1 Given Command Source Internal command pin input Command Command Command Command Communication Communication Communication selection 4 selection 3 selection 2 selection 1... - Page 48 User Manual of E10 Series AC Servo Driver 5.6 Selection of Torque Limitation Output (TLC) and Zero-speed Detection Output (ZSP) Signal P08 or P09 TLC Output signal ZSP Output signal Torque limit signal. The output transistor turns ON While torque command is limited by torque at Servo-ON status.
-
Page 49: Parameter List
User Manual of E10 Series AC Servo Driver 6 Parameter List Descriptions of Parameters 6.1 Parameter Checklist Adrs Parameter Name Adrs Parameter Name Velocity feedforward filter time Communication Address※ constant Control mode setup※ 2nd position loop gain Torque limitation selection... - Page 50 User Manual of E10 Series AC Servo Driver Adrs Parameter Name Adrs Parameter Name Communication position control 4th internal speed method External input logic level selection 5th internal speed Control command source selection 6th internal speed Digital input multiplexing function...
- Page 51 User Manual of E10 Series AC Servo Driver Adrs Parameter Name Adrs Parameter Name Excessive level of position Feedback speed deviation Excessive level of Analog Velocity deviation command Over-load level Torque command Over-speed level Actual torque 140~149 Historical record 1~10...
-
Page 52: Details Of Parameters
User Manual of E10 Series AC Servo Driver 6.2 Details of Parameters Make sure to understand the Parameters' meaning before adjustment, incorrect settings may result in equipment malfunction. You can try to restore the factory default parameters while servo failure occurs. - Page 53 User Manual of E10 Series AC Servo Driver Control Read- Default Adrs Name Range Function mode Write value You can set the torque limitation signal in both clockwise and counterclockwise directions. Value CCW (Counterclockwise) CW (Clockwise) External Analog External Analog...
- Page 54 User Manual of E10 Series AC Servo Driver Control Read- Default Adrs Name Range Function mode Write value You can select the command source of external speed control mode and communication control mode. 0: Analog input command 1: Internal Command (1st~4th internal command) 2: Internal Command (1st~3rd internal command;...
- Page 55 User Manual of E10 Series AC Servo Driver Control Read- Default Adrs Name Range Function mode Write value You can select the function of external zero-speed clamp signal: 0: zero-speed clamp is disabled. 1: zero-speed clamp is enabled. While the parameter is configured to 2, it operates in...
- Page 56 User Manual of E10 Series AC Servo Driver Control Read- Default Adrs Name Range Function mode Write value You can set the communication rate of CANopen communication. 0: CANopen bus not used 1: 1000Kbps 2: 800Kbps CANopen 3: 500Kbps baud rate...
- Page 57 User Manual of E10 Series AC Servo Driver Control Read- Default Adrs Name Range Function mode Write value You can define the response characteristics of velocity loop 1~ integration action. integration 1000 Reducing the setting, you can accelerate the time integration action.
- Page 58 User Manual of E10 Series AC Servo Driver Control Read- Default Adrs Name Range Function mode Write value 2nd torque You can set the time constant of the primary delay 0~ filter time filter that is inserted to the torque command portion.
- Page 59 User Manual of E10 Series AC Servo Driver Control Read- Default Adrs Name Range Function mode Write value Set the output pulses number from feedback Numerator interface per one motor single turn. ① P57=0: command Feedback pulses per single turn=P56×4...
- Page 60 User Manual of E10 Series AC Servo Driver Control Read- Default Adrs Name Range Function mode Write value You can select the homing mode: 0: Reset the P216 (User position coordinates) by triggering the DI signal 1: Refer to both the negative original switch and Z-phase signal mode.
- Page 61 User Manual of E10 Series AC Servo Driver Control Read- Default Adrs Name Range Function mode Write value You can select the conditions for switching between the 1st and 2nd gain. Gain 0: PI/P can be switched by selecting the 1st gain.
- Page 62 User Manual of E10 Series AC Servo Driver Control Read- Default Adrs Name Range Function mode Write value You can select the External DI logic level. Bit0: Servo-on method 0: The communication enable and pin enable cannot take effect at the same time.
- Page 63 User Manual of E10 Series AC Servo Driver Control Read- Default Adrs Name Range Function mode Write value Parameter Symbol B0~B7 SRV_ON Digital input multiplexing B8~B15 DIN6 function B0~B7 DIN5 register4 B8~B15 DIN4 B0~B7 DIN3 B8~B15 DIN2 B0~B7 DIN1 16#00: No functions were allocated.
- Page 64 User Manual of E10 Series AC Servo Driver Find the corresponding function code for each pin in above table, and enter 16#0000 for P76, 16#070B for P77、16#0302 for P78. Digital output Please refer to Chapter 5.2 "Control signal definition Multiplexing and Multiplexing choice".
- Page 65 User Manual of E10 Series AC Servo Driver Control Read- Default Adrs Name Range Function mode Write value You can set the resolution of command pulse Numerator according to frequency division. of 1st 0~ Numerator Pulse Number Revolution...
- Page 66 User Manual of E10 Series AC Servo Driver Control Read- Default Adrs Name Range Function mode Write value You can set the relationship between the motor speed and the voltage applied to the analog velocity command input terminal. This parameter defines the gradient "rpm/command voltage".
- Page 67 User Manual of E10 Series AC Servo Driver Control Read- Default Adrs Name Range Function mode Write value 1st internal -20000~ You can set the 1st speed of internal speed speed 20000 command. Unit:rpm You can set the 2nd speed of internal speed...
- Page 68 User Manual of E10 Series AC Servo Driver Control Read- Default Adrs Name Range Function mode Write value You can set the acceleration/deceleration time of external/communication speed control mode. If the input speed command changes so much, it would switch to rather smoothing acceleration/Deceleration speed command.
- Page 69 User Manual of E10 Series AC Servo Driver Control Read- Default Adrs Name Range Function mode Write value You can set the relationship between the motor torque and the voltage applied to the analog torque command input terminal. Unit: 0.1V/1000‰...
- Page 70 User Manual of E10 Series AC Servo Driver Control Read- Default Adrs Name Range Function mode Write value You can set the threshold value of Arrival speed, when the actual rotating speed of the motor exceeds Arrival 10~ this parameter value, the arrival speed signal...
- Page 71 User Manual of E10 Series AC Servo Driver Control Read- Default Adrs Name Range Function mode Write value Mechanical Defines the delay time from OFF of the mechanical Brake braking release signal (BRKOFF) to the shutdown delay time 0~100 of motor while SRV-ON signal is cut-off in motor stalling status.
- Page 72 User Manual of E10 Series AC Servo Driver Control Read- Default Adrs Name Range Function mode Write value You can set the excess voltage level of analog Excessive velocity command or torque command after the level of S、T 0~100 zero-drift adjustment. Unit: ×0.1V...
- Page 73 User Manual of E10 Series AC Servo Driver Control Read- Default Adrs Name Range Function mode Write value Software Software version of current driver. version 16#0101: E10 series+400W motor+2500 p/r Encoder Type of 16#0202: E10 series+200W motor+2500 p/r Encoder servo and 16#0303: E10 series+750W motor+2500 p/r Encoder...
- Page 74 User Manual of E10 Series AC Servo Driver Control Read- Default Adrs Name Range Function mode Write value The current alarm state of the servo: 0: No alarm 1: Under-voltage 2: Over-voltage 3: Over-current 4: Over-heat 6: Encoder feedback error...
- Page 75 User Manual of E10 Series AC Servo Driver 0: CCW direction, 1: CW direction bit11: Original switch input, 1: Valid bit12: Command selection 1 bit13: Command selection 2 bit14: Command selection 3 bit15: Torque limitation switching input 0: 1st Torque limitation, 1: 2nd Torque limitation...
- Page 76 User Manual of E10 Series AC Servo Driver Control Read- Default Adrs Name Range Function mode Write value Sum of The total number of command pulse. command Unit:pulse pulses Sum of The total number of feedback pulse. Feedback Unit:pulse pulses User The absolute coordinates of communication control.
- Page 77 User Manual of E10 Series AC Servo Driver Control Read- Default Adrs Name Range Function mode Write value Please see below for the explanation of "No-motor Running": 0: No particular reason 1: Main power shutoff 2: SRV-ON signal is not enabled...
- Page 78 User Manual of E10 Series AC Servo Driver Control Read- Default Adrs Name Range Function mode Write value The related communication control function codes: 16#0000: No command. 16#0102: Write all parameters down to EEPROM. 16#0104: Write the memory updated parameters down to EEPROM.
- Page 79 User Manual of E10 Series AC Servo Driver Control Read- Default Adrs Name Range Function mode Write value Bit0: 1: Servo is enabled, 0: Servo is disabled. Bit1: 1: Alarm clear is valid, 0: Alarm clear is invalid. Bit2: Cancel relative position command, 1: Cancel,...
-
Page 80: Electronic Gear Ratio Setup
(P280~P389) to EEPROM. 3) Can read and write show as P, read only show as R. 4) The values in above table are the default parameters of E10 Series 400W Servo driver. 6.3 Electronic gear ratio setup While in position control mode, adjusting electronic gear ratio can set the motor speed and displacement per input command pulse unit. -
Page 81: Communication Functions
User Manual of E10 Series AC Servo Driver 7 Communication Functions Introduction of Modbus / CANopen communication protocols 7.1 Introduction of CANopen protocol E10 servo driver supports CANopen communication, which allows the operations of writing/reading params via CANopen controller. The controller can modify param commands in real time so as to change the running position or speed etc while E10 servo driver under communication control mode. - Page 82 User Manual of E10 Series AC Servo Driver Rx PDO Event-trigger, Time-trigger, Synchronizing cycle and Asynchronizing PDO transmit type cycle are supported. Emergency Object Sync Object Time Object Error Control Protocols Heartbeat Protocol 2. Object Dictionary (OD) The central point of connection for all objects is the object dictionary of every CANopen network device.
- Page 83 User Manual of E10 Series AC Servo Driver <Note> Be sure to set terminal resistance for CPU226M-CAN and the last slave device. 4. Applications Application example of CANopen config refer to “8.3.1 Application Example of Communication position control mode”. 5. Diagnostic You can diagnose CANopen network by E10 CANopen indicator or SMB status byte of MagicWorks PLC.
-
Page 84: Introduction Of Modbus Rtu Protocol
0x7: Configuration data error 7.2 Introduction of Modbus RTU Protocol E10 series servo driver built-in standard Modbus RTU protocol, which supports Modbus RTU master reading/writing single or multiple params. As the controller that with Modbus protocol was connected with Servo driver, the controller would execute the operation of setting params, reading status etc. - Page 85 Write single param of the driver 16#10 Write multiple params of the driver The params of E10 series servo driver corresponds to the Modbus address, eg. The Pr0.00 of driver corresponds to Modbus address 0, P324 corresponds to Modbus address 324.
- Page 86 User Manual of E10 Series AC Servo Driver If the read operation is successful, response frame see as follows: Slave Data Data Data … Data 0 Data1 Length n×2-2 n×2-1 Format … 1Byte 1Byte 1Byte 2Bytes 2Bytes 2Bytes Example 16#01...
- Page 87 User Manual of E10 Series AC Servo Driver If single param is successfully written, the response frame format see as follows: Slave Preset Preset Adr H Adr L Data H Data L Format 1Byte 1Byte 2Bytes 2Bytes 2Bytes Example 16#01...
- Page 88 User Manual of E10 Series AC Servo Driver 6) Data0/Data1/…/Data n×2-1: Write the 8 high-bit of the initial param/8 low-bit of the initial param/…/Write the 8 low-bit of the last param. 7) CRC: CRC Check word. If multi-params are successfully written, the response frame format:...
- Page 89 User Manual of E10 Series AC Servo Driver Error Code Name Description Incorrect writing range of param, Param is read only、 16#02 Illegal data address Incorrect manufacturer password etc. Address for param group is greater than 11st group etc. 16#03 Illegal data Busy、Refuse to...
-
Page 90: Applications Of Basic Control Modes
8 Applications of Basic control modes Applications of Communication control or External control modes You can set the parameters of E10 series servo by MagicWorks Tuner software from the upper computer. Please download the MagicWorks Tuner software from our company's website: www.co-trust.com. -
Page 91: Test Run
User Manual of E10 Series AC Servo Driver 3、Select "Connection" -> "Search" in the main interface, or click the search button from the toolbar to open the search dialog box (Baud Rate defaults to 19200bps, Parity defaults to Even parity). Then double-click the Refresh button search, the interface see as follows: 4、Click... - Page 92 User Manual of E10 Series AC Servo Driver mode, the specific steps see as follows: Step 1: Wiring Be sure to connect well with main power, control power, encoder, and motor driver cables etc. according to “chapter 4 Wiring”, and turn on the power of servo driver. If red light turns on, please refer to “10 Protective Function”...
-
Page 93: External Control Mode
User Manual of E10 Series AC Servo Driver Select Xth given torque(P358~P389) via P05, for this example, P05 is set to 0, so that the motor rotates as the value of P358(Given torque 0). Step 5: If servo motor stalls and the driver has not reported alarm, please refer to P235 for the stall reason. - Page 94 User Manual of E10 Series AC Servo Driver Numerator of 1st command pulse ratio Setup the resolution of command pulse according to Numerator of 2nd frequency division. Numerator Pulse Number Revolution Encoder Resolution (10000) command pulse ratio Denominato...
- Page 95 User Manual of E10 Series AC Servo Driver If PLC (such as Siemens PLC) or upper computer uses PNP output, the connection refers to following diagram: ◆ Connection example of CTSC-200 CPU 224E and E10 servo driver: Step 5: After the wiring is completed, the controller enables the servo driver and sends out pulse command, the pulse indicator begins to twinkle, and the motor starts to rotate.
-
Page 96: Application Example Of External Speed Control Mode
User Manual of E10 Series AC Servo Driver 8.2.2 Application Example of External speed control mode 【Relevant Parameters】 Name Description Control mode setup※ 1: External Speed control-S Command source Select the command source of external speed control selection mode and communication control mode. -
Page 97: Application Example Of External Torque Control Mode
User Manual of E10 Series AC Servo Driver 8.2.3 Application Example of External torque control mode 【Relevant Parameters】 Name Description Control mode setup※ 2: External Torque control-T Setup the relationship between the motor torque and Analog Torque command P117 the voltage applied to the analog torque command scale factor input terminal. -
Page 98: Communication Control Mode
User Manual of E10 Series AC Servo Driver 8.3 Communication control mode Communication control modes include: Communication Position, speed, torque control modes, the definition of each mode describe as follows: Communication Position control mode: Achieve position control via modifying position command in communication mode. - Page 99 User Manual of E10 Series AC Servo Driver P290: Given Position 0 P292: Given Position 1 P290~320 Given Position ..P320: Given Position 15 Output status of servo system, such as homing R204 Output state complete, positioning complete etc. 【Example】...
- Page 100 User Manual of E10 Series AC Servo Driver ⑥ Select Digital input Multiplexing function: P78 (Digital input Multiplexing function register1) =16#020B Parameter symbol Value B8~B15 DIN2 16#02: CCW overtavel inhibit B0~B7 DIN1 16#0B: Original switch input ⑦ Effective level for Sensor signal is high level, so we need choose external input logic...
- Page 101 User Manual of E10 Series AC Servo Driver ③ Double click CT E10 or drag CT E10 from Device Catalog to CAN Bus, that you can add E10 slave for master: ④ Expand CT E10 node from Device Catalog, and select the desired params to start communication position control for E10 Servo.
- Page 102 User Manual of E10 Series AC Servo Driver Write new value to the mapping address of param to execute related operation, eg, Write 1 to P282_Bit0, which mapping address is V10..11, so that you can enable the servo in communication mode.
- Page 103 User Manual of E10 Series AC Servo Driver...
-
Page 104: Application Example Of Communication Speed Control Mode
User Manual of E10 Series AC Servo Driver Subprogram for servo initialization see as follows: 8.3.2 Application Example of Communication speed control mode 【Relevant Parameters】 Name Description Control mode setup※ 7: Communication Speed control-S You can set the acceleration/deceleration time of... - Page 105 User Manual of E10 Series AC Servo Driver Communication control Communication given control command, such as P282 word Servo-on、Alarm clear etc. P324: Given speed 0 P325: Given speed 1 P324~355 Given speed ..P355: Given speed 31 Output status of servo system, such as homing...
- Page 106 User Manual of E10 Series AC Servo Driver Request frame (P282_Bit0 =1): Slave Start Start No. of No. of Data Data 0 Data 1 Data 2 Data 3 Adr H Adr L Regs H Regs L Length 16#02 16#10 16#01 16#19 16#00 16#02 16#04 16#00 16#00 16#00 16#01 16#XX 16#XX...
- Page 107 User Manual of E10 Series AC Servo Driver Preset Preset Slave Adr Reg Adr H Reg Adr L Data H Data L 16#02 16#06 16#01 16#44 16#00 16#64 16#XX 16#XX If the write operation is successful, response frame see as follows:...
-
Page 108: Application Example Of Communication Torque Control Mode
User Manual of E10 Series AC Servo Driver Request frame: No. of No. of Slave Adr Start Adr H Start Adr L Regs H Regs L 16#02 16#03 16#00 16#C8 16#00 16#1E 16#44 16#0F If the read operation is successful, response frame see as follows:... - Page 109 User Manual of E10 Series AC Servo Driver Communication command source 0~31: Select Communication given torque command. selection Communication Communication given control command, such as P281 extended control word Zero-speed clamp, Homing command etc. Communication Communication given control command, such as...
-
Page 110: Introduction And Example Of Application Functions
User Manual of E10 Series AC Servo Driver 9 Introduction and Example of Application functions Introduction and example of Application functions 9.1 Homing Function 【Function Overview】 The homing function in communication/external position mode is a positioning function that the servo searches the origin point of device. - Page 111 User Manual of E10 Series AC Servo Driver <Note> Please refer to “6.2 Details of Parameters” for details of above parameters. 【Mode specification】 There are 14 kinds of homing modes for servo, you can select the modes according to your requirements of accuracy and the practical applications.
- Page 112 User Manual of E10 Series AC Servo Driver special one without “homing complete signal” ) Homing mode 1: Refer to Negative original switch and Z-phase signal Machine slider Motion trail of Machine phase signal Origin Switch signal Original switch is located in the negative direction of the machine. The machine is...
- Page 113 User Manual of E10 Series AC Servo Driver Machine slider Motion trail of Machine Origin Switch signal Original switch is located in the negative direction of the machine. The machine is moving in the direction of original switch, it would slow to a suspend while the original...
- Page 114 User Manual of E10 Series AC Servo Driver After received the homing command, the motor is moving in negative direction, and it would record the next Z-phase signal as the original point. Homing mode 6: Refer to Z-phase signal only (Homing towards positive direction)
- Page 115 User Manual of E10 Series AC Servo Driver searches the original point in negative direction; As the machine is out of the range (Motion trail 1 & 3 of the machine), it moves towards the direction of inhibit switch, which can search the original point according to the motion trail of the detected order for Original switch and inhibit switch.
- Page 116 User Manual of E10 Series AC Servo Driver Effe ctive ra n g e o f Orig in sw itch sig n a l Machine slider Motion trail Motion trail Motion trail phase signal Origin Switch signal Positive limit signal As seen above, machine is moving to the positive limit switch, Z-phase signal is located at left of right edge of the original point signal, which is within the range of original switch.
- Page 117 User Manual of E10 Series AC Servo Driver Effe ctive ra n g e o f Orig in sw itch sig n a l Machine slider Motion trail Motion trail Motion trail phase signal Origin Switch signal Positive limit signal...
- Page 118 User Manual of E10 Series AC Servo Driver Effe ctive ra n g e o f Orig in sw itch sig n a l Machine slider Motion trail Motion trail Motion trail phase signal Origin Switch signal Negative limit signal...
- Page 119 User Manual of E10 Series AC Servo Driver Effe ctive ra n g e o f Orig in sw itch sig n a l Machine slider Motion trail Motion trail Motion trail phas e s ignal Origin Switc h s ignal...
- Page 120 User Manual of E10 Series AC Servo Driver Effe ctive ra n g e o f Orig in sw itch sig n a l Machine slider Motion trail Motion trail Motion trail phas e s ignal Origin Switc h s ignal...
- Page 121 User Manual of E10 Series AC Servo Driver Effe ctive ra n g e o f Orig in sw itch sig n a l Machine slider Motion trail Motion trail Motion trail phase signal Origin Switch signal Negative limit signal As seen above, machine is moving to the negative limit switch, Z-phase signal is located at left of left edge of the original point signal, which is out of the range of original switch.
- Page 122 User Manual of E10 Series AC Servo Driver Original switch is located in the negative direction of the machine. The machine is moving in the direction of original switch, as the original switch is detected, it continues to finish the position increment of P128(Running speed set by P97), the homing complete signal would be outputted after P128 has been finished.
- Page 123 User Manual of E10 Series AC Servo Driver Step 3: Selection of external input logic level Select the effective level for input signal by P72 (External input logic level): Parameter Function Value of Bit Effective way Low level On CCW Overtravel Inhibit...
- Page 124 User Manual of E10 Series AC Servo Driver Example 2)Applying Homing function in external position control mode, please follow these steps: Step 1: Select homing mode Select homing mode by setting P59, for this example, we use mode 1. Step 2: Select control command source Select MagicWorks Tuner menu bar “Option”...
-
Page 125: Communication Multi-Positionspeedtorque Control
User Manual of E10 Series AC Servo Driver 9.2 Communication Multi-Position\Speed\Torque control 【Function Overview】 Multi control under communication control mode means: Set multi given position / speed / torque control params(16 given position / speed / torque params at most) via upper controller communication, and switch between different sections(Position/speed/torque) by several external DI, then the driver running according to the settings. - Page 126 User Manual of E10 Series AC Servo Driver P358: Given Torque 0 P359: Given Torque 1 P358-389 Given Torque ..P389: Given Torque 31 R203 Check the executing status of multiple commands Command Status 【Example】 Following example illustrates the function of communication multi-position control.
- Page 127 User Manual of E10 Series AC Servo Driver position 5). Please refer to “5.5 Communication command selection under communication control mode (P4=4)” for details. Step 9: Trigger the rising edge of DIN5 (start signal) DIN5 changes from 0 to 1 (Monitor the value of P203_Bit6: from 0 to 1), so servo would complete P300 with the speed of P97.
-
Page 128: Adjustment Function Of Pulse
User Manual of E10 Series AC Servo Driver observe chapter “5.5 Communication command selection under communication control mode (P4=4)”. 9.3 Adjustment function of Pulse 【Function Overview】 In external position mode, pulse adjustment function can be achieved by adding pulses on basis of external pulses. - Page 129 User Manual of E10 Series AC Servo Driver source selection 16#0C: Command selection 1; Digital input multiplexing 16#0D: Command selection 2; P75~78 function register 4~1 16#0E: Command selection 3; 16#08: Command selection 4; P290: Given Position 0 P292: Given Position 1...
-
Page 130: Special Speed-Position Control Mode
User Manual of E10 Series AC Servo Driver Tips ● This function no need start signal to trigger; ● Command pins have up to 4, that is INTSPD1~INTSPD4; ● The modification could not be too large, usually within thousands of pulses. - Page 131 User Manual of E10 Series AC Servo Driver 【Explication for parameters’ value】 Value of Description P284/286/288 In speed control mode, when DIR signal rising edge is detected, it P284=0 & P286=0 would switch to position mode, and finish the designated position of P274.
- Page 132 User Manual of E10 Series AC Servo Driver DIR si g n a l i s i n va l i d i n th i s r a n g e D IR : C MOD E: Po sitio n...
- Page 133 User Manual of E10 Series AC Servo Driver DIR si g n a l i s i n va l i d i n th i s r a n g e D IR : C MOD E: Po sitio n...
- Page 134 User Manual of E10 Series AC Servo Driver D IR : C MOD E: Po sitio n Sp e e d C o n tro l mo d e : P284 P288 Se rvo p o sitio n : 【Set Terminal】...
- Page 135 User Manual of E10 Series AC Servo Driver switch to position mode, and the position would marked as PV5, finally servo finish the designated position of P274. <Note> Check DIR signal via R205_Bit14. Step 4: Detect C-MODE signal (Mode switching signal) System would switch to speed mode when the rising edge of C-MODE signal has been detected.
-
Page 136: Protective Function
User Manual of E10 Series AC Servo Driver 10 Protective Function Description of Alarms and faults Normally, alarm indicator stays off, power indicator and command pulse indicator are in the right status. If abnormal situation occurs, power indicator and command pulse indicator would turn off, the alarm indicator would lit according to the alarm type. - Page 137 User Manual of E10 Series AC Servo Driver Alarm Alarm Type Failure Description Solutions ALM1、2、3 Poor connections between the motor cables; The U. V and W terminals may short circuit with the ground; The U、V、W terminals may It is activated while the short circuit with each other;...
- Page 138 User Manual of E10 Series AC Servo Driver Alarm Alarm Type Failure Description Solutions ALM1、2、3 Actual torque has exceeded the P138(Overload level) value of driver and kept running for a long time. Vibrations or abnormal It is activated while the...
- Page 139 User Manual of E10 Series AC Servo Driver Alarm Alarm Type Failure Description Solutions ALM1、2、3 The given speed is too high; It is activated while the Over-speed actual velocity of motor Improper gains will result in exceeds the specified limit.
- Page 140 User Manual of E10 Series AC Servo Driver Alarm Alarm Type Failure Description Solutions ALM1、2、3 Please check the settings of P75、P76、P77、P78 Configuration Multi-pins were configured error of external (Whether two or more pins to the same signal input pins were allocated to the same function).
-
Page 141: Gain Adjustment
The servo gain parameters affect the value of each other, be sure to keep motor running at high-performance status, recommending professional engineers to adjust the gain parameters. 11.1 System Control Block Diagram of E10 Series Servo Driver 11.2 Setup the Related Gain Parameters of Servo 1、The gain of current loop (P18) Higher the gain of current loop you set, higher gain and better response you can obtain. - Page 142 User Manual of E10 Series AC Servo Driver 3、The gain of speed loop (P21、P28) Higher the gain of speed loop you set, higher gain and better rigidity you can obtain. The speed loop should set as higher value as possible under the conditions that without oscillation.
- Page 143 User Manual of E10 Series AC Servo Driver The above three schematics reflect that higher speed loop gain will result in vibration and overshoot, lower gain will lead to overtime speed arrival and bad system responsiveness, only proper speed loop gain can complete positioning in a short time and won't cause vibration and overshoot.
- Page 144 User Manual of E10 Series AC Servo Driver Figure 9.5 The position loop curve at high gain of position loop Figure 9.6 The position loop curve at low gain of position loop Figure 9.7 The position loop curve of proper position loop gain...
-
Page 145: The Curve Graphic Of Servo Upper Computer Magicworks Tuner
User Manual of E10 Series AC Servo Driver 8、Speed feedforward(P25) Speed feedforward is used for feedforward compensation which shorten the response time in position control mode. Higher the setup, smaller positional deviation and better response you can obtain, however this might cause an vibration and unstable system position, over-speed alarm of servo may also occur. - Page 146 User Manual of E10 Series AC Servo Driver to the Sampling Period, and then draw a curve in accordance with the 1000 sampling points. The interface show as following: We can check the Current loop (or Speed Loop, or Position Loop) by clicking the pull-down box of "Curve Circle", and might also single Read or Cycle Monitor by...
-
Page 147: The Principles And Methods Of Parameter Adjustment
User Manual of E10 Series AC Servo Driver launching the motor. Due to the given value is controlled without deceleration time, if gear ratio or given pulses becomes too much which might lead to large instant position deviation, this would also cause an over-speed alarm of servo. -
Page 148: Gain Switching
User Manual of E10 Series AC Servo Driver Please refer to the following steps for adjusting the gain parameters of servo, you might also use the curve function of MagicWorks Tuner software to assist the adjustment: 1)Set the position loop gain to a lower value, and gradually increase the gain of speed loop to the max. - Page 149 User Manual of E10 Series AC Servo Driver delay time for position loop gain, so as to restrain the rapid shock during switching. Unit:250us The related parameters of gain switching see as follows: P61=1, P61=0, When fixed to 2th Gain...
- Page 150 User Manual of E10 Series AC Servo Driver Address: Room 209 & 210, 2/F, ShenZhen IC design & Version: V2.30 application industrial park, South of Chaguang Road, Xili Town, Releasing Date: 05/2014 Nanshan District, Shenzhen, CHINA. All these parameters are subjected to change without notice.
Need help?
Do you have a question about the E10 Series and is the answer not in the manual?
Questions and answers