
Summary of Contents for Seiko SPT1020-35PL
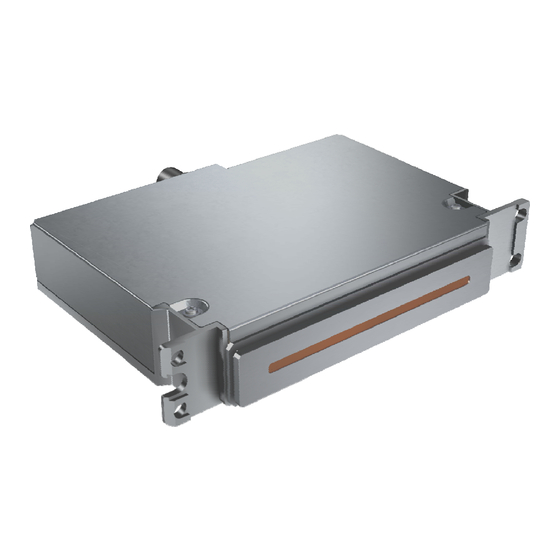
- Page 1 SPT1020-35PL X 4/6 Printheads Calibration and Maintenance Feb., 2011 Version : V2.0...
-
Page 2: Table Of Contents
Contents Chapter 1:Computer Requirement ........3 Chapter 2:Installation..........3 Chapter 3:Charateristic..........5 Chapter 4:Software Installtion........6 Chapter 5:Software Interface........8 Chapter 6:Software Calibration........9 Chapter 7:Other Functions and Parameters ......20 Chapter 8:Maintenance..........24 Chapter 9:Troubleshoot..........29 Chapter 10:Output Chart..........31... -
Page 3: Chapter 1:Computer Requirement
Chapter 1: Computer Requirement 1) Basic requirement: CPU: 2.0 GHz or higher Memory: 1Gb or higher Hard disk: 80 Gb (recommend 20Gb free space) Mother board: USB connection equipped Network card Operating system: Microsoft Windows (2000, XP) 2) Recommendatory requirement: CPU: 3.0 GHz or higher Memory: 2 Gb or higher Hard disk: 200 Gb or higher (NTFS format) - Page 4 10) Turn on the printer, and keep your hand on the emergency button for turning off the printer if problem happens suddenly. 11) Send a file to print to test the condition of the printer. 12) Clean the whole ink supply system with special solvent. Then empty the ink sub-tanks, and repeat the step twice.
-
Page 5: Chapter 3:Charateristic
Chapter 3: Characteristics SPT1020_35pl x 6/4; Resolution: 1440\1080\720 DPI; Colors:6/4 colors ; Print mode:2,3,4,6,8 Pass; Output mode:File or TCP/IP(Rip and Print at the same time); Output preview:Convert prn/prt file into a small bmp file for previewing; Print intelligently:Skip white area; Setting of multi-printing;... -
Page 6: Chapter 4:Software Installtion
Chapter 4: Software Installation This software consists of printer driver, printing adjustment and picture printing functions. Running this software requires a certain hardware and software condition. Herein, you are going to be introduced the operating system environment required, software and hardware configuration and software installation Please follow the following steps to install the software. - Page 7 3) Click “Next”, installation path is available to choose. Choose the directory to install. 4) By clicking “Next”, the installation progress will appear, then click “Confirm”, “configuration file SPT10206_35pl.ini options” dialog box will appear as shown below. Then, choose the file which corresponding to the print head.
-
Page 8: Chapter 5:Software Interface
Chapter 5: Software Interface 1) Main interface in: ,double-click the icon to open the software. Let us take a look at the Find the following shortcut icon main interface first. Main Manu Operation tools bar Preview Printer Condition Movement button Image information Printing job list and... -
Page 9: Chapter 6:Software Calibration
Chapter 6: Software Calibration 1) Printer initialization (New installed software has to be initialize according to the following instruction) ① Machine Length Test ② Y Motor Test ③ X Motor Test ④ X Motor Speed Setting 1.1 Double-click the icon to open the software, then select the “Test”... - Page 10 First of all, we marked a sign (1) on a certain place of the printer platform, then click “Test Begin”, the media will be fed a bit, then mark a sign (2) on the same position. Use a ruler to measure the distance between (1) and (2) as shown below.
- Page 11 1.3 X Motor Speed Setting: Select"Test" --> "X Motor Speed Setting" Click"Test", system There are 180,240,360、720 will send 1 dpi modes . second pulse. "Normal speed" and "High speed" are available. “Actual Speed”left Carriage Speed/Printhead Frequence Noted:Speed calculation method:(Print head frequence/Print mode)*25.4 = carriage speed 240 mode:normal=(6460Hz/240dpi)*25.4mm=684mm/s, high=(8000Hz/240dpi)*25.4mm=847mm/s;...
- Page 12 (3)Push the printhead to the right (2)Pull the printhead all the way to side the front Note:Install every printhead like above steps! 2.2 Printhead order printhead board: Group Group 1020 printhead holder: K1 K2 C1 C2 M1 M2 Y1 Y2 Lc1 Lc2 Connect the printhead to the printhead board according to the above diagram.
- Page 13 2. 3 Status: After install the printhead, print the nozzle status. Observe the printhead order and position, and the condition of the printhead. “Status”shortcut on the main interface: Click “Status” to print the following diagram: Turn off the feather function when doing the alignment! 2.4 HVert: Printhead angle alignment.
- Page 14 first straight line reference, then check second straight line. Both line should be connected, if not, the printhead holder need to be adjusted. Please check the following cases: Case 1:Both line in same vertical position; Second Pass First Pass No need to adjust! Case 2:Printheads offset to left side:...
- Page 15 Note: Tighten the four screws at the printhead holder when finish adjustment and before print the Hvert test diagram. Keep adjust until the first pass and second pass face each other. When vertical adjustment done, normally horizontal alignment well, printhead's horizontal alignment is not aligned, then have to do the adjustment. The following diagram shows how to adjust the horizontal position.
- Page 16 While the adjustment is not good, we need to adjust by software. Just enter “Setting\Option”, showed as the below picture: To Right To Left Choose “Unicolor” Adjust K1-K2 Factory setting: 180DPImode: ;C:1-2= ;M:1-2= ;Y:1-2= -9 ;Lc:1-2=-9 ;Lm:1-2=-9 K:1-2= Please click the “Save Parameters” after inputing values, then print the adjusting picture of the same color again.
- Page 17 Note: K is the reference. At the “0” point, other color should overlapped on K. If not, look for the rectangle which is overlapped, and input the corresponding value into the “Head Adjustment”. The following example use C (to right) to demonstrate: As the picture shown above, the rectangle of C and K are overlapped well at “-1”, at “0”...
- Page 18 Calculation of standard preference with the different colors: (printing resolution of X direction / 25.4)* physical position offset between K printhead and other printheads. For example, 180DPImode: K-C= K1<——C2 (36.27/25.4)*180=257; K-M= K1<——C2 + C1<——M2 (72.54/25.4)*180=514; K-Y= K1<——C2 + C1<——M2 + M1<——Y2 (108.81/25.4)*180= 771;...
- Page 19 2.7 Step Adjustment The location for button of “Step” on the menu of shortcut is showed as the below picture: Print the below adjusting picture by clicking the button of “Step” Add -4 Make the two lines at “0” as the standard. If the two lines at “0” are not in complete superposition, we need to adjust by software.
-
Page 20: Chapter 7:Other Functions And Parameters
Chapter 7: Other Functions and Parameters 1. Network Printing Setup (enter "Setting\\Setting" Setup of Network Printing Setup of Buffer Path Default Pass Number of Net Printing. Check the below dialog box for adjusting ink limit will be shown up if click the button of "Start", The ink density can be reduced according... - Page 21 Input Adjustment Printhead Printhead Voltage Offset Default Voltage Actual Printhead Voltage Actual Printhead Temperature Options of Printhead Group The changed parameters will take effect after clicking the “Setup”. 3. Printer Setup (enter “Setting\Option” ) Choose “Printer”...
- Page 22 Printer setup details: 3.1 Printing Mode There are two options for uni-direction and bi-direction. 3.2 X Direction Mode This is an option which is used for adjusting printheads alignment. It is recommended that the printheads alignment is adjusted under 180DDPI after installing printheads. For printing pictures of other resolutions, first choose the corresponding resolution under “X Direction Mode”, then click “Auto Adjust by 180DPI”...
- Page 23 4. Import Config/Export Config After setting all of parameters, we can export it as a configuration file (enter “File\Export Config”). We can directly import the configuration file saved before after reinstalling the software or parameters losing. Avoid setting the parameters again (enter “File\Import Config”).
-
Page 24: Chapter 8:Maintenance
Chapter 8: Maintenance Normal Cleaning 1.1 Positive Pressure Cleaning Press the cleaning button, and then use sponge stick or soft fabric to wipe the surface of the printhead. Warning: Using the material other than sponge stick or soft fabric to wipe the printhead may risk damaging nozzles. - Page 25 Daily maintenance 1) Please print the “Nozzles Checking” to make sure all the nozzles are firing fine before switching off the printer. Then switch off the printer. 2) Prepare solvent, PE film, and 8 pcs of nonwoven fabric(7cm x 2cm) (Figure 5-2). Figure5-2 3) Place the PE film on the capping, and then place the non-woven fabric which is moistened by solvent on top of the PE film(Figure 5-3)
- Page 26 5) Place the cap in the waste tank, and move the carriage back to home. (Figure 5-5) Figure5-5 6) Close the cover of waste tank. Finish the daily maintenance. (Figure 5-6) Figure5-6 5 Short term shut down (3~7 days) 1)Disconnect the tube connector for the tube from the Subtank to the printhead. Wait until the ink finishes dropping, and then, connect the tube to the solvent tube.
- Page 27 5.7 Cleaning procedures for nozzle clogging 1) Disconnect the tube connector for the tube from the Subtank to the printhead. Wait until the ink finishes dropping almost, and then, connect the tube to the solvent tube. Press both of the flush buttons to clean the printhead with solvent. Stop when the solvent becomes clear.
- Page 28 Step 1 Step 2 Step 3 Ink inlet PE film Close the cap.Ensure the Cut the PE film into 30cm x30cm Place the PE film on the washer is in the cap. Prevent the film to get wrinkle。 printhead Step 4 Step 5 Step 6 Make sure there...
-
Page 29: Chapter 9:Troubleshoot
Chapter 9: Troubleshoot After turning on the printer, the 12V, 24V, and 35V LED on the connecting board are lit on. And also, the D4 LED on the main board is lit on. D1 and D2 LED are lit on when connecting the printer to the computer by USB cable. - Page 30 a) Check whether the encoder is clean, or scratched, or not installed properly. b) The config file is lost. Recalculate the machine length. 7) The interface of the software becomes grey. The movement cannot be controlled. Extra solid color is printed : a) Check whether the USB cable is loosened or defective.
-
Page 31: Chapter 10:Output Chart
Chapter 10: Output Chart Output Chart Printhead SPT1020-35PL Number of prnthead 8 Heads Printing Mode Output(m Draft 2Pass Standard 3Pass Output Quantity Quality 4Pass High Quality 4Pass Compensation 6Pass *The above data is obtained when printing speed is set to high, value may vary in different computer*...
Need help?
Do you have a question about the SPT1020-35PL and is the answer not in the manual?
Questions and answers