
Summary of Contents for OLIMEX ARM-USB-OCD-H
- Page 1 ARM-USB-OCD-H, ARM-USB-OCD OLIMEX OPENOCD ARM JTAG DEBUGGERS USER’S MANUAL Document revision D, July 2015 All boards produced by Olimex LTD are ROHS compliant...
-
Page 2: Disclaimer
This document is intended only to assist the reader in the use of the product. OLIMEX Ltd. shall not be liable for any loss or damage arising from the use of any information in this document or any error or omission in such information or any incorrect use of the product. -
Page 3: Table Of Contents
3.6 IAR Embedded Workbench for ARM ............25 3.7 Rowley Crossworks for ARM ................. 26 3.8 CooCox IDE ..................... 28 3.9 Olimex Open Development Suite (ODS) package ........28 3.10 Other software tools ..................29 CHAPTER 4: FREQUENTLY ASKED QUESTIONS .......... 30... - Page 4 OLIMEX© 2015 ARM-USB-OCD user's manual CHAPTER 5: REVISION HISTORY AND SUPPORT ........31 5. Introduction to the chapter ................31 5.1 Document revision ................... 31 5.2 Useful web links and purchase codes ............. 31 5.3 Product support ....................33 Page 4 of 33...
-
Page 5: Chapter 1: Overview
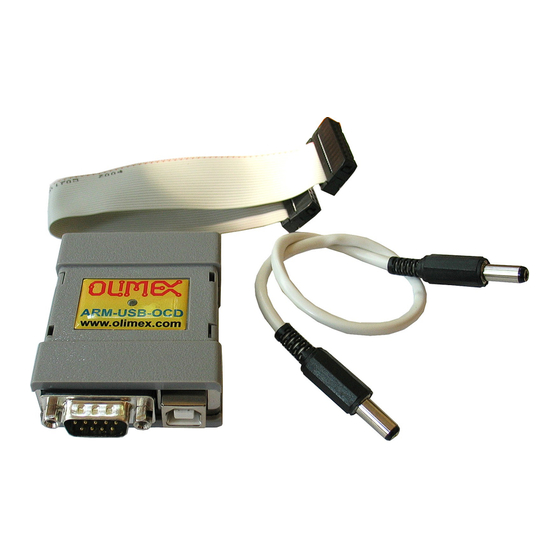
1. Introduction to the chapter Thank you for choosing an OpenOCD debugger manufactured by OLIMEX LTD. This document provides information about two of the ARM debuggers manufactured by OLIMEX LTD – ARM- USB-OCD and ARM-USB-OCD-H. ARM-USB-OCD and ARM-USB-OCD-H are very similar in features and hardware design. -
Page 6: Functional Description And Purpose Of The Board
Both debuggers are able to power your target board via the JTAG. Both debuggers can power the target board via a DC power plug. The ARM-USB-OCD-H always provides up to 5V of voltage to the target via the plug, while the ARM-USB-OCD can be configured to provide 9V or 12V. -
Page 7: Comparison Of Olimex Openocd Debuggers
An extension cable that fits the barrel jack is included in the package. The ARM-USB-OCD can provide 5V or 9V or 12V (controlled via jumper), while ARM-USB-OCD-H can only provide 5V. This feature is useful when you want to power the target board without establishing the JTAG connection. - Page 8 OLIMEX© 2015 ARM-USB-OCD user's manual 1.5 Organization Each section in this document covers a separate topic, organized as follow: – Chapter 1 is an overview of the board usage and features – Chapter 2 provides information about the connectors and the status LEDs –...
-
Page 9: Chapter 2: Device Description
The USB type B connector follows the USB 2.0 specification. The connector itself looks like this: You would most likely need a suitable cable to connect the debugger to your personal computer. The cable should be USB A-B type. You might find a cable like that in the Olimex web-shop or any electronics store nearby. -
Page 10: Jtag Connector
OLIMEX© 2015 ARM-USB-OCD user's manual 2.2.2 JTAG connector The JTAG connector is a 20-pin male one. It has the standard ARM JTAG 20 at 2.54mm (0.1'') pitch, specified by IEEE 1149.1. There is a female-female ribbon cable included in the box of ARM-USB-OCDfor easier connection to the target board. -
Page 11: Rs232 Connector
The voltage available at the power out barrel jack depends on the exact product you have! The voltage available at the PWR_OUT barrel jack might vary ARM-USB-OCD or ARM-USB-OCD-H. By default both debugger designs can provide 5V DC to the PWR_OUT jack. However, ARM- USB-OCD has two jumpers that can enable 9V DC voltage output or 12V DC voltage output. - Page 12 OLIMEX© 2015 ARM-USB-OCD user's manual ARM-USB-OCD-H powering LPC-P11C24 (via the PWR_OUT jack). Page 12 of 33...
-
Page 13: Chapter 3: Setting Up Arm-Usb-Ocd
CHAPTER 3: SETTING UP ARM-USB-OCD 3. Introduction to the chapter More details about the standard connection routine of Olimex ARM-USB-OCD and your target via the most often used development environments. You can find the guidelines to use ARM-USB-OCD and the similar Olimex products below. -
Page 14: Enabling Swd Interface For Arm-Usb-Ocd
ARM-USB-OCD debuggers lacks SWD interface by hardware design but such can be added. You can use the ARM-JTAG-SWD adapter to enable the SWD interface of ARM-USB-OCD debuggers. Connect the adapter to Olimex programmers in the following way: JTAG debugger – SWD interface – JTAG ribbon cable – Target;... -
Page 15: Getting Openocd
OLIMEX© 2015 ARM-USB-OCD user's manual 3.3.1 Getting OpenOCD You can either download a ready package or compile OpenOCD from sources. The first choice is faster but the second option allows you to customize the OpenOCD and use a specific configuration. One of the most important parts of such a compilation is the point where you select what drivers would be expected from OpenOCD –... -
Page 16: Drivers And Driver Installation
OLIMEX© 2015 ARM-USB-OCD user's manual If you are going for FTDI driver support: ./bootstrap ./configure --enable-ftdi --enable-ft2232_ftd2xx make make install If you are going for the LibUSB driver support: ./bootstrap ./configure --enable-maintainer-mode --enable-ft2232_libftdi make sudo make install After the OpenOCD is ready (no matter if you compiled it or downloaded it ready) you would need drivers for the debugger. -
Page 17: Driver Installation In Windows
“Driver Signature Verification” which is enabled by default. It prevents the installation of any unsigned drivers to your system. After you plug ARM-USB-OCD-H for the first time and you open ''Windows Device Manager'' you should see two entries under ''Other devices'' like shown below: The driver installation in Windows would depend on which version of OpenOCD you are using. - Page 18 OLIMEX© 2015 ARM-USB-OCD user's manual If Zadig doesn't do the job or you are using OpenOCD version prior to 0.8.0 the more robust method is to download an archive with the drivers and point the Windows Device Manager to it manually.
-
Page 19: Driver Installation In Linux
Create a file /etc/udev/rules.d/olimex-arm-usb-ocd-h.rules Put this single line in the file: The Olimex vendor and product IDs are part of the driver (VID/PID) and you have to find the right IDs from table 2 (above in this manual). For ARM-USB-OCD-H those are: PID: 0×002b... -
Page 20: How To Uninstall And Clean-Up Previously Installed Drivers
PID/VID in decimal. You might want to use a calculator for the conversion (hex to decimal). Search for "Olimex OpenOCD JTAG B" and edit the <integer> fields after the keys idProduct (PID) and idVendor (VID). Remember you need to have root privileges to edit the file. -
Page 21: Basic Openocd Connection
This is the default way to communicate with your target if you use an OpenOCD version 0.8.0 or newer. If you are using a 64-bit operating system and OpenOCD versions 0.8.0 a typical connection command between ARM-USB-OCD-H and a STM32F1 target would would like: openocd-x64-0.8.0.exe -f ./interface/ftdi/olimex-arm-usb-ocd-h.cfg -f ./target/stm32f1x.cfg... -
Page 22: Simple Target Connection Via Libusb Drivers
This is the default way to communicate with your target if you use an OpenOCD version prior to 0.8.0. Note that the interface cfg is located at a different place compared to the previous example with FTDI drivers. openocd -f interface/olimex-arm-usb-ocd-h.cfg -f target/stm32f1x.cfg Info : JTAG tap: stm32f1x.cpu tap/device found: 0x3ba00477 (mfg: 0x23b, part: 0xba00, ver: 0x3) Info : JTAG tap: stm32f1x.bs tap/device found: 0x06418041 (mfg: 0x020, part:... -
Page 23: Simple Swd Target Connection With Arm-Jtag-Swd
In OpenOCD there is a specific parameter that allows the usage of multiple debuggers on the same computer. Despite that the OLIMEX debuggers have the same VID and PID, they have unique serial numbers. The serial number is stored in the “iSerial” property of the USB information. After we have identified the serial number of each connected debugger we need to create own configuration file for each debugger. - Page 24 OLIMEX© 2015 ARM-USB-OCD user's manual For example, if we want to use two ARM-USB-OCD-H (with serial numbers “OLWWV0SZ” and “OLXZY1SP”) to the same computer we need to make two files “olimex-arm-usb-ocd-h1.cfg” and “olimex-arm-usb-ocd-h2.cfg” we would need to include the following: -olimex-arm-usb-ocd-h1.cfg-...
-
Page 25: Changing The Vid And Pid Of The Debugger
Then download the FTD2XX drivers (from here: https://www.olimex.com/Products/ARM/JTAG/_resources/driver-ftd2xx.zip), extract them somewhere and point manually the installer to that location. -
Page 26: Rowley Crossworks For Arm
There is profile for ARM-USB-OCD in Crossworks – it works with both ARM-USB-OCD and ARM-USB-OCD-H. The ready-to-use configuration also works fine for a SWD setup – a debugger with ARM-JTAG-SWD. If you experience disconnects you might increase the “JTAG Clock Divider”... - Page 27 The correct VID and PID for your device might be found in table 2 in case you missed it. The SWD interface via ARM-JTAG-SWD might require different manual settings compared to the JTAG ones. You can see a properly connected ARM-USB-OCD-H + ARM-JTAG-SWD in Crossworks 3.5.1 in the picture below: Page 27 of 33...
-
Page 28: Coocox Ide
Windows installer so if you are a pure Linux user you might want to skip this chapter. The package is primarily meant to be used by people who own an Olimex OpenOCD debugger and one of the supported Olimex boards. It might be a very helpful software package for the OpenOCD beginners. -
Page 29: Other Software Tools
Open-Source tools used in Olimex ODS) once you get the idea! Unfortunately, Olimex is unable to provide any support for the Olimex ODS (we can't give you any custom configurations, neither makefiles, neither additional examples). Olimex ODS it is meant to be used only as a reference in your efforts to configure own environment. -
Page 30: Chapter 4: Frequently Asked Questions
Q: I have LPC1227 board and can't program it with your OpenOCD debugger. What do I do wrong? A: LPC1227 lacks JTAG according to the microcontroller's datasheet. The board can be programmed only via SWD (Serial Wire Debug) interface. Olimex OpenOCD debuggers have JTAG by default. You would need an additional adapter – ARM-JTAG-SWD. -
Page 31: Chapter 5: Revision History And Support
OLIMEX© 2015 ARM-USB-OCD user's manual CHAPTER 5: REVISION HISTORY AND SUPPORT 5. Introduction to the chapter In this chapter you will find the current and the previous version of the document you are reading. Also the web-page for your device is listed. Be sure to check it after a purchase for the latest available updates and examples. - Page 32 OLIMEX© 2015 ARM-USB-OCD user's manual Web addresses: ARM-USB-OCD-H – https://www.olimex.com/Products/ARM/JTAG/ARM-USB-OCD-H/ ARM-USB-OCD – https://www.olimex.com/Products/ARM/JTAG/ARM-USB-OCD/ ARM-USB-TINY-H – https://www.olimex.com/Products/ARM/JTAG/ARM-USB-TINY-H/ ARM-USB-TINY – https://www.olimex.com/Products/ARM/JTAG/ARM-USB-TINY/ ARM-JTAG-20-10 – https://www.olimex.com/Products/ARM/JTAG/ARM-JTAG-20-10/ ARM-JTAG-SWD – https://www.olimex.com/Products/ARM/JTAG/ARM-JTAG-SWD/ USB-A-B-CABLE – https://www.olimex.com/Products/Components/Cables/USB-A-B-CABLE/ How to purchase? You can purchase directly from our web shop or from any of our distributors. List of distributors: https://www.olimex.com/Distributors.
-
Page 33: Product Support
ARM-USB-OCD user's manual 5.3 Product support For product support, hardware information and error reports mail to: support@olimex.com. Note that we are primarily a hardware company and our software support is limited. Please consider reading the paragraph below about the warranty of Olimex products.
Need help?
Do you have a question about the ARM-USB-OCD-H and is the answer not in the manual?
Questions and answers