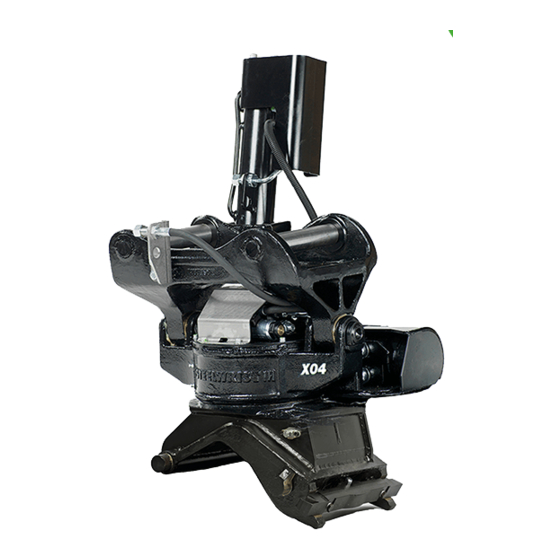

Summary of Contents for Steelwrist Tiltrotator Front pin lock X04
- Page 1 User Manual ™ Tiltrotator Front pin lock X04, X06, X07, X12, X18, X20, X26 XControl G2 DocNo: 700347ENA...
- Page 3 User Manual ™ Tiltrotator Front pin lock X04, X06, X07, X12, X18, X20, X26 XControl G2 DocNo: 700347ENA...
- Page 4 Tiltrotator Front pin lock X04, X06, X07, X12, X18, X20, X26 Published by: Steelwrist AB Bäckvägen 18 192 54 Sollentuna Sweden +46-626 07 00 www.steelwrist.com Translation of Original User Manual © Copyright 2013, Steelwrist AB. No part of this document can be reproduced.
-
Page 5: Table Of Contents
User Manual tiltrotator with Front pin lock | TOC | 5 Contents 1. Introduction.....................7 1.1. EC Declaration of Conformity.........................8 1.2. Thank you for choosing a tiltrotator from Steelwrist................9 1.3. Steelwrist Design Philosophy.......................10 2. Safety......................11 2.1. Safety Levels............................12 2.2. Safety regulations..........................12 2.3. - Page 6 ™ 6 | User Manual tiltrotator with Front pin lock | TOC 6.6. Profile Management..........................42 6.7. Layout..............................44 6.8. Clinometer............................44 6.9. Troubleshooting............................45 6.10. Troubleshooting - in / out signals......................46 6.11. Language............................46 7. Wheels and Track steering (Option)............49 7.1. Introduction Wheels/Track steering......................50 7.2.
-
Page 7: Introduction
Chapter 1. Introduction Topics: • EC Declaration of Conformity • Thank you for choosing a tiltrotator from Steelwrist • Steelwrist Design Philosophy... -
Page 8: Ec Declaration Of Conformity
SS-EN474-1:2006+A1:2009, SS-EN474-5:2006+A1:2009, SS-EN12100:2010, ISO/DIS13031.2. This declaration and Steelwrist guarantee is void if changes or other interventions are made without Steelwrist approval. The technical documentation for this product is held at the above address. -
Page 9: Thank You For Choosing A Tiltrotator From Steelwrist
1.2. Thank you for choosing a tiltrotator from Steelwrist We would first like to thank you for the confidence in choosing a tiltrotator from Steelwrist. At Steelwrist we work hard to build tiltrotators that are well adapted to modern excavators. We will do everything we can for you to be happy with your Steelwrist. -
Page 10: Steelwrist Design Philosophy
1.3. Steelwrist Design Philosophy Steelwrist's development work is aimed at giving you a tiltrotator that is optimized for your excavator. To enable you to get the best digging geometry and best fuel efficiency, we have designed a tiltrotator that is robust, low weight, has a low overall height and also has a high tilt angle. -
Page 11: Safety
Chapter 2. Safety Topics: • Safety Levels • Safety regulations • Machine plate and warning labels • Type certificate for lifting hook... -
Page 12: Safety Levels
2.1. Safety Levels Most accidents occur as a result of carelessness or negligence to follow given safety instructions. For us at Steelwrist safety is very important and we will do our best to avoid risks with preventive measures. However no safety instruction or protection measure, no matter how good they are made, is better than a prudent machine operator. -
Page 13: Machine Plate And Warning Labels
In addition to machine plate so there is also a warning label that must be visibly mounted in the cabin. The warning labels pinpoints safety risks and is therefore of crucial importance. Exchange damaged labels when needed. Contact your supplier or Steelwrist if the old labels have been damaged and you need new ones. The text above in the local language:... - Page 14 14 | User Manual tiltrotator with Front pin lock | 2. Safety • Read the tiltrotator user manual! • This machine is equipped with a Steelwrist tiltrotator • Never go under a lifted attachment • Attachments can be moved sideways, as well as tilt and rotate •...
-
Page 15: Type Certificate For Lifting Hook
™ User Manual tiltrotator with Front pin lock | 2. Safety | 15 2.4. Type certificate for lifting hook The following type certificate is valid for lifting hooks used on Steelwrist products. -
Page 17: Product Description
Chapter 3. Product Description Topics: • Function description • Tilt rotator main parts • Hydraulic system • Electrical control system... -
Page 18: Function Description
| 3. Product Description 3.1. Function description This function description gives an overall description of the Steelwrist tiltrotators structure and principle of its operation. The tiltrotator is an hydraulic work tool aimed to be mounted an excavator or backhoe loader. The tiltrotator is used to position various work tools by combining a tilting and rotating movement. -
Page 19: Tilt Rotator Main Parts
™ User Manual tiltrotator with Front pin lock | 3. Product Description | 19 1. Excavator dipper arm 2. Excavator quick coupler 3. Tiltrotator - upper coupler with tilt cylinders (may be one or two tilt cylinders, depending on the excavator's size) 4. - Page 20 ™ 20 | User Manual tiltrotator with Front pin lock | 3. Product Description 1. Upper coupler: 2. Tilt cylinder Upper coupler to excavator and double-acting tilt cylinders. In the upper coupler the gearbox is mounted via two joints (so-called tilt shafts). The tilt shafts makes the tiltrotator tiltable. The tilt movement is achieved with the tilt cylinders.
-
Page 21: Hydraulic System
When the gripper cylinders are in the retracted position the gripping arms are open. Steelwrist gripper solution is ™... - Page 22 ™ 22 | User Manual tiltrotator with Front pin lock | 3. Product Description (or B) port in order to run the function in a certain direction. The oil is routed back to through the B (or A) port to the tank line (T).
-
Page 23: Electrical Control System
™ User Manual tiltrotator with Front pin lock | 3. Product Description | 23 1. Joystick 2. Control unit (On XControl G2 divided into two cooperating units) 3. Shunt valve 4. Excavator hydraulic tank 5. Excavator pump system 6. Excavator manifold 7. - Page 24 ™ 24 | User Manual tiltrotator with Front pin lock | 3. Product Description Revision: See page 2 Machine Machine QC Power Lockout Safety gate Art.No. Pc(s). Description 801070 XCG2 Tiltrotator Module RF 801059 XCG2 Cabin Module RF 800349 XCG2 Display Multi Lang. Memory RF 800717 Joystick Xcontrol G2 left 2A-5D 800718...
- Page 25 ™ User Manual tiltrotator with Front pin lock | 3. Product Description | 25 • Clinometer – Tilt and rotational angles are shown in real time, an electronic spirit level • Built in troubleshooting – The system indicates any errors in plain text XControl G2 contains the central control, the brain of the system, split into two modules of which one, the cabin module (2), is installed in the excavator's cab and the other, the Tiltrotator module (1), is installed in the tiltrotator.
-
Page 27: Technical Data
Chapter 4. Technical data Topics: • Technical data • Technical data - hydraulics • Technical data - weights and dimensions • Technical data - gripper cassette • Tightening torque... -
Page 28: Technical Data
™ 28 | User Manual tiltrotator with Front pin lock | 4. Technical data 4.1. Technical data Table 2: Technical data Machine weight (ton) Max 4 Max 6 Max 7 Max 12 Max 16 Max 20 Max 26 Break out torque (kNm) Max 35 Max 45 Max 65... -
Page 29: Technical Data - Weights And Dimensions
™ User Manual tiltrotator with Front pin lock | 4. Technical data | 29 4.3. Technical data - weights and dimensions Table 4: Weights and dimensions A. Width (mm) B. Length (mm) C. Building height (mm) D. Width upper section (mm) Weight from (kg) Tilt Torque (kNm) - Page 30 ™ 30 | User Manual tiltrotator with Front pin lock | 4. Technical data Gripper cassette M20 (12.9) M20 (12.9) M16 (12.9) M20 (12.9) M20 (12.9) M20 (12.9) M20 (12.9) 649Nm 649Nm 333Nm 649Nm 649Nm 649Nm 649Nm...
-
Page 31: Operation
Chapter 5. Operation Topics: • Operating the lock function • Operation of the tilt function • Operating of the rotation function • Operation of the extra function • Operation of the gripper function • Other functions • Operation of the excavators quick coupler •... -
Page 32: Operating The Lock Function
™ 32 | User Manual tiltrotator with Front pin lock | 5. Operation 5.1. Operating the lock function The tiltrotator has an integrated attachment coupler where the lock is operated with an safety switch mounted in the cab. The attachment coupler is opened and closed as follows. For coupling of a work tool: Connecting work tools Warning: If the quick coupler safety switch is activated without the buzzer sounding or without the warning... -
Page 33: Operating Of The Rotation Function
™ User Manual tiltrotator with Front pin lock | 5. Operation | 33 When you pull the roller to the right, the tiltrotator will tilt so that the right side of the work tool lowers, seen from the driver's seat. 5.3. -
Page 34: Other Functions
™ 34 | User Manual tiltrotator with Front pin lock | 5. Operation 5.6. Other functions Control systems, such as XControl, can be expanded with modules for wheels or track steering. For these functions, see chapter 7. This is not applicable to simpler control system on / off system (Control System 5) or similar. The excavator's original functions such as horn, "power boost", etc, can be moved during tiltrotator installation from the places listed in the excavators original documentation. - Page 35 ™ User Manual tiltrotator with Front pin lock | 5. Operation | 35 Procedure for connecting a work tool for example a bucket is the following. 1. Connect the front grip of the tiltrotator attachment coupler to the front bracket pin of the work tool. When entering the work tools front bracket pin make sure no hydraulic hoses are damaged on the work tool, if such hoses exists.
-
Page 36: Disconnecting Work Tools
™ 36 | User Manual tiltrotator with Front pin lock | 5. Operation 4. Deactivate the quick coupler safety switch and pressurize the system. The locking pins will be ejected below the rear bracket pin. When the quick coupler is locked, this is indicated by a green indicator bar (right) protruding at the front edge by the work tool shaft and the red indicator bar (left) is no longer visible. -
Page 37: Using The Lifting Hook
™ User Manual tiltrotator with Front pin lock | 5. Operation | 37 Procedure for disconnecting a work tool for example a bucket is the following. 1. Crowd in the tiltrotator so that the work tool hangs in the work tools front bracket pin 2. - Page 38 ™ 38 | User Manual tiltrotator with Front pin lock | 5. Operation The procedure for connecting a lifting shackle or lifting strap to the lifting hook is as follows. 1. Check that the lifting hook is intact and that protective lugs are in place. 2.
-
Page 39: User Interface
Chapter 6. User interface Topics: • Understanding the user interface • Operating mode • Menu: • Speed • Brightness • Profile Management • Layout • Clinometer • Troubleshooting • Troubleshooting - in / out signals • Language... -
Page 40: Understanding The User Interface
| 6. User interface 6.1. Understanding the user interface Steelwrist XControl control system (Generation 2) uses a touch screen interface to easily communicate with the system. You point to objects on the screen to make your selections. In this manual we will use the arrow key (>) to indicate when you need to point at several objects after each other. -
Page 41: Menu
™ User Manual tiltrotator with Front pin lock | 6. User interface | 41 1. Menu: The left hand side of the status bar indicates your position in the system. In operating mode XControl G2 is indicated. 2. Warning symbol: If the system detects something abnormal during operation, the warning symbol illuminates. It is still possible to control the tiltrotator but do so with great caution. -
Page 42: Speed
™ 42 | User Manual tiltrotator with Front pin lock | 6. User interface Return button - Back arrow takes you back to the operating mode. The system will automatically return to operating mode after 10 minutes in menu mode if no other function is activated. In cases where multiple screens are used for interaction scroll between images with right or left arrow in the navigation bar. - Page 43 ™ User Manual tiltrotator with Front pin lock | 6. User interface | 43 To change the profile, select Change Profile as follows: 1. Use the drop down menu to select Change Profile 2. A button for each profile is shown with the current profile indicated by green edges. 3.
-
Page 44: Layout
™ 44 | User Manual tiltrotator with Front pin lock | 6. User interface 6.7. Layout In the layout menu, you can get information about the buttons and rollers on your joysticks are configured. The indications on the screens are as follows: •... -
Page 45: Troubleshooting
™ User Manual tiltrotator with Front pin lock | 6. User interface | 45 2. When you operate the work tool values for tilt, bucket and rotation is indicated relation to the chosen reference position. 6.9. Troubleshooting With the Troubleshooting menu, you can get help in solving system errors. You can also test that the signals coming in from the handles are correct and verify the outputs signals. -
Page 46: Troubleshooting - In / Out Signals
™ 46 | User Manual tiltrotator with Front pin lock | 6. User interface 6.10. Troubleshooting - in / out signals In the Troubleshooting menu you can test input signals as follows: Both buttons and rollers in your joysticks and switches in the console create inputs to the system. By activating buttons and rollers you can with this menu verify that the signals are correct and thus verify that the system is working properly. - Page 47 ™ User Manual tiltrotator with Front pin lock | 6. User interface | 47 2. Press the OK button on the right of the navigation bar to save the settings and the system goes back to the Main menu. If you do not want to save settings press Cancel on the left side of the navigation bar.
-
Page 49: Wheels And Track Steering (Option)
Chapter 7. Wheels and Track steering (Option) Topics: • Introduction Wheels/Track steering • Function description Wheels/Track steering • User interface Wheels/Track steering... -
Page 50: Introduction Wheels/Track Steering
The other type of excavator has an orbitrol that does not have LS-signals. To solve this problem, Steelwrist has two types of hydraulic block solutions to ensure that a safe installation can be carried out regardless of excavator type. - Page 51 ™ User Manual tiltrotator with Front pin lock | 7. Wheels and Track steering (Option) | 51 Track steering: 1. Handle with activation button 2. Cabin module 3. Wheels steering module / Track steering module 4. Wheels steering block / Track steering block 5.
-
Page 52: User Interface Wheels/Track Steering
™ 52 | User Manual tiltrotator with Front pin lock | 7. Wheels and Track steering (Option) For activation to be possible at least five of the following activation criteria must be met: Table 7: For wheels steering For track steering Security gate in driving mode Security gate in driving mode Creep or low range active. - Page 53 ™ User Manual tiltrotator with Front pin lock | 7. Wheels and Track steering (Option) | 53 Some changes can be made for track steering. Track control - Combined means that you can run both tracks forwards or backwards on one index finger roller whilst using the other index finger roller to swing left or right.
-
Page 55: Environmental Aspects
Chapter 8. Environmental aspects Topics: • Environmental information... -
Page 56: Environmental Information
• Metals are the largest part of the weight of Steelwrist products. Over 80% is made of steel but also aluminum bronze is used in the product. Most metals can be recycled. Steel and aluminum bronze should be separated from other metals before disposal for recycling. -
Page 57: Maintenance
Chapter 9. Maintenance Topics: • General Maintenance • Grease and hydraulic oil • Axial and radial play • Checkpoints • Lubrication points • Full Service • Check list - Delivery of the machine • Check list - Weekly inspection and lubrication •... -
Page 58: General Maintenance
After prolonged use it may be worthwhile to submit tiltrotator to your local service center or Steelwrist for full service review. Normally, all wear parts such as slide bearings, bushings, grease, chafed hoses etc. are replaced. For... -
Page 59: Checkpoints
™ User Manual tiltrotator with Front pin lock | 9. Maintenance | 59 9.4. Checkpoints Warning: Before use, the lock function must be pressurized by activating one hydraulic function. Ensure that work tools and the machine quick coupler is safe and properly secured to tiltrotator before work is started. -
Page 60: Lubrication Points
Over time it may be advantageous to replace wear parts such as slide bushings, slide bearings, shaft bushings, hydraulic hoses, etc. Steelwrist has a full service program for this where your tiltrotator is inspected and all wear parts are replaced for a fixed price. -
Page 61: Check List - Delivery Of The Machine
™ User Manual tiltrotator with Front pin lock | 9. Maintenance | 61 9.7. Check list - Delivery of the machine To ensure correct installation, your installer received an installation guide. Experience shows that not all workshops are equally meticulous in following the installation instructions and of course even the best fitter may make a mistake if unlucky. -
Page 62: Feedback
| 9. Maintenance 9.10. Feedback Steelwrist continuously strives to improve products and processes. If you have any remarks, suggestions for improvements or other views on this publication, please make a copy of this page and post, fax or email it to us at one of the following addresses. - Page 64 Steelwrist AB Bäckvägen 18 192 54 Sollentuna Sweden +46-626 07 00 www.steelwrist.com 700347ENA...
Need help?
Do you have a question about the Tiltrotator Front pin lock X04 and is the answer not in the manual?
Questions and answers