
Related Manuals for iKAMPER Skycamp Series


Summary of Contents for iKAMPER Skycamp Series
- Page 1 Skycamp User Manual INSTRUCTIONS/MOUNTING BRACKET INSTALLATION/OPENING THE SKYCAMP/ INSTALLING THE LADDER/CLOSING THE SKYCAMP/SAFETY/WARRANTY...
- Page 2 Skycamp Mini TECHNICAL SPECIFICATIONS...
- Page 3 Skycamp 2.0 TECHNICAL SPECIFICATIONS...
-
Page 5: Table Of Contents
Contents - MOUNTING THE SKYCAMP ON YOUR VEHICLE ........ 1 Installing the Mounting Brackets ........... 2-3 Crossbar Placement ..............4 - OPENING THE HARDSHELL ............5-7 - INSTALLING THE LADDER ............... 8-9 - ERECTING THE CANOPY ..............10 - CLOSING THE HARDSHELL ............11-14 - TENT CARE .................. -
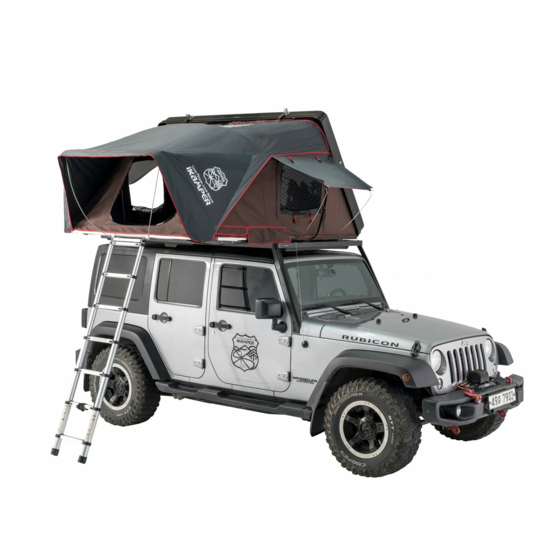
Page 6: Mounting The Skycamp On Your Vehicle
165lbs (75kgs) and MUST be at least 30” (76cm) apart. • If you are unsure of the mounting process or have any questions, contact an iKamper representative at support@ikamper.com. It is easiest to mount the Skycamp from the side of your vehicle, rather than the front or back. -
Page 7: Installing The Mounting Brackets
INSTALLING THE MOUNTING BRACKETS IMPORTANT: WHEN MOUNTING THE SKYCAMP ON YOUR VEHICLE, MAKE SURE THAT EACH BRACKET IS SECURELY FASTENED. FAILURE TO DO SO COULD CAUSE DAMAGE, INJURY OR EVEN DEATH. INCLUDED a.8 x Mounting Bracket b.4 x Allen Bolts c.4 x Rail Caps d. - Page 8 1. Slide the first bracket piece inside the rail. Lift the Skycamp slightly 1. Slide the first bracket piece inside the rail. Lift the Skycamp slightly to allow the piece to travel to the other side of the crossbar. Ensure to allow the piece to travel to the other side of the crossbar.
-
Page 9: Crossbar Placement
CROSSBAR PLACEMENT NOTE: Your crossbars should always be at least 30’’(76cm)apart . Please refer below to the crossbar mounting safezone. One crossbar should be placed in each to ensure the Skycamp is mounted safely. Mounting Safe Zone... -
Page 10: Opening The Hardshell
OPENING THE HARD SHELL 1. Unlock the hard shell locks and pull down the metal case to release the strap. 2. With one hand, push up the hard shell. The gas struts will allow it to open on its own. - Page 11 3. Once the top has fully opened, reach up and grab the base of the ladder. 4. Pull the ladder towards you, allowing it to extend completely . When you first use the Skycamp, you will first need to undo the velcro strap on the ladder.
- Page 12 5. Push down on the ladder, as it acts as a lever and lowers the extension floor. 6. After the extension floor has been lowered, securely install the ladder.
-
Page 13: Installing The Ladder
INSTALLING THE LADDER CAUTION: FAILURE TO PROPERLY SECURE THE LADDER COULD CAUSE DAMAGE AND SERIOUS INJURY. CAREFULLY READ THE INSTRUCTIONS BELOW BEFORE ATTEMPTING TO USE THE LADDER. The ladder acts as the support for the Skycamp’s extension panel. Always make sure the ladder is firmly planted in the ground, and each step is securely locked before going up the ladder. - Page 14 •The ladder should be able to offer support to the extension panel and the tent’s occupants. The main panel (floor) and extension panel should be horizontal, with a small space between the two panels (the extension panel should be lifted up slightly higher than the main panel).
-
Page 15: Erecting The Canopy
ERECTING THE CANOPY The canopy should be erected using the two steel rods included with your Skycamp: 1. Climb half-way up the ladder, take one rod, and insert the straight end into one of the holes located at the top of the ladder (illustrated below). -
Page 16: Closing The Hardshell
CLOSING THE HARD SHELL 1. Retract the ladder, starting with the top steps. Make sure to press the release buttons with your thumbs and be careful not to get any fingers caught between steps. 2. Using the ladder, push the extension panel up and then into the Skycamp. - Page 17 3. Reach into the Skycamp to grab the black nylon strap attached to the top of the shell. Pull down on the strap to close the hard shell. Simaltaneously pull the nylon straps on either side to reduce the tent skin residing outside of the hardshell.
- Page 18 4. Make sure the tent material is tucked into the Skycamp on the front, back and side before closing. 5. Pull down on the hard shell, and securely fasten the locks. IMPORTANT: Make sure both devices are securely locked before driving.
- Page 19 • The fastening straps keep your Skycamp closed and make sure it does not open when driving. ALWAYS make sure that the hard shell is completely closed and the straps are securely fastened before driving. • If you find it difficult to completely close the Skycamp, it may be due to excess bedding left inside the tent.
-
Page 20: Tent Care
TENT CARE Most modern tents often use a fully polyester material. At iKamper we use canvas (65/35 Poly-cotton Blend). Using canvas as opposed to polyester allows constant fresh airflow and full breath-ability throughout the tent. In addition, using canvas drastically decreases the condensation that occurs when sleeping in a tent. -
Page 21: Liquid Sealant
LIQUID SEALANT Continued use of your tent may cause the sealant tape to peel away from the rainfly. In case of this we have provided you with a liquid sealant. Simply cut away the loosened sealant tape and apply the liquid sealant along the seam. - Page 22 www.ikamper.com...
-
Page 23: Warranty
fill out the After-Service Care form. We'll do our best to solve the problem as soon as possible. IKAMPER ROOF TOP TENT WARRANTY For 2 years from the date of purchase, iKamper will repair or replace (at our option) defective parts at no cost to the customer. Extended 3 Year Warranty For 5 years from the date of purchase, iKamper will repair or replace (at our option) defective parts at a minimum cost (production cost).
Need help?
Do you have a question about the Skycamp Series and is the answer not in the manual?
Questions and answers