
Related Manuals for HSS Hire MI TOWER STAIRS

Summary of Contents for HSS Hire MI TOWER STAIRS
- Page 1 332 / 01 Operating & Safety Guide 332 MI TOWER MOBILE ACCESS TOWER versatile MiTower One-Person Quick Build Tower for construction site and maintenance applications. 332_MI TOWER_12/06/2019...
-
Page 2: Table Of Contents
SAFETY DOS AND DON’TS - NEVER MITOWER+ 4M - ASSEMBLY BEFORE YOU START MI TOWER STAIRS ASSEMBLY GETTING STARTED KNOW YOUR MI TOWER STAIRS MI TOWER - ASSEMBLY KNOW YOUR KIT LIST AND SPECIFICATIONS KNOW YOUR MI TOWER KNOW YOUR STORAGE AND TRANSPORT PACK KNOW YOUR KIT LIST AND SPECIFICATIONS MITOWER STAIRS 2.2M &... -
Page 3: Introduction
The MI TOWER family is a versatile and high quality tower providing a work platform for one person (MI TOWER & MI TOWER STAIRS) or up to two persons (MI TOWER+). It is designed in accordance with the latest testing and quality standards. -
Page 4: Know Your Mitower Components
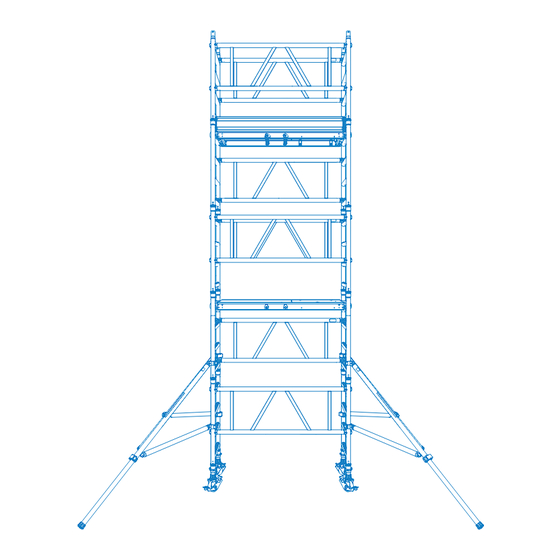
KNOW YOUR MI TOWER COMPONENTS 1 GUARDRAIL BRACE PANEL jaw which is released by simply moving the jaw’s trigger. The claw must only be attached to the frame with the opening facing outward. Attachment with the jaw’s opening facing inward will not fully protect the user if lent upon and may cause serious injury or death. - Page 5 8 ADJUSTABLE LEG WITH RUBBER FOOT Extend The adjustable leg with rubber foot allows for secure positioning of your Mi TOWER STAIRS in relation to your workplace. The leg can be extended or retracted to allow for levelling and the rubber foot Engagement prevents slipping.
-
Page 6: Safety Dos And Don'ts - Always
SAFETY DOS AND DON’TS - ALWAYS Read and understand this guide before you begin assembly. ALWAYS Ensure that all safety requirements are met and that the tower is the correct access solution for ALWAYS the task you wish to perform. Ensure that the tower is assembled and dismantled by a qualified, competent person. -
Page 7: Safety Dos And Don'ts - Never
SAFETY DOS AND DON’TS - NEVER Use the tower if you don’t understand something in this guide; please contact the supplier for NEVER advice. Assemble, use, move or dismantle the tower if you are tired or unwell or if you are under the NEVER influence of alcohol or drugs. -
Page 8: Before You Start
BEFORE YOU START PREPARATION The floor area must be clear of any obstructions including materials and debris. Check that you have all the components necessary to construct the tower height you require. Check also each component for condition and correct function. If any part is missing or damaged/not working correctly it must be replaced before assembling 3T (THROUGH THE TRAPDOOR) SYSTEM The 3T method of construction has been developed to reduce the risk of an erector falling from a tower during construction. -
Page 9: Getting Started
GETTING STARTED The MI TOWER and MI TOWER+ requires only one person to assemble and dismantle it. The MI TOWER STAIRS requires two persons. Your tower is supplied with uniform 1m high rung frames which can be used at any stage of the assembly. -
Page 10: Mi Tower - Assembly
TOWER Page 9 332_MI TOWER_12/06/2019... -
Page 11: Know Your Mitower
KNOW YOUR MiTOWER PA R T S L I S T I N G 4 R UNG F RA M E ADJU STAB LE LEG A ND CASTO R TO E BOA RD GUA RD RA IL BR AC E PA NEL TELES CO P I C S TA BILI SE R HATCH PL ATFO RM Page 10... -
Page 12: Know Your Kit List And Specifications
KNOW YOUR KIT LIST AND SPECIFICATIONS COMPONENT MATRIX AND WEIGHTS GROUND CONDITIONS Weight (Unit) 4 RUNG FRAME 3.58 TELESCOPIC OUTRIGGER 3.58 HATCH PLATFORM 8.56 GUARDRAIL BRACE PANEL 3.34 220MM ADJUSTABLE LEG 0.85 125MM LOCKING CASTOR 2.50 TOE BOARD SET 5.33 MITOWER WEIGHT (KG) 76.45 98.85... -
Page 13: Know Your Storage And Transport Pack
KNOW YOUR STORAGE AND TRANSPORT PACK TRANSPORT AND STORAGE TROLLEY COMPONENTS For ease of storage and of transportation, GUARDRAIL BRACE PANEL X2 MiTOWER has been designed so that all TOE BOARD SET components can be safely stored within the HATCH PLATFORM ADJUSTABLE LEG AND CASTOR X4 tower’s base assembly. - Page 14 MI TOWER 4m - ASSEMBLY STEP 1 STEP 2 Fully insert the adjustable Attach a guardrail brace panel to the vertical tube of one frame with the legs with castors into two upper claw positioned above the fourth rung and with all claws facing frames, turning the leg’s height outward.
- Page 15 MI TOWER 4m - ASSEMBLY STEP 5 Stand inside the tower and fit a platform on to the eighth rung, making sure that the wind-lock catches engage. STEP 6 Fit a stabiliser to each corner of the tower. Position the lower horizontal stabiliser coupler clamp just above the frame’s second rung, then secure the top stabiliser coupler clamp just above the frame’s fifth rung.
-
Page 16: Mi Tower+ Assembly
MI TOWER 4m - ASSEMBLY STEP 9 Place three guardrail brace panels on to one set of hangers and a pair of eight rung conjoined frames to the other side. Enter the tower framework and climb the frame rungs until you are half way through the platform’s trap door. - Page 17 MI TOWER 4m - ASSEMBLY STEP 11 Access the tower then carefully fit the second platform on to the sixteenth rung, making sure that the wind-lock catches engage. Extend and lock the four component hangers located on either side of the platform. Transfer the two guardrail brace panels and the set of toe boards to the component hangers on the second platform.
- Page 18 TOWER+ Page 17 332_MI TOWER_12/06/2019...
-
Page 19: Know Your Mi Tower
KNOW YOUR MI TOWER+ PA R T S L I S T I N G 4 R UNG F RA M E ADJU STAB LE LEG A ND CASTO R TO E BOA RD GUA RD RA IL BR AC E PA NEL TELES CO P I C S TA BILI SE R HATCH PL ATFO RM Page 18... -
Page 20: Know Your Kit List And Specifications
KNOW YOUR KIT LIST AND SPECIFICATIONS COMPONENT MATRIX AND WEIGHTS GROUND CONDITIONS Weight (Unit) 4 RUNG FRAME 3.55 TELESCOPIC OUTRIGGER 4.35 HATCH PLATFORM 12.20 GUARDRAIL BRACE PANEL 4.15 220MM ADJUSTABLE LEG 0.85 125MM LOCKING CASTOR 2.45 TOE BOARD SET 6.50 164.90 MITOWER+ WEIGHT (KG) 87.20... -
Page 21: Know Your Storage And Transport Pack
KNOW YOUR STORAGE AND TRANSPORT PACK TRANSPORT AND STORAGE TROLLEY COMPONENTS For ease of storage and of transportation, GUARDRAIL BRACE PANEL X2 MiTOWER+ has been designed so that all TOE BOARD SET components can be safely stored within the HATCH PLATFORM ADJUSTABLE LEG AND CASTOR X4 tower’s base assembly. -
Page 22: Mitower+ 4M - Assembly
MI TOWER+ 4m - ASSEMBLY STEP 1 FROM TROLLEY For ease of storage and transportation your MiTOWER+ is designed so that all the components can be safely stored within the tower’s base. Start by removing the free-standing components from within the trolley and stack safely nearby for use. - Page 23 MI TOWER+ 4m - ASSEMBLY STEP 5 Stand inside the tower and fit a platform on to the eighth rung, making sure that the wind-lock catches engage. STEP 6 Fit a stabiliser to each corner of the tower. Position the lower horizontal stabiliser coupling clamp just above the frame’s second rung, then secure the top stabiliser coupling clamp just above the frame’s fifth rung.
- Page 24 MI TOWER+ 4m - ASSEMBLY STEP 10 Extend and lock the four component hangers located on either side of the platform. From the ground place three guardrail brace panels onto the hangers on one side of the platform and two sets of conjoined four rung frames on the other side.
- Page 25 MiTOWER+ 4m - ASSEMBLY STEP 14 Access the first platform and carefully fit the second platform on to the sixteenth rung, making sure that the wind-lock catches engage. Next extend and lock the four component hangers located on either side of the second platform. Move the two guardrail brace panels from the hangers on the first platform on to the the hangers of the second platform and then repeat the process with the toeboard set on the other side of the platform.
-
Page 26: Mi Tower Stairs Assembly
TOWER STAIRS Page 25 332_MI TOWER_12/06/2019... -
Page 27: Know Your Mi Tower Stairs
KNOW YOUR Mi TOWER STAIRS PARTS L ISTING 4 R UN G FR AM E ADJ USTA BLE LEG WITH RUB BER FOOT TO E BOAR D SE T WALK-TH ROUG H G AT E FR AME 2 R U NG FR AM E... -
Page 28: Know Your Kit List And Specifications
PLATFORM SAFE WORKING LOAD (KG) 150kg 150kg 150kg 150kg See page 11 (Tying in) for Mi TOWER STAIRS heights outside the scope of this instruction guide or instances where the standard stabilisers cannot be deployed as instructed. Page 27 332_MI TOWER_12/06/2019... -
Page 29: Know Your Storage And Transport Pack
TOWER STAIRS has been designed so that all 4 RUNG FRAME X2 TOE BOARD SET components can be safely stored within the Mi HATCH PLATFORM TOWER STAIRS trolley assembly. See illustration. ADJUSTABLE LEG AND CASTOR X4 Product shown is Mi TOWER STAIRS 2.7m Page 28 332_MI TOWER_12/06/2019... -
Page 30: Mitower Stairs 2.2M & 4.2M - Assembly
Mi TOWER STAIRS 2.2M & 4.2M - ASSEMBLY STEP 1 Take four adjustable legs with rubber feet and insert two into the walk- through gate frame. Then insert the remaining two adjustable legs with rubber feet into the two rung frame. Adjust all leg height adjustment collars to bring all four legs to the lowest position. - Page 31 Ensure all hooks are facing outwards and correctly locked on to the frame tubes. STEP 7 Stand inside the Mi TOWER STAIRS and fit the platform on the sixth rung of the uppermost frame assembly, ensuring the trap door is positioned at the lowermost end of the Mi TOWER STAIRS.
-
Page 32: Mitower Stairs 2.7M & 4.7M - Assembly
Mi TOWER STAIRS 2.7M & 4.7M - ASSEMBLY STEP 1 Fully insert the adjustable legs with rubber feet into two walk-through gate frames, turning the leg’s height adjustment collar to bring alll four legs to the lowest position. STEP 2 Construct the lowermost frame assembly. - Page 33 Ensure all hooks are facing outwards and correctly locked on to the frame tubes. STEP 7 Stand inside the Mi TOWER STAIRS and fit the first platform on the eighth rung of the uppermost frame assembly, ensuring the trap door is positioned at the lowermost end of the Mi TOWER STAIRS.
- Page 34 Access the first platform and fit one set of conjoined frames to each end of the Mi TOWER STAIRS and apply the easy-lock frame clips. Next, attach a guardrail brace panel to the Mi TOWER STAIRS, with its lower jaw positioned above the fourteenth frame rung on the uppermost frame assembly.
-
Page 35: Point Pre-Use Safety Checklist
10 POINT PRE-USE SAFETY CHECKLIST (ALL TOWERS) 10 POINT PRE-USE CHECKLIST FOR USERS BEFORE USE Completed Mi TOWER STAIRS must be checked by a competent person COMPONENTS Check all components are free from damage STAIRCASE Ensure staircase is cordened off correctly... - Page 36 Safety Guide Manager at the address below e-mail: safety@hss.com ©HSS Hire Service Group Ltd 2009 No. 504/01 Group O ce: Oakland House, 76 Talbot Rd. Manchester M16 0PQ Web Site: http://www.hss.com...
Need help?
Do you have a question about the MI TOWER STAIRS and is the answer not in the manual?
Questions and answers