Table of Contents
Advertisement
Quick Links
Advertisement
Table of Contents

Subscribe to Our Youtube Channel
Related Manuals for Comecta FA-2204B

Summary of Contents for Comecta FA-2204B
- Page 1 Balance Model FA-2204B Cod. 5830039 INSTRUCTIONS MANUAL...
- Page 2 FA2204B Electronics Balance Operation Instructions...
-
Page 3: Table Of Contents
Contents I. Outline ......................2 II. Main Technical Parameters ................. 3 III. Drawings for Balance Installation.............. IV. Operating ..................... 6 §1 Preparation ..................6 §2 Operation ..................... 6 §3 Start ..................... 8 §4 Balance Calibration ................10 §5 COU Count Function ................ 11 §6 UNT Unit Conversion ............... -
Page 4: Outline
I. Outline The balance is a multifunction electronic balance adopting MCS-51 series single chip microprocessor. The weighing can be automatically calibrated, the integrating time can be adjusted and the sensitivity can be selected like common intelligent electronic balances. Besides, it has three weighing systems for users’ choice: gram, metric carat and troy ounce (the metric carat and troy ounce are for the exported balance). -
Page 5: Main Technical Parameters
II. Main Technical Parameters FA2204B Model Weighing range 0 to 220g Actual Scale Division Value 0.1mg Taring Range 0 to 220g Repeatability Deviation 0.0002g Accuracy Degree Stable Time (typical) ≤8s Integrating Time (adjustable) 2.5/5/10s Pan Diameter (mm) Φ80 Overall Dimensions (mm) 350×210×346 Net Weight 8.5kg... -
Page 6: Drawings For Balance Installation
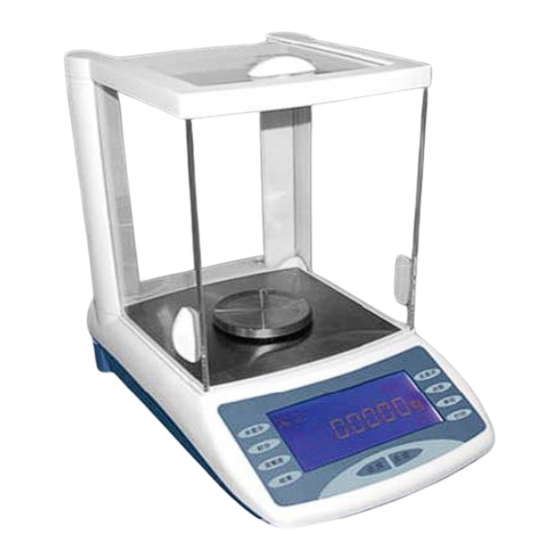
Ⅲ.Drawings for Balance Installation 1. pan 2. data interface 3. level bubble 4. outer power supply connector... - Page 7 5. adjustable level leg 6. small round cover (hook inside)
-
Page 8: Operating
IV. Operating §1 Preparation Unpack the box and remove all the packing. Take out buffer sponge in the wind-proof cover and install pan. Put the balance on a stable working table free from vibration, sunshine and air flow. Ambient temperature: Balance of grade: :20℃±5℃... - Page 9 “ASD” – key to adjust the sensitivity “CAL”– key to calibrate the balance, confirm the count function (for detail see §5), “COU” – key of count function “UNT” – key for unit conversion (For detail see operation in §6) “PRT” – key of output mode setting Introduction of LCD panel (see the sketch): 1.
-
Page 10: Start
Sketch of LCD panel Please choose Please wait §3 Start Select an appropriate line voltage an set the voltage switch to the corresponding position. Turn on the power on and the balance is ready to run (but the display doesn’t work), normally warm-up is needed before the display panel can be operated. - Page 11 For emergency, weighing can be done through calibrating the balance before use for accurate measurement, if the warm-up time is not enough. Function of the keyboard “ON” displays on Depress slightly the button “ON”, the display will be lighted. Check the function of the display, about 2 seconds later, the model of the balance will be displayed: For example: —...
-
Page 12: Balance Calibration
- 1 8 . 9 0 0 1 g Depress “TAR” again, the display will be all zero, i. e. the balance clears: 0 . 0 0 0 0 g §4 Balance Calibration After a long period of storage, movement, change of environment, the weighing unit may not be displayed on the panel, one weight may be displayed on the left button of the display panel when there is no any weighting carried out. -
Page 13: Cou Count Function
§5 COU Count Function The balance has a function of counting. The average numbers are in four steps of 5, 10, 25, and 50. The setting of average numbers: Only depress “COU” and hold, “Please choose” will appear on the display panel, while the menu display will be circulating continuously as the following: Cou-00 Cou-05... -
Page 14: Unt Unit Conversion
§6 UNT Unit Conversion Depress “UNT” button and hold the display of “Please choose” will appear on the panel, while the following menu is circulating continuously: —Unt—0 —Unt— —Unt—2 When the unit you need appears, let go, then it shows “pleas wait” and turns into the unit you set up. -
Page 15: Int Integrating Time Adjustment
§7 INT Integrating Time Adjustment Depress “INT” button and hold; “Please choose” will appear on the panel, while the display is shown as the following menu, circulating continuously: —INT—0 —INT—1 —INT—2 —INT—3 When the mode you need appears, let go, then it shows “pleas wait” and turns into the mode you set up. -
Page 16: Prt Output Mode Setting
—ASD—0 —ASD—1 —ASD—2 —ASD—3 When the mode you need appears, let go, then it shows “pleas wait” and turns into the mode you set up. The corresponding sensitivity will be: -ASD-0 the highest, -ASD-1 high, -ASD-2 higher, and -ASD-3 low. Where -ASD-0 is used for test run and not to be used by the users. -
Page 17: Operation Of Weighing, Taring, Add Objects, Read Deviations
—PRT—0 —PRT—1 —PRT—2 —PRT—3 —PRT—4 When the mode you need appears, let go, then it shows “please wait” and turns into the mode you set up. PRT-0 is the mode of indefinite time output; slightly depress “PRT” once, the weighing result will be output on the output interface once. - Page 18 Taring: Put the container on the pan, the weight will display. Depress “TAR”, zero display. That is taring. Put the object to be weighed into the container, the value displayed is the net weight of the object to be weighed. Accumulative weighing: Put the objects to be weighed on the pan one by one with taring method and tare and clear for each one.
-
Page 19: Maintenance And Troubleshooting Of The Balance
V. Maintenance and Troubleshooting of the Balance Maintenance: The balance should be used carefully. Clean the pan and the case frequently with soft cloth and toothpaste. Don’t wipe the balance with strong agent. Troubleshooting: Trouble Cause Remedy · Power in not on ·... - Page 20 · Not · Depress “TAR” button. The result is not zeroing before correct weighing · Use the balance without · Recalibrate the balance. calibration calibration weight is not · Change to the correct voltage. accurate · The line voltage is not correct ·...
-
Page 21: Ⅵ. Data Interface
Ⅵ. Data Interface Data interface adopts the standard 9-core RS232C socket equipped with RS232 universal serial two-way interface output (parallel interface not equipped). For the convenience of the user to connect the system computers or multi-terminals equipment, it also can be connect with micro-processor and printer. -
Page 22: Ⅷ. Randmo Accessories
A detailed output frame is as follows: Ⅷ. Random Accessories 1. 200g (or 100g) calibration weights 1 box 2 .AC Adapter 1 piece 3 Weights tweezers 1 piece 4 Handkerchief 1 piece 5 Operation Manual 1 copy...
Need help?
Do you have a question about the FA-2204B and is the answer not in the manual?
Questions and answers