RCA RDR2600 Service Manual
Hide thumbs
Also See for RDR2600:
- Instruction manual (63 pages) ,
- Instruction manual (63 pages) ,
- Instruction manual (63 pages)
Table of Contents
Advertisement
Quick Links
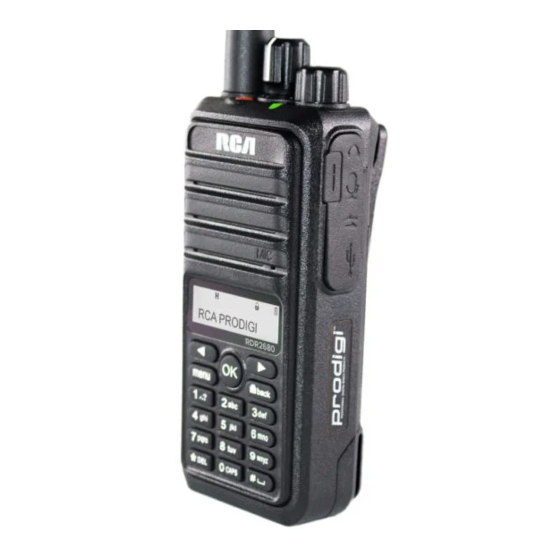
RDR2600 UHF
SERVICE MANUAL
RDR2600 UHF DISASSEMBLY FOR REPAIR.........1-7
TECHNICAL SPECIFICATIONS .................8-9
CIRCUIT DESCRIPTION.....................10-12
PARTS LIST .............................13-16
RDR2600 UHF EXPLOSION......................17
RDR2600 UHF CHARGE PACKING.................19
RDR2600 UHF RADIO PACKING..................20
SCHEMATIC DIAGRAM ......................21-25
PC BOARD ................................26-37
PTT BOARD..............................38-39
CONTENTS
Advertisement
Table of Contents

Related Manuals for RCA RDR2600


Summary of Contents for RCA RDR2600
-
Page 1: Table Of Contents
SERVICE MANUAL CONTENTS RDR2600 UHF DISASSEMBLY FOR REPAIR..1-7 TECHNICAL SPECIFICATIONS ....8-9 CIRCUIT DESCRIPTION.....10-12 PARTS LIST ......13-16 RDR2600 UHF EXPLOSION......17 RDR2600 UHF EXPLOSION SERIES OF ACCESSORIE..18 RDR2600 UHF CHARGE PACKING....19 RDR2600 UHF RADIO PACKING....20 SCHEMATIC DIAGRAM ......21-25 PC BOARD ........26-37 PTT BOARD......38-39... -
Page 2: Rdr2600 Uhf Disassembly For Repair
RDR2600 UHF DISASSEMBLY FOR REPAIR 1.Removing the Case Assembly from the Chassis (1)Remove the two screws (2)Remove the channel knob and volume knob (3)Remove the channel copper nut, volume copper nut, antenna head copper nut and antenna head waterproof ring. - Page 3 2.Remove the keypad from the Chassis Remove the eleven screws which connect the PCB Using a soldering iron, dissolve the tin on the antenna end,lift it up and remove the PCB from the aluminum case at the same time.
- Page 4 3.Remove the keypad from the Chassis (1)Remove the cable from the keypad (2)Remove the six screws that connect the keypad (3)Use a soldering iron to melt the tin at the horn solder joints and remove the microphone (4)Remove the keypad...
- Page 5 4. Assemble the PCB to the aluminum case (1) Put the aluminum antenna pin on the antenna board and align it with the corresponding positioning hole on the PCB,lock the screws into all 11 screw hole,fix PCB Board and the aluminum shell.(Note: PCB board should be close to the aluminum shell, do not have tilted phenomenon, the screws should be fully and intact locked.) 司、...
- Page 6 5.put the keyboard on the shell (1)Assemble the button into the front case (2)Put the microphone pin on the positioning hole on the keyboard and add tin to weld (3)Install the screw holes on the keypad and the screw holes on the surface shell, and lock them with 6 screws (4)Install the cable BLACK...
- Page 7 6.Assemble the aluminum shell into the front case (1)Add tin on the welding point of PCB speaker (2)Weld the speaker line and the microphone line on the PCB board (Note: the Red speaker line connect to SPK + pole, black line connect to SPK- pole;The red microphone line connect to MIC + pole, black line connect to MIC- pole) (3)put the cable on the PCB board (4)Open the USB port cover to prevent the aluminum case from pressing against the USB...
- Page 8 7.Install nuts and knob caps (1)Insert the channel copper nut, volume copper nut, antenna head brass nut and antenna head waterproof ring into the walkie-talkie (2)Channel knob cap and volume knob cap are respectively put into the walkie-talkie...
-
Page 9: Technical Specifications
RDR2600 UHF Technical Specifications GENERAL Model RDR2600 1000 Channel Numbers Digital:12.5KHz Channel Spacing Analog:12.5KHz/25KHz Working Voltage DC 7.4V Frequency UHF:400-470MHz Operating Temeperature (-20℃)~+50℃/(-4℉)~+122℉ Storage Temeperature (-40℃)~+80℃/(-40℉)~+176℉ Weight 318g/0.71b.(with battery B2618LI) 5.3"×2.3"×1.3"(without antenna) Size:HxWxD(inch) Waterproof Level IP54 Dust &Water Resistant RECEIVE Frequency Stability ±1.0ppm... - Page 10 RDR2600 UHF Technical Specifications TRANSMITTER Transmit power FM noise -40dB@12.5KHz Intermodulation 60dB -36dBm@<1GHz Transmit Spurious Radiation -30dBm>1GHz Adjacent Channel Power -60dB@12.5KHz Modulation Limit 2.5KHz@12.5KHz Idle Slot Power -57dBm Audio Response +1dB---(-3)dB Rated Audio Distortion ≤3% FSK Error ≤3% Emisson Designator(Analog) 16K0F3E/110KF3E 12.5KHz Data:7K60F1D&7K60FXD...
-
Page 11: Circuit Description
RDR2600 UHF CIRCUIT DESCRIPTION 1.Frequencies constitute The receiver using highly integrated RF frequency chip, 1846S as a radio frequency (RF). ANT SW RX AMP AF AMP 26MHz 1846S TX AMP MIC AMP 2.The received signal amplifying circuit The front-end (RF amplifier) From the antenna signal into the transmit/receive switch diode circuits (D402 D403), and is the RF amplifier (Q401 3 sk318) amplifier, directly into the 1846 s. - Page 12 RDR2600 UHF CIRCUIT DESCRIPTION Q 401 D402 D403 RF_RX 3SK318 3.D/A conversion circuit Audio and modulation: Audio through (U401 RDA1846S) demodulation, into (U101 HR_C6000), after (U308 TDA2822) amplification, into the horn. Modulation input after (U102 NJM2100V) amplification. Into (U101 HR_C6000), input (U401 RDA1846S) modulation,transmit.
- Page 13 RDR2600 UHF CIRCUIT DESCRIPTION Q 408 Q 407 Q 406 Q 405 D401 RF_TX RQ A0009 RD01MUS2 2SC3356 2SC3356 APC_VCC R432 U404 B AT+ R433 NJM2904V R434...
-
Page 14: Parts List
RDR2600 UHF PARTS LIST Specification Device Element bit number Material name model package Number Capacitance 1SR154-400 SOD-106 D301 1SS372 SOT-323 D101 D103 26MHz X3.2X2.5 X601 29.4912MHz X3.2X2.5 X101 1XTW29491CA 2SA1586 SOT-323 Q101 2SC3356 SOT-23 Q405-406 2SC4116 SOT-323 Q104 32.768KHz MC-146... - Page 15 RDR2600 UHF PARTS LIST C223 C414 C101-102 C124 C231 C252-253 C256 C330-331 C411 C413 C419 C429 C433 470P C447 C449 C452-454 C460 C464 C473 C480 C354 C472 C300 C468 C469 C431 C204-205 C201-202 C434 C430 GRM21BR71A1 10U/10V C156 C161 C175 C328 C349 C474...
- Page 16 RDR2600 UHF PARTS LIST BA592 SOD-323 D401 L410 L416 MLG1608B18N 18nH L407 MLG1608B22N L405 MLG1608B2N7 2.7nH L417 MLG1608B22N 22nH L409 L412-413 MLG1608B33N 33nH L406 VLS3012ET- 10uH L3030 L306 100M VLS3012ET- 47uH L3030 L105 470M 330R L430 0603电阻 L101-104 L106-108 L201 L301-303...
- Page 17 RDR2600 UHF PARTS LIST R414 180K R408 R449 180R R227 R116 R106 R113 R139 R147 R155 R201-202 R211 R235-237 R239-241 R245-256 R258-259 R303 R315 R403 R410 R418 R420 R458 R469 R473 R103 200K R304 220R R212 R228 R407 R221 R225 R310 R416 R451...
-
Page 18: Rdr2600 Uhf Explosion
RDR2600 UHF EXPLOSION 21 22 Ax11... -
Page 19: Rdr2600 Uhf Explosion Series Of Accessorie
RDR2600 UHF EXPLOSION SERIES OF ACCESSORIES Serial Part Name PPT button PTT silicone key PTT frame Front Label Speaker line microphone Side label Radio Body label Thermal Conductive Adhesive Channel Knob Volume Knob program port cover earphone cover Headphone Cover Shaft... -
Page 20: Rdr2600 Uhf Charge Packing
RDR2600 UHF CHARGER PACKING Charger AC adapter... -
Page 21: Rdr2600 Uhf Radio Packing
RDR2600 UHF RADIO PACKING Instruction manual Protection bag Whip antenna Battery assy Belt clip Lanyard... -
Page 22: Schematic Diagram
A3V3 A3V3 L106 RDR2600 UHF BLM18AG601S C180 C181 C182 C183 C184 C178 C179 C161 C162 C163 C164 C165 C166 C167 C168 TP102 10U/10V SCHEMATIC DIAGRAM R105 R101 USB_D+ USB_D- J102 R125 MICRO-USB TP103 R155 MOD2 A3V3 C152 220P 1 HPVCC... - Page 23 R211 RDR2600 UHF C217 C216 C215 BAT201 ML621 R212 D201 220R KDS160E SCHEMATIC DIAGRAM PTT_KEY R239 PF1_KEY R240 FPC201 R241 PF2_KEY C213 C212 C211 C210 R202 C209 PF3_KEY C214 C256 C252 C253 C231 470P 470P 470P 470P TP202 JTAG_SWCLK 69 PA10...
- Page 24 RDR2600 UHF BAT7V5 BAT7V5 BAT+ L302 U302 BLM18AG601S XC6204B502MR J301 F301 Q301 BATTERY-CON 3AFUSE FMMT717 VBATT+ 2 VSS SCHEMATIC DIAGRAM C318 C304 C303 C302 C323 C306 C305 C322 C324 C311 C310 C319 C320 R301 C300 C301 100P D301 1SR154-400 R323...
- Page 25 AVDD AVDD C480 R449 180K X601 R448 560K 470P L422 R452 CTC/DCS_OUT 26MHz PABIAS SDIO 3.3uH R467 AVDD SCLK RDR2600 UHF R450 AVDD_ C479 C493 C492 U403 C491 C490 MOD2_BIAS TC75S51F R468 R451 C489 C488 SCHEMATIC DIAGRAM R469 R458 R473...
- Page 26 RDR2600 UHF LCD1 According to the keypad schematic diagram VOUT MIC2- MIC2 L-SHIFT MENU BACK R-SHIFT MIC2+ 100P 220P 220P MIC+ MIC- LAMP KEY-3V3 LCD_DB7 LCD_DB6 LCD_A0 LCD_RES LCD_CS1 CON-20P BLM18AG601S FMMT717 10U/10V 330R 330R 330R 330R 330R 330R 100R...
- Page 27 PC BOARD RDR2600 UHF CW410-C6000-UHF-V3.0 2.2NH 104P...
- Page 28 PC BOARD RDR2600 UHF CW410-C6000-UHF-V3.0 333P KDS114E 223P CON-20P-FPC NC NC...
- Page 31 RDR2600 UHF PC BOARD...
- Page 32 RDR2600 UHF PC BOARD...
- Page 35 RDR2600 UHF PC BOARD...
- Page 36 RDR2600 UHF PC BOARD...
- Page 37 RDR2600 UHF PC BOARD...
-
Page 38: Pc Board
RDR2600 UHF PC BOARD... -
Page 39: Ptt Board
RDR2600 UHF PTT BOARD... - Page 40 RDR2600 UHF PTT BOARD...
Need help?
Do you have a question about the RDR2600 and is the answer not in the manual?
Questions and answers