Table of Contents
Advertisement
Quick Links
Advertisement
Table of Contents

Summary of Contents for Arexx CLASSICAL PIANO CP-01
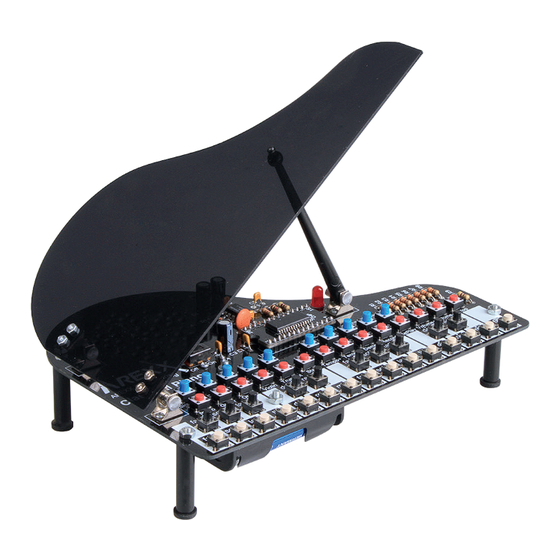
- Page 1 CP-01 MANUAL CLASSICAL PIANO www.arexx.com V20179...
-
Page 2: Product Information
19 Tempo differences Record and play function Power supply 4.5 Volt (3 pcs AA batteries) © CLASSICAL PIANO is a trademark of AREXX, The Netherlands en DAGU, China. © AREXX en DAGU are registered trademarks © All rights reserved. Reprinting any of this instruction manual without our permission is prohibited. -
Page 3: Table Of Contents
Contents Product information Partlist Necessary tools 3.1 Soldering techniques Electronic part assembly 4.1 Soldering of the parts Final assembly Function test Description of the keyboard functions What is a synthesizer Circuit diagram When you open the plastic bags of the parts the return right will be disposed Read before you start assembly the complete instruction manual Be careful with tools and always keep it away from little children! Keep this product out of reach of children and do not build this kit when children are in... -
Page 4: Partlist
O Piano arm 1 pc. O Feet 4 pcs. each O Piano cover 1 pc. O PCB 1 pc. Tube Feet Sound chip O AREXX IC 1 pc. O Condensator O Battery holder 6 pcs. LM386 1 pc. O Speaker 1 pc. -
Page 5: Necessary Tools
CAUTION • Read this manual carefully in advance to fully understand how to assemble this product. • Children below 14 may only assemble this product with the help of adults. • Be careful with the tools. Especially be careful with sharp tools such as nippers or cutter knife to prevent any injuries or accidents. -
Page 6: Electronic Part Assembly
4. Electronic assembly • Please study the soldering instructions on the previous page first • Check all invidual components with the help of the parts checklist. • Start soldering the resistors and capacitors (passive components) and solder the diode, transistors and IC‘s (active components) after that. •... -
Page 7: Final Assembly
Push switch Push switch Push switch Push switch Notice Black 10 Pcs. White 15 Pcs. Red 14 Pcs. Blue 10 Pcs. Polarity & No polarity No polarity No polarity No polarity Marking marking □ □ 3th row □ 4th row □... - Page 8 5.2. Solder the speaker wire in red spot as 5.3. Assemble the tree hinges halves to the shown in the drawing below PCB top ** Notice new + and - Position!! Vinyl cable Metal hinge assembly. Please notice the direction of the hinges! TOP side Speaker M3×4 Roundhead screws...
- Page 9 5.5. Install the piano feet to the PCB 5.6. Installing the hinges to the piano cover. NOTICE the correct direction! Install 4 Pcs. Top side (side with the parts). M3 Nut Piano cover Metal hinges NOTICE the Feet tube correct direction! M3 long Roundhead screws M3×4 Roundhead screws...
-
Page 10: Function Test
6. FUNCTION TEST a. Insert the batteries into the battery holder. PLEASE NOTICE the correct polarity of the batteries! b. Lift the piano cover and place the piano arm NOTICE: you can stop all playing actions directly with the STOP button! c. -
Page 11: Description Of The Keyboard Functions
7. Description of keyboard functions The synthesizer in the Classical Piano has been preprogrammed. Press the instrument key once or repeat the key to change the available instrument styles. Pressing the key will activate the processor to load the synthesizer control parameters from the chips memory into the synthesizer processor. - Page 12 Demo Toggle between several preprogrammed melodies. Select a preprogrammed melody by pushing the key again. While playing a melody, you may alter the instrument by pressing the tone key and alter the tempo by pressing the tempo keys. Starting another melody will start the tune in a standard tempo.
-
Page 13: What Is A Synthesizer
8. What is a synthesizer The word “synthesize“ may be translated to “put things together”. Obviously a synthesizer provides a system to produce any kind of sound, e.g. the sound of a musical instrument or even the sound of a thunderstorm. A synthesizer transforms electrical energy into all kinds of tune signals. - Page 14 If a guitar player for instance strums one single chord, we will hear a “ploink“- sound, which will end abruptly as soon as he lays his finger on the chord. The sound wave starts suddenly with a “pl” in “ploink” (Attack), quickly de- creasing (Decay), followed by a constant phase (“oin”...
- Page 15 Mixer: Module, used for mixing several sound waves. Amplifier: Module, used for amplifying the weak synthesizer signals up to a loudspeaker level. Early synthesizer versions were volumineous boxes and cabinets, containing a great number of analog modules and a lot of connecting cabling. Modern integrated circuits and digital signal processing in software tools allowed mini- mizing size and cabling of the synthesizer equipment.
Need help?
Do you have a question about the CLASSICAL PIANO CP-01 and is the answer not in the manual?
Questions and answers