Advertisement
Table of Contents
gtw mach rear flip seat
WILL FIT YAMAHA DRIVE 2
installation instructions
mach 1 steel : 01-176, 01-177, 01-178
mach 2 aluminum : 01-179, 01-180, 01-181
included:
Main Brackets
1
Remove hardware from struts and take off
canopy. Retain hardware. You will need it
later.
2
Remove hardware from gutters. Retain
hardware from gutters. You will need it later.
Remove gutters by sliding them upward.
(2017-UP)
Bagwell Brackets
HARDWARE
Pack 1
6 - 10x25mm hex bolt
12 - 10mm flat washer
6 - 10mm lock nut
2 - 8mm lock nut
2 - 10x90mm hex bolt
4 - 10mm flat washer
2 - 10mm lock nut
2 - 6x35mm hex bolts
2- 6mm flat washers
2 - 6mm fender washers
2 - 6mm lock nuts
Pack 2
6 - 10x70mm hex bolt
2 - 10mm countersunk #3 bolts
14 - 10mm flat washers
6 - 10mm lock nuts
2 - rubber spacers
2 - 10mm acorn nuts
Pack 3
4 - 6x25mm hex bolt
4 - 6mm lock washers
4 - 6mm flat washers
Pack 4
2 - 10x45mm hex bolt
4 - 10mm flat washers
2 - 10mm lock nuts
Pack 5
8 - 8x35mm countersunk bolts
Advertisement
Table of Contents

Summary of Contents for GTW MACH 01-176
- Page 1 8 - 8x35mm countersunk bolts WILL FIT YAMAHA DRIVE 2 (2017-UP) installation instructions mach 1 steel : 01-176, 01-177, 01-178 mach 2 aluminum : 01-179, 01-180, 01-181 included: Bagwell Brackets Main Brackets Remove hardware from struts and take off canopy.
- Page 2 Remove rear strut from both sides. Retain all hardware. You will need it later. Remove seat back. Retain hardware. You will need it later. Remove basket and retain hardware A) Attach new main brackets with strut mounts pointing to the outside of cart. Use retained hardware from previous step.
-
Page 3: Driver Side
Attach front bracket brace to brackets using hardware from pack 1. Attach seat back to brackets using hardware retained from step 4. DRIVER SIDE Place bagwell bracket in bagwell as shown. Install 6x35mm bolts from pack 1 in outer holes and hand tighten. Measuring 3.5” from the inside edge of the bagwell nearest to the bumper mark drill location using predrilled hole of bracket as guide. - Page 4 Attach bagwell bracket using hardware from pack 1. Attach seat frame to bagwell brackets using hardware from pack 2. Attach seat back support and armrests to seat frame using hardware from pack 2. Be sure to use rubber spacers from hardware pack 2 between seat back support and armrest as shown.
- Page 5 Attach armrests to rear portion of seat frame using hardware from pack 2. (A) Attach footrest bagwell bracket using remaining hardware from pack 1. (B) Attach footrest brackets to footrest and armrest using remaining hardware from pack 2. Attach seat back brackets to seat back using hardware from pack 3 and tighten.
-
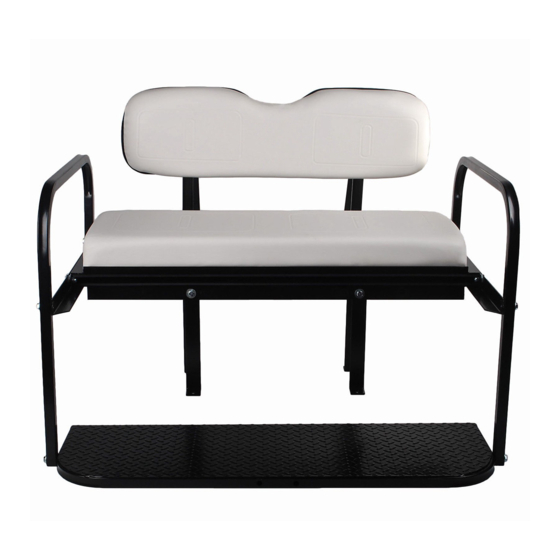
Page 6: Installation Complete
Attach seat bottom and strap to seat frame using hardware from pack 5. Insert gutters and attach canopy using hardware from step 1. INSTALLATION COMPLETE...
Need help?
Do you have a question about the 01-176 and is the answer not in the manual?
Questions and answers