Table of Contents
Advertisement
Advertisement
Table of Contents

Summary of Contents for SleepOne Bilevel ST
- Page 1 SleepOneBilevel ST User Manual 04.07.2012 Rev.02...
-
Page 2: Table Of Contents
IMPORTANT SAFEGUARDS ..................3 GENERAL INFORMATION ..................4 PARTS AND ACCESSORIES ..................5 SYSTEM CONTENT....................5 ACCESSORIES ......................5 ASSEMBLY OF SLEEPONE DEVICE ................ 6 INSTRUCTION FOR USE ..................7 MAINTENANCE AND CLEANING ................12 POSSIBLE PROBLEMS ................... 13 SPECIFICATION ...................... 15... -
Page 3: Symbol Definitions
SleepOne should be used only with masks recommended by Kare Medical. SleepOne is not a life support device and may stop operating with certain device faults or with a power failure. To avoid electric shock, alwaysunplug power cord from outlet power source when performing... -
Page 4: General Information
Allow the device to completely dry before use. CAUTION–Do not places the SleepOne device where it can be fallen downthe floor or where the power cord may create a trip hazard. -
Page 5: Parts And Accessories
• Dehydration. SleepOne Bilevel Devices SleepOne Bilevel device was initially used mainly by patients for the treatment of sleep apnea at home. Obstructive sleep apneaoccurs when the upper airway becomes narrow as the muscles relax naturally during sleep. This reduces oxygen in the blood and causes arousal from sleep. -
Page 6: Assembly Of Sleepone Device
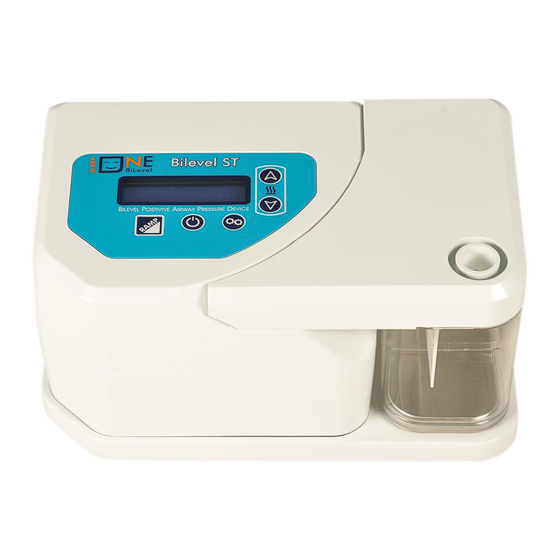
LCD Display ASSEMBLY OF SLEEPONE DEVICE 1. Place the SleepOne on a stable surface. Ensure that the air inlet in the back of the device is not blocked by anything. NOTE– Never place the SleepOne device on a soft surface. -
Page 7: Instruction For Use
INSTRUCTION FOR USE To begin operation, verify that your SleepOne is connected to a ‘power source. When plugged in, the LCD display should appear as noted. Put on your CPAP mask and press the ON/OFF button on the keypad to turn on airflow or put on your CPAP mask and take a few breaths to turn on airflow automatically. - Page 8 This is a pressure setting which controls the pressure during exhale. This setting can not be adjusted by EPAP patient. Only clinicians are authorized to adjust this cmH2O level. This is a pressure setting which controls the pressure during inhale. This setting can not be adjusted by IPAP patient.
- Page 9 The standard tubing length is 1.8 meters however customer can adjust tubing length of 3.0 meters. If menu Tubing Length is unlocked, press Settings button to activate it. Use the 1.8 m Up and Down button to adjust the settings. Selectable delay time setting.
- Page 10 Locks are setted by clinicians before patients start therapy. If the menu is unlocked , patient can edit some settings according to their comfort. Menu Display Adjusting Display Bilevel ST P: 3.0 cmH2O H:OFF EX - > S bpm: 12 P:5.0...
- Page 11 I:E Ratio 1:1.5 Ins Time 1.5s (1:1.0) Bilevel ST and T Modes Backup Rate Tubing Length Tubing Length 1.8 m 1.8 m Delay Time Delay Time 0 minutes 0 minutes Delay Pressure Delay Pressure 3.0 cmH2O 3.0 cmH2O...
-
Page 12: Maintenance And Cleaning
Set Pressure Set Pressure 3.0 cmH2O 3.0 cmH2O PATIENT MESSAGES While Ramp Mode is active, this message is Delay Running display every 5 minutes to let you know how 5 Minutes Left much time is left in the delay. This message appears whenever a high airflow condition occurs. -
Page 13: Possible Problems
Device Case Cleaning 1. Unplug the SleepOne from the power source. Use a clean dry cloth and mild detergents for cleaning the unit. 2. Allow the device to dry completely before plugging it into a power source. Filter Cleaning Air-Inlet Filter (Standard) 1. - Page 14 4. Locate the device away from the heat source be too warm. temperature is too so the air being drawn into the device is at high. room temperature. 4. The SleepOne is If the problem persists contact your provider located near a heat company.
-
Page 15: Specification
source. Nasal, sinus or ear You may have a Do not continue to use and contact your doctor. pain, possibly with reaction to air flow runny nose. pressure. SPECIFICATIONS Size..................... 18.1 x 15.5 x 11.7 cm Weight......................... 1.25kg Electrical Requirements................100-230 V AC Maximum Power Consumption................50W...
Need help?
Do you have a question about the Bilevel ST and is the answer not in the manual?
Questions and answers