
Related Manuals for Krone KW 5.50 / 4 x 7 T

Summary of Contents for Krone KW 5.50 / 4 x 7 T
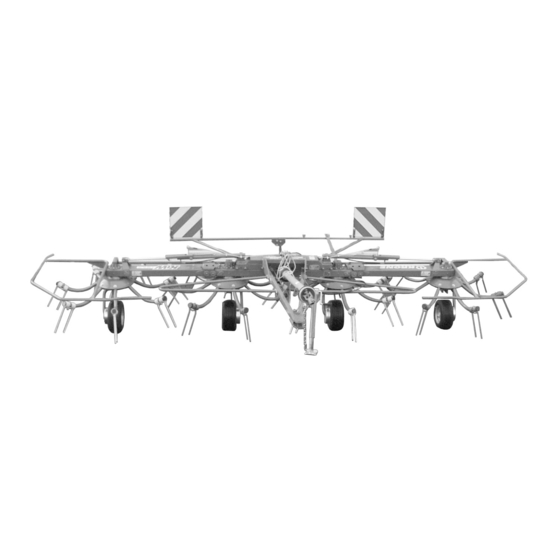
- Page 1 Operating instructions No. 770-0 USA Rotary tedder KW 5.50 / 4 x 7 T (from machine no. 523 800)
- Page 3 We hope that you will be satisfied with your KRONE machine. Machine factory Bernard Krone GmbH Spelle...
- Page 4 Foreword...
-
Page 5: Table Of Contents
Contents General ....................I -1 Intended Use ......................I -1 Technical Data ......................I -1 1.2.1 Manufacturer's Address ..................... I -1 1.2.2 Certification ......................I -1 1.2.3 Identification ......................I -1 1.2.4 Data Required for Questions and Orders ..............I -1 1.2.5 Operation in Accordance with Specifications ............. - Page 6 Settings .................... IV -1 Special safety instructions ..................IV -1 Spreading angle setting..................IV -1 Setting the working depth ..................IV -2 Drive rpms ......................IV -2 Angling device for clearing field boundaries ............IV -3 Tine adjustment ...................... IV -3 Care and maintenance ..............
-
Page 7: General
1.1 Intended Use The rotary tedder is used to tedding and swath cut hay. 1.2 Technical Data Maschinenfabrik Bernard Krone GmbH Heinrich-Krone-Straße 10, D 48480 Spelle 1.2.1 Manufacturer's Address Jahr Masch. Nr Année No. de série... -
Page 8: Operation In Accordance With Specifications
General 1.2.5 Operation in Accordance with Specifications The rotary tedder is designed solely for normal agricultural use (operation in accordance with specifications). Any use of the machine for other purposes is deemed to be not in accordance with specifications. The manufacturer bears no responsibility for any resulting damage;... -
Page 9: Safety
Safety Safety 2.2 Safety Instructions and Accident Prevent Regulations 2.1 Identifying Safety Instructions 2.2.1 Personnel Qualification and Trai- in the Operating Manual ning Persons who use, service or repair the rotary tedder The safety instructions contained in this manual which must be trained in its use and instructed as to the risks could result in personal injury if not followed are connected with its operation. -
Page 10: Safety Instructions And Accident Prevention Regulations
Safety Observe the applicable traffic laws when using public 15. Actuating mechanisms (cables, chains, linkages roads (for example, in Germany, the Road Traffic Type etc.) for remote controlled devices must be Approval Law and Road Traffic Law). positioned in such a way that no movements are unintentionally triggered at any transport or working positions. -
Page 11: Attached Equipment
Safety 2.2.5 Attached Equipment until the machine has come to a complete stand- still and the flywheel has been secured using the 1. Take steps to prevent implements from rolling! hand brake. 2. Take care not to exceed the maximum permitted 14. -
Page 12: Tyres
2.2.8 Tyres technical requirements set by the manufacturer of the implements! 1. When working on the tyres, make sure that the This is ensured by using genuine KRONE implement has safely lowered and secured against replacement parts! rolling (wheel chocks). -
Page 13: Introduction
Safety 2.3 Introduction The KRONE rotary tedder is equipped with all required safety devices (protective equipment). However, it is not possible to eliminate all potential hazards on this machine as this would impair its full functional capability. Corresponding danger notices attached to the machine warn against any dangers. - Page 14 Safety II - 6...
- Page 15 Safety No personnel allowed inside swivel space of Danger from self-turning swather disk arms. the operating equipment while the Maintain safe distance! deployment arms are being folded down. Order No. 939 472-2 (4x) Order No. 939 469-1 (2x) Order No. 942 050-0 (1x) Order no.
-
Page 16: Position Of The General Information Labels On The Machine
Safety 2.3.2 Position of the general information labels on the machine II - 8... - Page 17 Safety 942 320-0 600 lang 942 363-1 (1x) 942 085-0 (1x) 72 Nm 85 Nm 1,5 bar 1,5 bar 1,5 bar 1,5 bar 1,5 bar 42 Nm 942 107-1 1,5 bar (2x) 939 170-1 2,0 bar (2x) 942 067-1 939 138-2 (2x) 939 139-1 (2x) 942 067-1 (1x) 924 569-0 (4x)
- Page 18 Safety II - 10...
-
Page 19: Preparations For Use
3. Preparations for use 3.1 Special safety instructions • In all care, maintenance, repair and assembly work on the rotary tedder the PTO shaft must always be switched off. Switch off the engine and remove the ignition key. Take measures to prevent the tractor and rotary tedder from rolling! •... -
Page 20: Pto Shaft
3.3 PTO shaft The rotary tedder is driven at a maximum pto speed of 540 rpm. Only fit or remove the PTO shaft if the engine has been switched off and the ignition key has been removed. Secure the tractor against rolling away. Make sure that the PTO shaft seal snaps into place. -
Page 21: Hydraulic
After the rotary tedder has been coupled to the swinging drawbar, turn off the engine. Remove the ignition key. Protect the tractor from rolling! • Push the PTO shaft onto the PTO shaft end of the tractor. Make sure that the locking device clicks into place. -
Page 22: Jack Stand
3.4.2 Jack Stand Front jack stand The rotary tedder is fitted with a jack stand (1) which can be swung clear to the rear. Prior to operation the jack stand must be swung to the rear as follows: • Pull pin (2) out of position I. •... -
Page 23: Converting From Transport To Working Position
3.6 Converting from transport to working position When the outer swather discs are being lowered, no persons may be allowed to enter the swivel area of the outer swather discs. • Activate the single action control valve on the tractor and pressurize the hydraulic cylinder. -
Page 24: Removing From The Tractor
3.8 Removing from the tractor • When removing the rotary tedder, make sure that the ground is level and firm. • When the rotary tedder is being raised and lowered, make sure that no persons enter the space between the tractor and the attachment. •... - Page 25 Switch off the engine and remove the ignition key. Protect the tractor from rolling. Only then pull off the PTO shaft. • Loosen the holding chain, pull off the PTO shaft and lay it on the PTO shaft support bracket (1). The holding chains of the protective tubes are not designed or suitable for holding up the PTO shaft.
- Page 26 III - 8...
-
Page 27: Settings
Settings Settings 4.1 Special safety instructions • The adjustments described here must only be carried out when the machine is at a complete standstill. Switch off the engine and remove the ignition key. • Secure the rotary tedder and tractor from rolling. •... -
Page 28: Setting The Working Depth
Settings 4.3 Setting the working depth • Move the rotary tedder to working position on a level surface. • Setting the working depth of the tines is by rotating crank (1). • The distance "a" between the front tines (2) and the ground is approx. -
Page 29: Angling Device For Clearing Field Boundaries
Settings 4.5 Angling device for clearing field boundaries The angling device can be set to three positions. For this proceed as follows: • Remove R-clip (2), move setting lever (1) to the desired position and secure using R-clip (2). Basic adjustment (central position): position II KW000015 4.6 Tine adjustment The tines (3) must be aligned vertically to the ground. - Page 30 Settings IV - 4...
-
Page 31: Care And Maintenance
Care and maintenance Care and maintenance 5.1 Special safety instructions • Repair, service, maintenance and cleaning work must only be carried out when the machine is at a standstill. Switch off the engine and remove the ignition key. • Protect the rotary tedder and tractor from rolling. •... -
Page 32: Gearbox
Care and maintenance 5.3 Gearbox The main gearbox of the rotary tedder is grease filled and needs no maintenance. Designation/Brand Quantity lit Flowing gearbox grease GFO 35 0,5 l 5.4 Tyres • Repair work on the tyres must only be carried out by qualified personnel and with suitable equipment. - Page 33 Care and maintenance Lubrication points V - 3...
- Page 34 Care and maintenance V - 4...
-
Page 35: Winter Storage
Make a list of all replacement parts needed, and order • Clean the machine thoroughly. Dirt attracts moisture them in good time. It is easier for your KRONE dealer and causes corrosion. If you clean the machine with to obtain and fit the necessary parts out of the high pressure water jet sprayers, do not direct the season. - Page 36 Winter storage VI - 2...
-
Page 37: Start-Up After Winter Storage
Start-up after winter storage 7. Start-up after winter storage 7.1 Special safety notes • Repair, servicing, maintenance, cleaning work may only be carried out when the machine is at a standstill. Switch off the machine. Remove the ignition key. Secure the tractor from rolling away. - Page 38 Start-up after winter storage VII - 2...
-
Page 39: Special Accessories
Special accessories Special accessories 8.1 Additional tine loss safety mechanism • For all care, maintenance, repair and assembly work on the rotary tedder, always switch off the PTO shaft. • Switch off the engine and remove the ignition key. • Protect the tractor and rotary tedder from rolling! Apart from the standard tine loss safety mechanism(5), it is possible to fit an additional tine securing mechanism. - Page 40 Special accessories VIII -2...
- Page 41 Special accessories VIII - 3...
- Page 42 . . konsequent, kompetent Maschinenfabrik Bernard Krone GmbH Heinrich-Krone-Straße 10, D-48480 Spelle Postfach 11 63, D-48478 Spelle Phone +049 (0) 59 77/935-0 +049 (0) 59 77/935-339 Internet: http://www.krone.de eMail: info.ldm@krone.de...
Need help?
Do you have a question about the KW 5.50 / 4 x 7 T and is the answer not in the manual?
Questions and answers