
Summary of Contents for Mitchell Golf DigiFlex Frequency Meter 2.0
- Page 3 The clamps interchange in seconds with an Allen flange screw. The DigiFlex™ Frequency Meter 2.0 offers accuracy, consistent clamping, and versatility that makes it the best in the industry. All products manufactured by Mitchell Golf come with a one year warranty, and are guaranteed against defects and workmanship.
- Page 5 Introduction ..........................1-2 Table of Contents ........................4 Package Contents ........................5 Maintenance & Assistance ....................... 6 Frequency Facts ......................... 7 Getting Started ..........................Installation ..........................8 Primary Button Functions ....................9 Secondary Button Functions .................... 10 Charging ........................11-12 Operating Instructions .........................
- Page 6 This package includes the following contents:...
- Page 7 Do not attempt to replace the DigiFlex™ Frequency Meter 2.0 battery yourself—you may damage the battery, which could cause overheating, fire, and injury. The lithium- ion battery in your DigiFlex™ Frequency Meter 2.0 should be serviced by Mitchell Golf LLC, and must be recycled or disposed of separately from household waste. Dispose of batteries according to your local environmental laws and guidelines.
- Page 8 •Frequency is the best measure of flex. •Deflection method is a measure of a shaft’s beam strength. •Rigid objects have a natural frequency. •Rate of frequency is not dependent on the amount of force required to create oscillation. •Frequency is the number of times a shaft oscillates in a unit of time. •CPM (cycles per minute) is the measurement of the number of times a shaft oscillates in one minute.
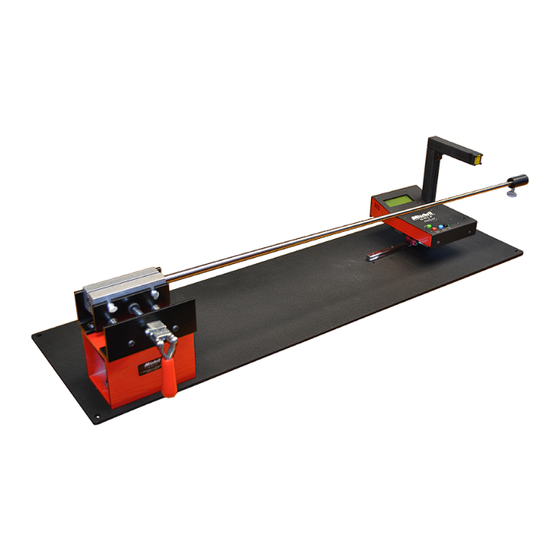
- Page 9 Bolt the Vise Assembly to your Portable Base Plate with the two Mounting Bolts provided, making sure the clamp lever is facing forward. See image 1. When bolted to your workbench, allow enough work area to the right for up to a 48” driver. Slide the DigiFlex™...
- Page 10 The RST (Reset) button clears the last results and sets the DigiFlex in ready state (DigiFlex display will show “Ready”). The DigiFlex will not respond to any other button presses until it is in ready state. After every measurement, steady the club shaft so there is no movement.
- Page 11 Each of the lower row buttons are also used to access the menu functions. The menu functions are used to adjust the display settings and enable/disable Bluetooth (if equipped). Any settings configured will be stored in memory and applied whenever powered on. To access the menu, press and hold the RST/Menu image 4-1 button for 2+ seconds.
- Page 12 The DigiFlex™ Frequency Meter 2.0 incorporates lithium-ion battery management system that continuously monitors the charge rate and discharge level of the battery. The status of the battery and charging are displayed on the upper right side of the LCD display as shown. See image 5 image 5.
- Page 13 When charging, a up arrow appears next to the battery status indicator on the upper right side of the LCD display. See image 8-1. image 8-1 Charging should take less than four hours using the supplied AC adapter. Charging using third-party adapters or via USB should take less than four hours, but may take longer depending on the capability of the hardware.
- Page 14 Place the shaft in the clamp securely. Be sure the club has been clamped so the shaft grip end is flush with the clamp. If the club head is attached to the shaft, position the club head up and centered. See image 9-1. Press the “Power”...
- Page 15 Pull the club shaft end back approximately 1.5” (no more than two inches is necessary). See image 9-2. Upon release of the club shaft, the display will show status of measurement taking place. See image 10-1. image 10-1 Upon completion of measurement, the display will show the measured frequency.
- Page 16 Change the two Grip Clamps to the two Shaft Clamps. Follow the instructions for changing the clamps on page 17. Place the butt of raw shaft into the Shaft Clamps flush with the end of the clamp or adjust shaft position to other desired clamping lengths.
- Page 17 Turn on the DigiFlex™ Meter. With thumb and forefinger near the weight, pull the shaft HORIZONTALLY toward you approximately 3 inches. See image 11-3. Release the club so it oscillates HORIZONTALLY over the DigiFlex™ Meter. Press and release the Reset Button with the other hand. Do image 11-3 not oscillate the shaft vertically.
- Page 18 To change the Grip Clamps and Shaft Clamps, loosen the two thumb screws that hold each clamp piece to the Vise Assembly approximately 1/2 turn. See image 12-1. Lift each clamp up and replace with other clamps. image 12-1 Re-tighten the two thumb screws on each clamp. Be sure to align the Grip Clamps in the same direction, with large opening on the left side of the Vise Assembly, away from the meter.
Need help?
Do you have a question about the DigiFlex Frequency Meter 2.0 and is the answer not in the manual?
Questions and answers