Table of Contents
Advertisement
Available languages
Available languages
S
T
S
T
VARIATORE ELETTRONICO DI FREQUENZA (INVERTER)
VARIABLE FREQUENCY DRIVE (INVERTER)
M
A
N
U
M
A
N
U
O
P
E
R
A
T
O
P
E
R
A
T
Model
V in
M/M 8.5
1 ~ 230V
M/M 11
1 ~ 230V
M/M 16
1 ~ 230V
M/T 7
1 ~ 230V
M/T 12
1 ~ 230V
T/T 6
3 ~ 400V
T/T 8
3 ~ 400V
E
A
D
Y
P
E
A
D
Y
P
A
L
E
D
I
U
A
L
E
D
I
U
O
R
'
S
A
N
D
O
R
'
S
A
N
D
V out
1 ~ 230V
1 ~ 230V
1 ~ 230V
3 ~ 230V
3 ~ 230V
3 ~ 400V
3 ~ 400V
DGFLOW srl
Tel. Via Emilia, 5 – 46030 Bigarello (Mantova) Italy
+39 0376 340922 – fax +39 0376 249525
info@dgflow.it
10205407A.05 - 1604
R
E
S
V
2
R
E
S
V
2
S
O
E
M
A
N
S
O
E
M
A
N
M
A
I
N
T
E
N
M
A
I
N
T
E
N
–
www.dgflow.it
1
.
0
IT
.
0
U
T
E
N
Z
I
O
U
T
E
N
Z
I
O
A
N
C
E
M
A
A
N
C
E
M
A
A
P (kW)
8,5
1,1
11
1,5
16
2,2
7
1,1
12
2,2
6
2,2
8
3,0
EN
N
E
N
E
N
U
A
L
N
U
A
L
P (HP)
1,5
2,0
3,0
1,5
3,0
3,0
4,0
Advertisement
Table of Contents

Subscribe to Our Youtube Channel
Related Manuals for DGFLOW STEADYPRES M/M 8.5

Summary of Contents for DGFLOW STEADYPRES M/M 8.5
- Page 1 T/T 6 3 ~ 400V 3 ~ 400V T/T 8 3 ~ 400V 3 ~ 400V DGFLOW srl Tel. Via Emilia, 5 – 46030 Bigarello (Mantova) Italy +39 0376 340922 – fax +39 0376 249525 info@dgflow.it – www.dgflow.it 10205407A.05 - 1604...
- Page 2 NORME DI SICUREZZA Istruzioni importanti per la sicurezza. Questo simbolo avverte che la mancata osservanza della prescrizione comporta un rischio di scosse elettriche. Questo simbolo avverte che la mancata osservanza della prescrizione comporta un rischio di danno a persone o cose. Prima di installare e utilizzare il prodotto: - leggere attentamente il presente manuale in tutte le sue parti - controllare che i dati di targa siano quelli desiderati ed adeguati all’impianto, ed...
-
Page 3: Table Of Contents
INDICE - Norme di sicurezza …………………………………………….…. PARTE 1 - ISTRUZIONI RAPIDE DI INSTALLAZIONE . o Controlli e indicazioni o Installazione e collegamenti idraulici o Collegamenti elettrici di potenza o Collegamento dei segnali o Accensione o Accesso ai menu principali o Accesso ai parametri o Struttura del MENU o Settaggio dei parametri di base - Settaggio rapido della pressione... -
Page 4: Parte 1 - Istruzioni Rapide Di Installazione
PARTE 1 - ISTRUZIONI RAPIDE DI INSTALLAZIONE CONTROLLI E INDICAZIONI In fase di prima installazione e di manutenzione, assicurarsi che NON CI SIA TENSIONE sulla rete elettrica In fase di prima installazione e di manutenzione, assicurarsi che l’impianto NON SIA IN PRESSIONE NON APRIRE I COPERCHI DELL’INVERTER, ad eccetto del coperchio connettori I modelli T/T (alimentazione trifase / uscita trifase) non hanno l’interruttore a bordo;... -
Page 5: Collegamenti Elettrici Di Potenza
COLLEGAMENTI ELETTRICI DI POTENZA Collegare i cavi come mostrato negli schemi sotto: A = cavo di alimentazione inserire il connettore e richiudere Aprire il coperchio laterale inverter il coperchio pressacavi. pressacavi (4 viti) B = cavo di uscita al motore ATTENZIONE: in presenza di cavi lunghi tra inverter e motore (es. -
Page 6: Collegamento Dei Segnali
COLLEGAMENTO DEI SEGNALI Scheda di espansione: è situata nella parte posteriore dell’inverter (v. fig. sotto Descrizione della funzione dei morsettI: 10: non collegato RS 485 + RS 485 - non collegato non collegato ingresso livello uscita segnale NC comune C uscita segnale NO JP3: comunicazione standard 2 / 4 cavi JP4: comunicazione standard 2 / 4 cavi... -
Page 7: Accensione
ACCENSIONE accendere premendo il l’interruttore tasto (non START STOP presente sui si mette mod. T/T) ed IN SERVIZIO attendere il FUORI SERVIZIO tempo di l’inverter. STARTING (ca. 10 sec). ACCESSO AI MENU PRINCIPALI Per scorrere i Per accedere ai menu principali MENU PRINCIPALI utilizzare i tasti premere il pulsante... -
Page 8: Struttura Del Menu
STRUTTURA DEL MENU BASIC PRESSIONE DI SET SECONDA PRESSIONE DI SET CORRENTE MOTORE SENSO DI ROTAZIONE DEL MOTORE (solo modelli con uscita trifase) PRESSIONE DIFFERENZIALE DI RIPARTENZA FREQUENZA NOMINALE DEL MOTORE FREQUENZA MINIMA DI FUNZIONAMENTO FREQUENZA MASSIMA DI FUNZIONAMENTO RITARDO ARRESTO PER MARCIA A SECCO FATTORE DI POTENZA MINIMO (solo modelli T/T) RITARDO ARRESTO PER FATTORE DI POTENZA (solo modelli T/T) INTERVALLO RIPERTENZE PER MARCIA A SECCO... -
Page 9: Settaggio Dei Parametri Di Base
SETTAGGIO DEI PARAMETRI DI BASE I PARAMETRI DI BASE per la configurazione dell’inverter devono obbligatoriamente essere settati in fase di installazione. Param. descrizione m.u. Default Min Max Step bar 3,5 1 10 0,1 Imposta il valore di PRESSIONE BASIC P 3.5 DI SET pressione costante in impianto. -
Page 10: Settaggio Dei Parametri Avanzati
SETTAGGIO DEI PARAMETRI AVANZATI Sono elencati i PARAMETRI AVANZATI per la configurazione dell’inverter. u.m. Default Min Max Step Param. descrizione 0,5 0,4 Imposta il differenziale fra la pressione PRESSIONE d 0.40 selezionata (PRESSIONE DI SET) e la DIFFERENZIALE pressione effettiva di ripartenza DI RIPARTENZA 6 ... - Page 11 u.m. Default Min Max Step Param. descrizione FREQUENZA DI Imposta la frequenza di commutazione del kHz 8 4 COMMUTAZION FS 10 modulo di potenza. In presenza di cavo di E DEL MODULO potenza lungo senza il filtro sinusoidale, tale frequenza deve essere ridotta al valore minimo.
-
Page 12: Visualizzazione Dei Parametri Di Funzionamento
VISUALIZZAZIONE DEI PARAMETRI DI FUNZIONAMENTO durante il per visualizzare i scorrere i funzionamento parametri sul display parametri con i tasti Premendo il tasto si ritorna alla pressione di impianto (solo per il MASTER) Display Descrizione u.m. PRESSIONE IMPIANTO P 3.2 Pressione misurata sull’... -
Page 13: Test
TEST entrare in Durante il test si possono Per avviare e procedere come modalità visualizzare tutti i parametri di mostrato sotto per regolare TEST funzionamento avviare e regolare la manualmente velocità della pompa VISUALIZZAZIONE DEI PARAMETRI ACCESSO la pompa DI FUNZIONAMENTO AI MENU PRINCIPALI ATTENZIONE: sull’inverter SLAVE il comando TEST non è... -
Page 14: Allarmi
ALLARMI allarme per sovracorrente oltre la tolleranza prevista. OVER l’inverter arresta la pompa; il ripristino è solo manuale. CURRENT % allarme per sovracorrente oltre la capacità del modulo CURRENT l’inverter arresta la pompa; il ripristino è solo manuale. LIMIT Si verifica se, in assenza di flusso, la pompa non riesce a raggiungere la pressione di i DRY SET ma raggiunge almeno una percentuale prefissata della pressione di SET, espressa dal parametro Pd;... -
Page 15: Parte 2 - Manuale Di Uso E Manutenzione
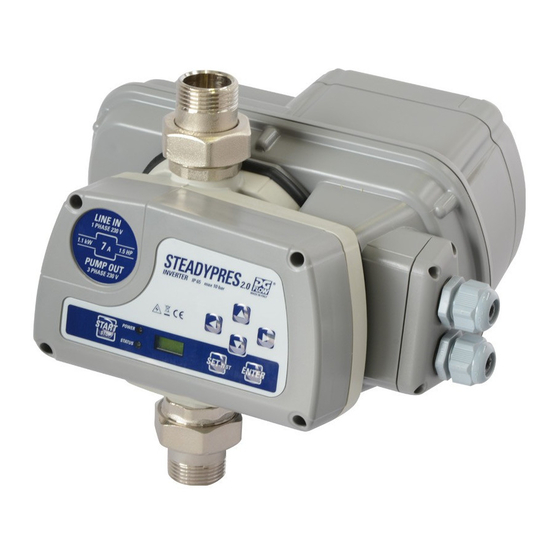
PARTE 2 – MANUALE DI USO E MANUTENZIONE GENERALITÀ STEADYPRES è un regolatore di velocità con le seguenti caratteristiche: alimentato in c.a. monofase oppure trifase uscita in c.a. monofase oppure trifase mantiene costante la pressione di impianto (CURVE A GIRI VARIABILI) controlla i parametri di funzionamento idraulici ed elettrici, e protegge l’elettropompa dalle anomalie può... -
Page 16: Limiti Di Utilizzo
LIMITI DI UTILIZZO pressione max di esercizio: 10 bar (140 p.s.i) fluidi ammessi: acqua pulita e liquidi chimicamente non aggressivi; se nel liquido sono presenti impurità, installare un filtro a monte. pericolo di incendio/esplosione: gli inverter STEADYPRES NON SONO ADATTI al pompaggio di liquidi infiammabili o ad operare in ambienti con pericolo di esplosione. -
Page 17: Dimensioni E Pesi
DIMENSIONI E PESI 1" Mod. M/M 8.5 M/M 11 M/T 7 M/T 12 1" 1"1/4 ÷ (1") Mod. M/M 16 T/T 6 T/T 8 1"1/4 ÷ (1") Modello Connessione peso Dimensioni dell’imballo idraulica (kg) (A x B x H - mm) M/M 8.5 - M/M 11 –... -
Page 18: Installazione
INSTALLAZIONE Prima di installare ed utilizzare STEADYPRES: leggere attentamente il presenta Manuale in tutte le sue parti e riferirsi alle Norme di sicurezza. Prima di effettuare i collegamenti assicurarsi che non vi sia tensione ai capi dei conduttori di linea. Assicurarsi inoltre che la rete di alimentazione elettrica sia dotata di protezioni ed in particolare di interruttore differenziale ad alta sensibilità... -
Page 19: Segnalazioni Luminose
FUORI SERVIZIO se al momento dell’ultimo spegnimento era FUORI SERVIZIO (OFF) In caso di caduta accidentale della tensione, se STEADYPRES era IN SERVIZIO (ON) al ripristino della rete torna automaticamente IN SERVIZIO (ON). Per mettere IN SERVIZIO / FUORI SERVIZIO STEADYPRES battere il tasto START/STOP. Nelle applicazioni con inverter in parallelo (MASTER / SLAVE) è... -
Page 20: Ricerca Guasti
RICERCA GUASTI: - Verificare che l’inverter sia stato correttamente collegato alla linea di alimentazione - Verificare che l’elettropompa sia stata correttamente collegata all’inverter - Verificare che tutti i cavi e le connessioni siano funzionanti. PROBLEMA La pompa non si accende Messaggio Causa intervento Nessuno Interruzione dell’alimentazione elettrica Ripristinare l’alimentazione elettrica Nessuno Fusibili bruciati Sostituire i fusibili Nessuno Intervento delle protezioni di linea Verificare la corretta taratura delle protezioni INPUT ERROR (solo modelli T/T) ‐ I collegamenti LINEA e Verificare i collegamenti LINEA e MOTORE e ricollegare MOTORE sono stati invertiti correttamente PROBLEMA Intervento dell’ interruttore differenziale a protezione della linea di alimentazione dell’inverter Messaggio Causa intervento Nessuno L’interruttore differenziale è inadeguato Sostituire l’interruttore differenziale con un modello all’alimentazione dell’inverter idoneo alle componenti pulsanti e in corrente continua (classe A) PROBLEMA La pompa non si avvia Messaggio ... -
Page 21: Manutenzione
PROBLEMA Pompa sempre in funzione, anche in assenza di richiesta Messaggio Causa intervento nessuno Perdite nell’impianto, superiori a 2 l/min Individuare le perdite e bloccarle nessuno Guasto o ostruzione al sensore di portata Ispezionare e pulire il sensore di portata PROBLEMA La pompa si arresta troppo presto, in presenza di richiesta Messaggio Causa intervento nessuno Guasto al sensore di flusso Verificare il funzionamento del sensore di flusso PROBLEMA Prestazioni della pompa inferiori a quelle di targa Messaggio Causa intervento nessuno Presenza di aria nel collettore di Spurgare l’aspirazione aspirazione nessuno Pompa ostruita o danneggiata Ispezionare la pompa ed eliminare il problema MANUTENZIONE SOSTITUZIONE DEL SENSORE DI PRESSIONE / SCHEDA INTERFACCIA Togliere tensione all’inverter ed attendere 2 minuti per la scarica dei condensatori Aprire il coperchio anteriore e procedere allo smontaggio del sensore di pressione e della scheda interfaccia come mostrato sotto... -
Page 22: Calibrazione Del Sensore Di Pressione
1. PRIMA DI AVVIARE L’INVERTER è NECESSARIO EFFETTUARE IL RESET DEI PARAMETRI DI FABBRICA (parametro SET.F a pag. 11 del Manuale) 2. RIPRISTINARE MANUALMENTE I PARAMETRI SPECIFICI DELL’IMPIANTO 3. NON EFFETTUARE LA RI-CALIBRAZIONE DEL SENSORE; IL SENSORE DI PRESSIONE E’ CALIBRATO IN FABBRICA ... -
Page 23: Esploso Ricambi
Inserire il cavo piatto della scheda di espansione (indicato in fig. a pagina seguente) sul connettore corrispondente montato sulla scheda di potenza dell’inverter ATTENZIONE : FARE CORRISPONDERE CORRETTAMENTE IL CONNETTORE DEL CAVO CON I PIN MONTATI SULLA SCHEDA DI POTENZA bloccare la scheda di espansione con 4 viti collegare i segnali (v. -
Page 24: Garanzia
EN 55014-2 (immunità) EN 61000-4 (immunità) Modelli con alimentazione trifase (T/T 6, T/T 8): EN 61800-3 EN 55011 (emissioni) EN 61000-3-2 (emissioni) EN 61000-3-3 (emissioni) EN 55014-2 (immunità) EN 61000-4 (immunità) Bigarello, 20/02/2015 DGFLOW S.r.l. Amministratore Unico Stefano Concini 24 ... - Page 25 SAFETY STANDARDS Safety important instructions. This symbol warns that failure to comply with the prescription leads to a risk of electric shocks. This symbol warns that failure to comply with the prescription leads to a risk of injury/damage to persons/objects. Before installation and use of the product: - read this manual completely and thoroughly Check that the nameplate data are those desired and appropriate to the system,...
- Page 26 INDEX - Safety standards …………………………………………………………. PART 1 – QUICK INSTALLATION GUIDE o Preliminary checks o Installation and hydraulic connections o Power connections o Signal connections o Starting-up o Access to main menu o Access to parameters o MENU structure o BASIC parameters ...
- Page 27 PART 1 - QUICK INSTALLATION GUIDE PRELIMINARY CHECKS During the initial installation and maintenance, make sure that ends of the line wires are not live. During the initial installation and maintenance, make sure that the system is not under pressure to ACCESS THE DRIVE WIRING, open the front cover as shown on p.
- Page 28 POWER CONNECTIONS Wire the cables as indicated in the diagrams below: Insert the connector and close A = inverter supply cable the side cover. Open the side cover B = output motor cable (4 screws) CAUTION : to overcome problems associated with long cables (between Inverter and pump motor) , evaluate the application of inverter output sinusoidal filter.
- Page 29 SIGNAL CONNECTIONS Expansion board: is located in the back of the inverter (see fig. below) Terminal clamp operation description: 10: not connected RS 485 + RS 485 - not connected not connected level input NC output signal comune C NO output signal JP3: bridged, no function JP4: bridged, no function JP5: no function...
- Page 30 STARTING UP Switch on By pressing (the switch is the button not present START in models STOP T/T) you put and wait the N SERVCE STARTING OUT OF SERVICE time (ab. 10 sec.) the inverter. ACCESS TO MAIN MENU To SCROLL the 4 MAIN MENU To ACCESS the use the buttons...
- Page 31 MENU STRUCTURE BASIC SET PRESSURE SECOND SET PRESSURE MOTOR CURRENT MOTOR DIRECTION OF ROTATION (models with three-phase output) DIFFERENTIAL PRESSURE FOR RESTART NOMINAL MOTOR FREQUENCY MINIMUM OPERATION FREQUENCY MAXIMUM OPERATION FREQUENCY STOP DELAY FOR DRY RUNNING MINIMUM POWER FACTOR (only T/T models) STOP DELAY FOR POWER FACTOR (only T/T models) RESTART INTERVAL FOR DRY RUNNING STOP DELAY FOR NO FLOW...
- Page 32 BASIC PARAMETERS The basic parameters for the configuration of the inverter must necessarily be set during installation Param. description m.u. Default Min Max Step Sets the constant bar 3,5 1 10 0,1 BASIC P 3.5 working pressure in the PRESSURE system.
- Page 33 ADVANCED PARAMETERS Listed below the ADVANCED PARAMETERS for the configuration of the inverter Param. description u.m. Default Min Max Step 0,5 0,4 1,0 Sets the difference between the DIFFERENTIAL d 0.40 selected pressure (SETPOINT) PRESSURE and the effective restart pressure FOR RESTART 6 ...
- Page 34 Param. description u.m. Default Min Max Step 8 4 kHz Sets the switchover frequency for the MODULE FS 10 power module. SWITCHING In case of long power cable, without a FREQ sinusoidal filter, set this value at the minimum 0 0 ...
- Page 35 DISPLAY THE OPERATING PARAMETERS During To display the parameters on the Scroll the operation display parameters through the keys Pressing the key You go back to the system pressure (only for MASTER inverter) Display Description m.u.. SYSTEM PRESSURE P 3.2 Displays the system pressure (only for MASTER inverter) OPERATING FREQUENCY F 45...
- Page 36 TEST Enter the During the test, you can view all Proceed as to start and TEST mode the operating parameters (see shown below to adjust the DISPLAY OF OPERATING ACCESS start and adjust pump TO MAIN PARAMETERS) the pump speed manually MENU CAUTION: TEST mode is not active on the SLAVE unit;...
- Page 37 ALARMS OVER The current exceeded the allowable tolerance on the current set. CURRENT % The inverter stops the pump, the rearm is only manual. The current exceeded the module current capacity. CURRENT LIMIT The inverter stops the pump, the rearm is only manual. i DRY Occurs if, in the absence of flow, the pump cannot reach the SET pressure, but can reach at least a pre-determined percentage of the SET pressure, defined through...
- Page 38 PART 2 ’ ’ GENERAL REMARKS STEADYPRES is a speed controller with the following features: - Powered by AC single-phase or three-phase - Output AC single-phase or three-phase - It maintains the system at constant pressure (VARIABLE SPEED CURVES) - It carries out continuous controls on electric and functioning parameters, saving the pumping unit from all common failures (over-currents, dry running, etc) - It works in stand-alone configuration or in parallel with other units, through serial connection.
- Page 39 WORKING LIMITS maximum working pressure: 10 bar (140 p.s.i) fluids accepted: clean water and liquids that are chemically non-aggressive. If there are impurities in the liquid, install a strainer upstream fire / explosion: inverters STEADYPRES ARE NOT SUITABLE for operation in environments with risk of explosion.
- Page 40 DIMENSIONS AND WEIGHTS 1" Mod. M/M 8.5 M/M 11 M/T 7 M/T 12 1" 1"1/4 ÷ (1") Mod. M/M 16 T/T 6 T/T 8 1"1/4 ÷ (1") Model connection weight Packaging dimensions (kg) (A x B x H - mm) M/M 8.5 - M/M 11 –...
- Page 41 INSTALLATION Before installing and using STEADYPRES: - read this manual thoroughly and carefully and refer to the Safety Standards. - Before making the connections, make sure that the ends of the line wires are not live. - Make sure also that the electric power supply network is protected by thermal magnet and differential protections according to the applicable Standard in force.
- Page 42 o in OUT OF SERVICE mode if at the time of the last shutdown was OUT OF SERVICE (OFF) In case of accidental fall of the power line, if it STEADYPRES was in serivce, when the power returns, it automatically returns in service - To put STEADYPRES IN SERVICE / OUT OF SERVICE, beat the START / STOP button.
- Page 43 TROUBLESHOOTING - Check that the inverter has been correctly connected to the power line (which is on) - Check that the motor pumps have been correctly connected to the inverter - Check that all the cables and connections are operative. PROBLEM The pump is not feeded Messaggio Causa intervento none Interruption of power supply Replace the power supply none Burned fuses Substitute the fuses none Intervention of the line protections Check the correct protecttions setting INPUT ERROR (only mod. T/T) ‐ connections LINE and Check the connections LINE and MOTOR and connect MOTOR were reversed correctly PROBLEM The current circuit breaker has tripped to protect the DGBOX power line Messaggio Causa intervento none The residual current circuit breaker is Replace the residual current circuit breaker with a model inadequate for inverter supply suitable for the pulsating components and in direct current (class A) PROBLEM The pump fails to start Messaggio ...
- Page 44 PROBLEM Pump always running even when not required Messaggio Causa intervento None System leaks greater then 2 l/min Identify the leaks and repair None Flow sensor fault or locked open Inspect and check the flow sensor PROBLEM The pump stops too soon when requested Messaggio Causa intervento none Flow rate sensor fault Check the flow rate sensor PROBLEM Low pump performances Messaggio Causa intervento none Air inside suction manifold Bleed the suction system none Pump blocked or damaged Inspect the pump and eliminate the problem MAINTENANCE Replacement of the CONTROL BOARD + PRESSURE SENSOR - Disconnect the inverter main power supply and wait 2 minutes (capacitors discharge) - Open the front cover and disassembly the pressure sensor and the control board as shown below - Install the new control board with pressure sensor in reverse order of removal.
- Page 45 2. RESTORE MANUALLY THE SPECIFIC PARAMETERS OF THE SYSTEM 3. DO NOT RE-CALIBRATE THE PRESSURE SENSOR, IT IS FACTORY-CALIBRATED CALIBRATION OF THE PRESSURE SENSOR You need an auxiliary gauge near STEADYPRES bring the system (and STEADYPRES) pressure to zero (0 bar) Start the calibration of the pressure sensor according to the diagram below.
- Page 46 the power board of the inverter - WARNING: PAY ATTENTION TO PROPERLY FIT THE CONNECTOR - Block the expansion board with 4 screws - Connect signals (see SIGNALS CONNECTION.) - Close the back cover SPARE PARTS DIAGRAM N° Description Quantità KIT 1 Cover Kit with keyboard KIT 2...
- Page 47 EN 61000-3-3 (emission) EN 55014-2 (immunity) EN 61000-4 (immunity) Models with three-phase power (T/T 6, T/T 8): EN 61800-3 EN 55011 (emission) EN 61000-3-2 (emission) EN 61000-3-3 (emission) EN 55014-2 (immunity) EN 61000-4 (immunity) Bigarello, 20/02/2015 DGFLOW S.r.l. President Stefano Concini...
Need help?
Do you have a question about the STEADYPRES M/M 8.5 and is the answer not in the manual?
Questions and answers