Table of Contents
Advertisement
Advertisement
Table of Contents
Troubleshooting

Related Manuals for Digital Knight DK20SP


Summary of Contents for Digital Knight DK20SP
- Page 1 Digital Knight 16x20 Digital AUTOMATIC Swinger Version 2-12...
-
Page 2: Table Of Contents
Contents Introduction......................3 Setup.&.Suggestions....................4 Normal.Operation....................5 Normal.Operating.Mode..................5 Setting.Temperature....................5 Setting.Time......................6 Pre-Press.Timer....................... 6 Setting.Platen.Height....................7 Activating.the.Press....................7 Guidelines.&.Standard.Settings................8 ERR.Mode......................9 Over-Temp.Alarm....................9 Programmable.Presets.................... 10 How.Presets.Work....................10 Loading.a.Preset. -
Page 3: Introduction
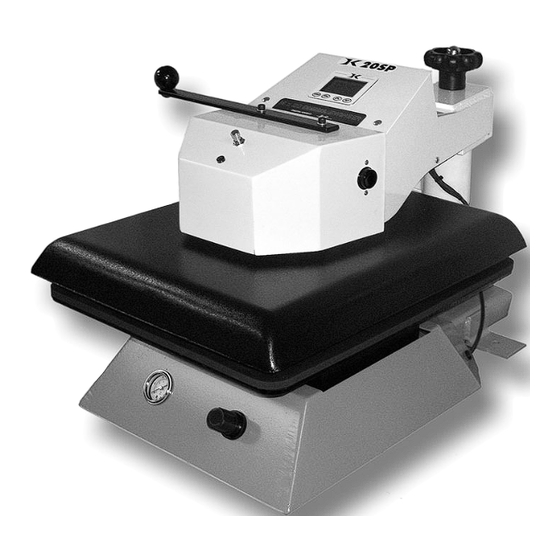
Introduction Congratulations on your purchase of the Air Operated Automatic DK20SP 16x20 digital swinger! This heat press machine has many ex- citing features, all of which are meant to help make your heat transfer pressing endeavors as successful and easy as possible. Please take the time now to thoroughly read through this manual to become acquaint- ed with them. -
Page 4: Setup.&.Suggestions
Setup & Suggestions • Locate the press on a firm, sturdy work surface. It is recommended but not necessary to bolt the press to a workbench using the rear mounting holes on the base frame. • A stand on lockable casters is available from Geo Knight & Co or your distributor. -
Page 5: Normal.operation
Normal Operation Normal Operating Mode The. normal. operating. mode. of. the. press. will. display. the. current. actual. Temperature. at. the. top. of. the. screen. and. the. time. setting. or. elapsed. time. below. the. temperature.. The. right. side. the. screen. will. indicate. -
Page 6: Setting.time
Setting Time From.the.normal.operating.mode,.simply. use. the. Arrow. Keys. ONLY. to. set. the. time..Do.not.touch.the.PRG.key. Hold.down.either.the.Up.or.Down.arrow. key.for.more.than.2.seconds.and.the.time. will.increase.rapidly. Press.BOTH.Arrow.Keys.and.the.time. will.reset.to.00.seconds. Pre-Press Timer There. is. a. second. timer. available. for. use,. called. the. “Pre-Press. Timer”.. This.feature.is.useful.if.a.multiple-step. process.is.performed.. For. example:. If. a. product. must. be. pre-pressed. -
Page 7: Setting.platen.height
1/4” thick. Unlike manual presses, the actual amount of pressure on the DK20SP is determined by the air regulator and air gauge, NOT by the height of the heat platen. However, if the platen height does not provide enough clearance for especially thick items, this can be adjusted. -
Page 8: Guidelines.&.Standard.settings
Guidelines & Standard Settings The following information covers some basic guidelines for press- ing, as well as some generic parameters for basic heat transfer applica- tions. • When pressing shirts, it is often recommended that the shirts be quickly pressed for 2 to 4 seconds before transferring to remove wrinkles and water content. -
Page 9: Err.mode
ERR Mode During. operation. of. the. press,. if. there. is.a.loss.of.signal.from.the.temperature. sensor. wire,. the. ERR. display. will. appear. This.is.a.safety.feature.that.will.shut.off. the.relay.so.the.press.will.not.overheat. aimlessly.without.a.temperature.signal. Once.the.temperature.signal.is.restored.(no.longer.broken,.or.plugged. back.into.the.control).the.press.will.resume.the.temperature.display,.and. start.heating.if.necessary..If.ERR.persists,.contact.support. Over-Temp Alarm If. the. press. heats. beyond. the. set. temperature. by. 40. degrees. or. greater,. the.OverTemp.alarm.will.sound. This. is. a. safety. feature. that. warns. the. operator.of.a.possible.thermal.run-away. -
Page 10: Programmable.presets
Programmable Presets How Presets Work There.are.70.programmable.presets.in.the.controller..The.operator.can. store.a.Temperature,.Time,.Prepress.Time,.and.Pressure.setting.in.each. preset. When.a.preset.program.is.loaded.by.the.operator,.the.Current.Temperature. Setting,.Time.and.Prepress.Settings.(if.there.is.a.Prepress.setting.in.that. preset).are.updated.in.the.normal.operating.mode.. The.pressure.is.NOT.set.for.the.operator.mechanically..A.brief.display. of.the.pressure.value.in.the.preset.is.shown.while.updating.the.current. settings..This.is.simply.a.reference..a.reminder.of.what.pressure.setting. the.operator.must.adjust.for.that.preset. There.are.2.main.functions.to.using.the.presets..LOADING.and.EDITING. the.preset..LOADING.a.preset.simply.means.selecting.a.desired.preset,. and.returning.to.the.normal.operating.mode.where.the.current.settings. are.changed..EDITING.a.preset.is.when.the.operator.actually.changes. the.preset’s.settings. Loading a Preset To. enter. the. presets,. press. the. PRG. key. SET.will.display.on.the.screen. Use. the. Arrow. Keys. to. select. a. preset. from.00.to.70. -
Page 11: Editing/Programming.a.preset
Use. the. Arrow. Keys. to. set. the. Prepress. time..Set.the.Prepress.time.to.00.if.only.one.timer. is.to.be.used.for.that.preset..Setting.Prepress.to. 00.will.disable.the.Prepress.feature. Press. the. TEMP. key.. The. Pressure. reference. value.will.flash..Since.the.Pressure.Barg.Graph. readout. is. not. used. on. the. DK20SP,. this. can. be.skipped,.or.use.the.number.as.a.reminder.to. reference.your.PSI.setting.(approximately). Press.the.TEMP.key..The.screen.returns.to.the. preset. #.. Press. PRG. to. return. to. the. normal. operating.mode,.or.use.the.Arrow.Keys.to.select. -
Page 12: A.walkthrough.tutorial.for.using.presets
A Walkthrough Tutorial for using Presets Here. is. a. tutorial. of. programming. 2. different. presets,. and. then. an. example.of.using.them.in.normal.daily.operations..Do.this.walkthrough. to.practice.using.presets. Part 1:.Programming.2.different.presets.. From.the.normal.operating.mode,.press.PRG..SET.appears. Use.the.arrow.keys.to.select.SET.01. Press.TEMP..Set.the.flashing.temperature.to.400.with.the.arrow.keys. Press.TEMP..Set.the.flashing.time.to.45.with.the.arrow.keys. Press.TEMP..Set.the.flashing.Prepress.time.to.00.with.the.arrow.keys. Press.TEMP..Set.the.flashing.Pressure.ref.to.8.with.the.arrow.keys. Press.TEMP..Use.the.arrow.keys.to.select.SET.02. Press.TEMP..Set.the.flashing.temperature.to.350.with.the.arrow.keys. Press.TEMP..Set.the.flashing.time.to.12.with.the.arrow.keys. Press.TEMP..Set.the.flashing.Prepress.time.to.3.with.the.arrow.keys. Press.TEMP..Set.the.flashing.Pressure.ref.to.9.with.the.arrow.keys. Press.TEMP..Press.PRG.to.leave.the.preset.mode. Presets.SET.01.and.SET.02.have.now.been.programmed. Part 2:.Loading.the.presets..Let’s.say.we.are.powering.on.the.machine. and.starting.a.job..The.first.job.will.need.to.use.preset.01,.and.later.on. the.next.job.will.need.preset.02. From.the.normal.operating.mode,.press.PRG..SET.appears. Use.the.arrow.keys.to.select.SET.01.then.Press.PRG..Done! The.press.is.now.set.for.400°F.and.45.seconds.and.will.start.to.heat.to. -
Page 13: User.menus
User Menus Entering the user menus & options There.are.many.useful.features.beyond.simply.setting.time.&.temperature,. and.storing.presets..All.of.these.additional.features.are.available.to.the. operator.in.the.User.Menus. To access the user menus, simply press TEMP & PRG at the same time from the normal operating mode and let go. (Try to use two hands and press the keys at the exact same time. If one key is pressed too early from the other, the temperature setting or preset modes may be activated instead. -
Page 14: Recorded.pressings.(User.odometer)
13),. Press. PRG. until. REC. displays..Use.the.arrow.keys.to.reset.the. counter.to.0..Press.PRG.to.move.to.the. next.menu.item. Pressure Minimum This. menu. item. is. not. used. on. the. DK20SP. Press. PRG. to. move. to. the. next. menu. item. Pressure Maximum This. menu. item. is. not. used. on. the. DK20SP. -
Page 15: Temperature.drop.sense
Temperature Drop Sense The. press. can. be. set. to. alarm. if. the. temperature.drops.a.certain.range.below. the. set. temperature.. This. is. useful. to. warn. the. operator. if. the. press. is. too. far. out. of. temperature. range. during. excessive.use. After.entering.the.user.menus.(see.top.of. page.13),.Press.PRG.until.DRP.displays.. Use.the.arrow.keys.to.set.it.to.OFF.(default),.or.10,.20,.30,.etc. If.the.current.temperature.drops.below.the.set.temperature.by.that.many. degrees,.and.alarm.will.sound..Press.TEMP.to.silence.the.alarm. Press.PRG.to.move.to.the.next.menu.item. -
Page 16: Alarms
Alarms The. timer. alarm. can. be. adjusted. for. different. beeping. patterns.. This. can. differentiate. between. multiple. presses,. and. allow. the. operator. to. have. a. short. beep.or.a.continuously.repeating.beep. After. entering. the. user. menus. (see. top. of. page. 13),. Press. PRG. until. ALR. displays..Use.the.arrow.keys.to.set.it.to. -
Page 17: Finished.warning.beep
Finished Warning Beep The.press.can.sound.a.beep.on.the.last. 3.seconds.of.the.timer.or.Prepress.timer. countdown.. This. is. useful. if. the. press. is. automatic. and. the. operator. needs. a. warning.that.the.press.is.about.to.finish,. . open,.or.pop-up.dramatically. After. entering. the. user. menus. (see. top. of. page. 13),. Press. PRG. until. FWB. displays..Use.the.arrow.keys.to.set.it.to. ON.or.OFF. Press.PRG.to.move.to.the.next.menu.item. Prepress Timer The. -
Page 18: Prepress.alarms
Prepress Alarms The. Prepress. timer. alarm. can. be. adjusted. for. different. beeping. patterns.. This.allows.for.differentiating.from.the. normal.timer,.and.can.allow.the.operator. to. have. a. short. beep. or. a. continuously. repeating.beep. After.entering.the.user.menus.(see.top.of. page.13),.Press.PRG.until.AL2.displays.. . The.PPR.menu.must.be.set.to.ON.for.this.menu.to.be.visible..Use.the. arrow.keys.to.set.AL2.to.OFF,.or.1.through.10. Press.PRG.to.move.to.the.next.menu.item. • denotes a short beep. _ denotes a longer beep. ~ denotes infinite loop. -
Page 19: Parts./.Maintenance./.Misc
Parts / Maintenance / Misc Maintenance The.majority.of.the.press.has.been.designed.to.be.as.maintenance.free. as.possible..There.are.only.a.few.aspects.of.the.machine.that.should.be. monitored.to.insure.proper.operation. • The Lifter Springs & Shoulder Bolts are the greatest area of wear and friction on the press. However they rarely if at all need to be replaced. If the press raises and lowers unevenly, carefully turn the press on its side and inspect the 4 springs. -
Page 20: Replacement.parts
Replacement Parts Here.is.a.list.of.current.replaceable.parts.on.the.DK20SP.as.of.the.writing.of.this.manual: DKP-ACTCVR ....DK20SP FRONT COVER W/SWITCHES/ASBLY SHN-DKPHOOD .....DK20SP FRONT COVER PANEL ONLY ELN-ABB1 ......PUSH BUTTON PANEL MOUNT (BLACK) ELN-110SP ......SPST PUSH/ ON-OFF SWITCH (E-STOP) ELN-8043X1 ....PILOT LIGHT (GREEN) 120V SOLICO ARN-AR20HZ ....¼ NPT SMC REGULATOR W/PANEL NUT ARN-15UB8 ....PANEL MOUNT 0-160 AIR GAUGE 1½ DIA SHN-DKPSKT ....DK20SP BOTTOM PANEL SKIRT... -
Page 21: Wiring.diagram
Wiring Diagram... -
Page 22: Troubleshooting
Troubleshooting The. following. information. attempts. to. address. the. most. probable. mechanical.and.user.issues.with.the.press..Most.issues.with.heat.transfer. presses.are.application.related..That.is,.they.have.to.do.with.the.results. of.a.particular.transfer.application.. For. technical. support. on. problems. having. to. do. with. the. final. results. of. a. particular. transfer. paper. or. media,. please. contact. the. supplier. of. that. transfer. media.. Generally,. the. machinery. manufacturer. is. unable. to.support.the.myriad.of.different.transfer.papers,.inks.and.imprintable. -
Page 23: Troubleshooting.(Cont.)
Troubleshooting (cont.) I press the keys on the keypad, and there is no sound or response from the controller. Check. the. connection. of. the. keypad. to. the. controller.. This. is. inside. the. top. panel.. The. keypad. connector. passes. in. through. the. top. panel..It.should.wind.around.the.first.circuit.board.and.be.seated.fully. -
Page 24: Limited.warranty
Limited Warranty Geo Knight & Co warrants that the press is free from defects in both material and workmanship One Year from the date of invoice to the buyer. If any parts or workmanship are found to be defective in manufacture, Geo Knight & Co will repair or replace the defective parts or workmanship. In addition, Geo Knight & Co warrants that the Digital Knight heat control is free from defects in both material & workmanship and is covered under no-charge support for (3) years. Geo Knight & Co also warrants that the heating element is warranted for the lifetime of the press, provided it is owned by the original purchaser. This lifetime warranty on the heating element does not cover temperature sensor failure, damage or disconnection. This warranty covers all parts to repair the defects, except when damage results from accident, alteration, misuse or abuse, or when the machine has been improperly installed, or modified in any way. If the press becomes defective during the limited warranty period of one year for the entire press, three years for the control, or the lifetime of the heating element, Geo Knight & Co reserves the right to recall the defective press to the factory for repairs if on site component replacement is deemed not possible by Geo Knight & Co. A return authorization must be granted by Geo Knight & Co prior to its return. If a press covered by the one year limited warranty must be returned to the factory for repairs, Geo Knight & Co shall make every effort to repair buyer’s press. However, Geo Knight & Co reserves the exclusive right to determine whether to repair or replace a defective press. If Geo Knight & Co authorizes a replacement press, the warranty of the replacement press shall expire on the anniversary date of the original machine’s invoice to the buyer. There are no warranties which extend beyond the description on the face hereof. Seller disclaims any implied warranty of merchantability and/or any implied warranty of fitness for a particular purpose, and buyer agrees that the goods are sold “as is”. Geo Knight & Co does not warrant that the functions of the press will meet the buyers requirements or expectations. The entire risk as to use, quality and performance of the press lies with the buyer. In no event will Geo Knight & Co be liable for any damages, including loss of profits, destruction of goods or any other special, incidental, consequential or indirect damages arising from the use of the press or accompanying materials. This limitation will apply even if Geo Knight & Co or its authorized agent has been advised of the possibility of such damage. Geo Knight & Co Inc 52 Perkins St, Brockton MA 02302 USA (508)588-0186 - Fax (508) 587-5108 info@heatpress.com - www.heatpress.com...
Need help?
Do you have a question about the DK20SP and is the answer not in the manual?
Questions and answers