Advertisement
Quick Links
Please read this user manual carefully, it contains instructions for the correct assembly of the model.
Please refer to the web site
Thank you for your purchase, we hope you enjoy your new Airplane.
For sales and info inquiries please e-mail
Specifications:
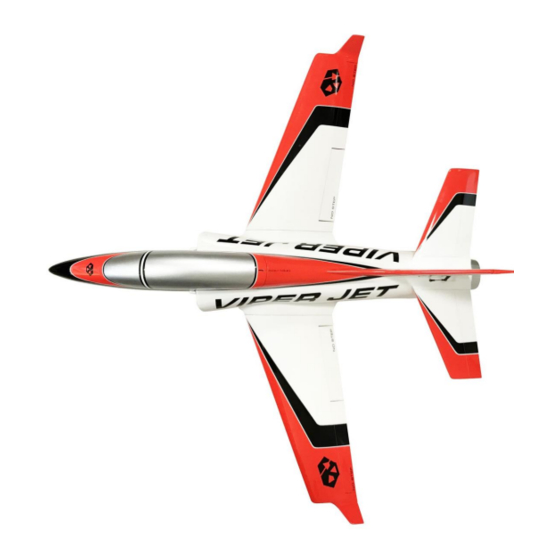
Wing span: 1400mm
Length: 1250mm
Radio: Minimum 8 channel | 8 micro servos
EDF: 90mm | 5000-5500mah 6s
Weight: 4,200Kg (with battery)
Inside the box:
Complete structure
Linkages
Screws and bolts
Thrust tube (electric version)
Carbon round tubes for wings and stabs
Hinges, Horns and servo holders already mounted
Additional required:
8 micro servo
EDF 90mm
Landing gear
LiPo battery pack 5000-5500mah 6s
Please refer to this manual for assembly instructions for this model.
Each step is based on the work done in the previous step. Changing the order of assembly may result in
additional or unnecessary steps.
VIPER 140 Manual
Release 1.0 – January 2018
www.harlock-rc.com
for updates and other important information.
sales@harlock-rc.com
NOTES FOR ASSEMBLY
1
Advertisement

Summary of Contents for Harlock-RC VIPER 140
- Page 1 VIPER 140 Manual Release 1.0 – January 2018 Please read this user manual carefully, it contains instructions for the correct assembly of the model. Please refer to the web site www.harlock-rc.com for updates and other important information. Thank you for your purchase, we hope you enjoy your new Airplane.
- Page 2 START ASSEMBLY Aileron servo on the wings Bag 1: 8x Self tapping metal screws 2,5x6mm 2x Threaded metal linkage M2 length 22mm 4x Plastic ball M2 4x M2 metal bolts 4x M2x10mm head cap screws 2x Servo holder Assembly the servo with the 2 servo screws (included with servo)
- Page 3 Self-tapping metal screws 2,5x6mm Approx 45mm...
- Page 4 Plastic ball links M2 M2x10mm metal screws and M2 metal bolts Suggested uniball distance linkage M2 length 22mm Do the same for both wings. Flap servo on the wings Bag 2: 2x Threaded metal linkage M2 length 22mm 4x Plastic ball M2 4x M2 metal bolts 4x M2x10mm head cap screws Approx 45mm...
- Page 5 Fix the servo with 2 servo screws (included with servo) M2x10mm metal screw and M2 metal bolt Suggested uniball distance Plastic ball links M2 linkage M2 length 22mm Fix servo horn (included with servo), M2x10mm metal screw and M2 metal bolt Do the same for both wings.
- Page 6 Lending gears on the wings (sold separately) Bag 3 8x Self tapping metal screws 3x12mm Before insert the screw proceed to hole with 1,5 drill bit. See following pictures to find the correct landing gear position. Self-tapping metal screws M3x12mm Do the same for both wings.
- Page 7 Fix the servo with 2 servo screws (included with servo) Plastic ball links M2 + linkage (included with landing gears) Before insert the screws proceed to hole with 1,5 drill bit. See following pictures to find the correct landing gear position. Self-tapping metal screws M3x12mm...
-
Page 8: Rudder Servo
Rudder servo Bag 5: 1x Threaded metal linkage M2 length 40mm 2x Plastic ball M2 2x M2 metal bolts 4x Self tapping metal screws 2,5x6mm 2x M2x10mm head cap screws 1x servo holder linkage M2 length 22mm M2x10mm metal screw and M2 metal bolt Plastic ball links M2 Fix the servo with 2 servo screws (included with servo) -
Page 9: Elevator Servo
Self-tapping metal screws 2,5x6mm Suggested uniball distance linkage M2 length 22mm M2x10mm metal screw and M2 metal bolt Elevator servo Bag 6: 2x Threaded metal linkage M2 length 22mm 4x Plastic ball M2 4x M2 metal bolts 4x M2x10mm head cap screws... - Page 10 M2x10mm metal screw and M2 metal bolt Suggested uniball distance linkage M2 length 22mm Fix the servo with 2 servo screws (included with servo) Plastic ball links M2 Fix servo horn (included with servo), assembly in according with the central horn position Pass the servo wire as shown: Do the same for both elevators.
- Page 11 Elevators on fuselage Bag 7: 2x Nylon nut M6 2x FG washers Ø6 x 12mm Carbon round tube Ø10x1x250mm Nylon M6 bolt Nylon Ø6 washer Not included...
- Page 12 Do the same for both elevators. Glue one side Velcro on the ESC support and other side on ESC...
- Page 13 Put the ESC on the proper support Ensure the ESC with plastic band...
- Page 14 Thrust tube and fan Bag 8: 6x Self tapping metal screws 3x12mm Enlarge the hole until thrust tube comes out of Approx 5mm Approx 5mm...
- Page 15 Fix the thrust tube Self tapping metal screw 3x12 with adhesive tape Approx 15mm Fan cover Bag 9: 4x Nylon bolt M4...
- Page 16 Nylon M4 bolts...
- Page 17 Wings Bag 10: 2x M4x15mm Head cap screws Carbon round tube Ø16x1x500mm M4X15mm Head cap screw Do the same for both wings.
- Page 18 Connect receiving, landing gear control unit and apply battery Velcro To save weight the landing gear control unit can be powered directly by your receiving. Indicative battery position...
- Page 20 Controls max surface travel: Please set as following for: Take off, landing and full-flap flight Dual rate: Please set as following for: During the flight...
-
Page 21: Center Of Gravity
Center of gravity 90mm from leading edge, please see the following draw: SAFETY GUIDELINES Fly only in areas dedicated to the use of model airplanes. Follow all control procedures for the radio frequency system. It is necessary that you know your radio system well. Check all functions of the transmitter before every flight. -
Page 22: Important Notes
*Lack of care with assembly or maintenance can result in an unreliable and dangerous model. *Neither HARLOCK-RC nor its agents have any control over the assembly, maintenance and use of this product. Therefore, no responsibility can be traced back to the manufacturer. You hereby agree to release...
Need help?
Do you have a question about the VIPER 140 and is the answer not in the manual?
Questions and answers