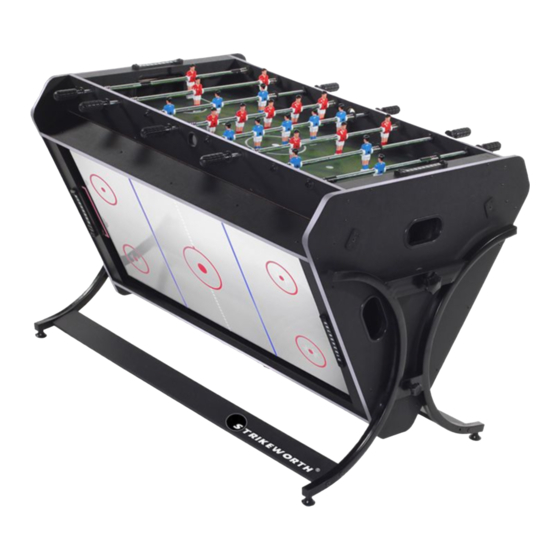
Summary of Contents for STRIKEWORTH TriSport
- Page 1 3 in 1 Multi-Game Table Assembly Manual Please note, a full colour PDF manual complete with step by step images can be downloaded at www.strikeworth.eu/trisport...
- Page 2 Parts Identification:- We recommend that all parts are laid out in order on the floor prior to starting the construction procedure. Please note that the triangular shaped panels marked #P4 and #P5 are different. Focus on identifying panel #P4 first - put the triangle piece on the floor as shown in the image below.
- Page 3 PART S IDENTIFIER (NoT o Scale) End ApronA End Apron B 1 PC 1 PC 1 PC 1 PC 1 PC #P10 Pool table /Hockey Pool table /Scoccer Hockey /Soccer Leg support brace side apron side apron side apron 6 PCS 1 PC 1 PC 1 PC...
- Page 4 PARTS IDENTIFIER (not to scale) #P36 #P37 #P38 #P39 #P40 Inner Nut Acorn Nut 4X45mm Screws Plastic corner pocket Plastic side pocket 8 PCS 8 PCS 50 PCS 2 PCS #P41 #P42 #P43 #P44 #P45 3.5X18mm Flat 3.5X12mm Flat 1/4" Washer set Head screws 3.5X28mm Screws Head screws...
- Page 5 Step 1 : a) Place air hockey playfield #P2 face down on a carpeted floor and attach fan #P44 including protection grill to the circular cut out using P53 screws. NOTE:- ensure air flow arrow is facing downwards directing air into the circular opening! - this indica- tor can be found on the side of the fan.
- Page 6 Step 1 #P53 IMPORTANT! Ensure triangle piece is correct [see page 1] #P44 #P41 #P40 #P41 Live build images:...
- Page 7 Step 2 : a) Attach the playfield support braces as shown in the diagram, be sure to check the orientation of the bar in question to check if it is to be secured on its side or in a more upright position. For those bars destined to support the football pitch en- sure they are secured in line with the grooves.
- Page 9 Step 3 : a) before sliding the football pitch into place as per the diagram below, ensure that one of the football end rails P16 is attached & seated in place using P40 screws. b) When inserting the football pitch you may find it easier to slightly loosen off the screws attaching panel P7 to the support braces - these can be re tightened when the pitch is in place c) When the pitch is in place insert the second goal end panel P16 and attach to P7...
- Page 10 Step 4 : a) Attach triangle end apron P5 to the structure making clear note of its orienta- tion shown in the diagram. b) Attach both P11 (hockey goal box) and P12 (football goal boxes) as indicated us- ing P41 screws, note that this must be completed on both ends of the table c) attach P34 metal plates using P33 screws to both Triangle end Aprons P4 and P5 as indicated d) This is also the time to double check that the air hockey power lead and plug...
- Page 12 Step 5 : a) Screw in levelling feet into P13 metal leg structure by hand b) Take P13 leg structure and push P15 lock through the upper central hole. Now put nut P49 on and spin down the thread. c) Place washer P50 over the thread and with the body of the table on end, offer up the leg structure pushing P15 into the central hole in the triangle end apron P4/ d) Reaching inside the table put P15 spacer over the protruding thread and up into the hole, secure the spacer with Nut 46 and finaly with wing nut P46 - see photo...
- Page 14 Step 6 : a) Now put the structure on to its legs - best way is to lift the body of the table up and the legs will swing down into position - we recommend loosely inserting lock- ing nut P14 to keep the table stable. b) Insert the pool table playfield P1 into the structure.
- Page 16 Step 6(b) : Please use cable clip P52 to secure air hockey mains lead and plug...
- Page 17 Step 7 : a) Ensuring it is flush with the edges, secure pool table playfield using x18 P41 screws as indicated in the diagram b) Insert the rubber pocket liners into each pocket cavity behind the metal wires. Secure these to the MDF using the small screws P42. There are no pilot holes but generally orientate the screw to the top corners of the rubber and don’t over tight- en.
- Page 19 Step 7 : a) rotate table and lock into place at football table side - now attach scoring sliders P31 to the table using P43 screws Rod insertion procedure b) Starting with the goalie /single player rod and face player correct way. insert the thick/ handle through the hole with the plastic trim (double check both sides of this rod have a spring attached) c) Now locate the thin rod and slide washer P18 over the spiked end...

Need help?
Do you have a question about the TriSport and is the answer not in the manual?
Questions and answers