Advertisement
Available languages
Available languages
Advertisement
Table of Contents

Subscribe to Our Youtube Channel
Related Manuals for VOSKER V200 Series


Summary of Contents for VOSKER V200 Series
- Page 1 QUICK START GUIDE V200-V (US only) V 1.3...
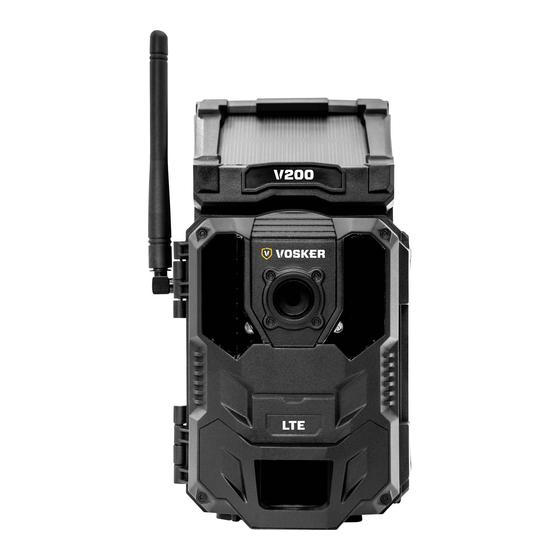
- Page 2 1x Quick start guide 1X Micro SIM card is pre-activated and inserted in the camera Note: Memory card and batteries are sold separately. User manual, latest firmware & FAQ available at: www.vosker.com COMPONENTS 1. Antenna 11. SD card slot 2. Solar panel 12.
- Page 4 About the device, SIM barcode. The SIM ID number will be displayed on the screen and you can then scan it using the VOSKER app. You will need this number to complete the registration of the V200 camera and log in to the application.
-
Page 5: Insert The Memory Card
INSERT THE MEMORY CARD Insert an SD/SDHC memory card (up to 32 GB capacity) in the card slot with the label side facing upward. The card is inserted cor- rectly when click is heard. Always ensure that the camera power is OFF before inserting an SD card. -
Page 6: Getting Started
GETTING STARTED INSTALL THE FREE VOSKER APP The VOSKER App lets you connect and control your camera remotely using a smartphone or tablet. Features include viewing your camera status, pictures, full-camera control and more. Install the free App 1. Make sure you have a data package with either your smartphone or tablet or a Wi-Fi connection. -
Page 7: Basic Settings
SETTING THE APP The VOSKER App let you configure all the camera’s settings. These new settings will take effect the next time the V100 camera connects to update its status. Here are the most important settings, there are more available in the app. -
Page 8: Transfer Settings
Mode - VIDEO Delay : Sets the time interval between each detection before the camera records the next video. Photo first: When this option is enabled, a photo is taken immedia- tely before each video. Video length : Allows the user to select the duration of the recording. TRANSFER SETTINGS First transfer time: Allows the user to choose at what time of the day the camera communicates for the first time. - Page 9 The camera has now updated its status in the VOSKER app with its latest information. The camera is now ready to take pictures and trans- mit them to your VOSKER app upon the next synch. Synchs are set by default to every 4 hours from midnight.
- Page 10 IR flash to the camera. IMPORTANT • BEFORE THE END OF THE 30-DAY FREE TRIAL In the VOSKER app, go activate your plan under the Account tab. For more details about the available plans, look at the Account tab in the App or follow the link below.
- Page 11 THIS DEVICE COMPLIES WITH PART 15 OF THE FCC RULES. Operation is subject to the following two conditions (1) this device may not cause harmful interference, (2) this device must accept any interferenc received, including interference that may cause undesired operation.
- Page 12 THANK YOU FOR CHOOSING Sit back & relax as this VOSKER cameras are covered by the “Know you’re covered” 2 year warranty. We strive on offering all customers a positive, user-friendly experience that will have a lasting impression. FAQ, user manual & latest firmware available at: www.vosker.com...
-
Page 13: Guide De Démarrage Rapide
GUIDE DE DÉMARRAGE RAPIDE... -
Page 14: Dans La Boîte
1x Guide de démarrage rapide 1X Carte Micro SIM pré activé et inséré dans la caméra Note: Carte mémoire et piles sont vendues séparément. Manuels d’utilisation, mise à jour du logiciel & FAQ disponible au: www.vosker.com COMPOSANTES 1. Antenne 12. Compartiment à piles &... - Page 16 Configuration, Général, à propos, code barre sim. Le numéro SIM ID s’affichera à l’écran et vous pourrez ensuite le balayer grâce à l’application VOSKER. Vous aurez besoin de ce numéro pour compléter l’enregistrement de la caméra V200 et vous connecter...
-
Page 17: Insérer Une Carte Mémoire
INSÉRER UNE CARTE MÉMOIRE Insérez une carte mémoire de type SD/SDHC (jusqu’à une capacité de 32 Go) dans la fente pour carte SD avec le côté de l’étiquette vers le haut. La carte est correctement insérée lorsqu’un clic se fait entendre. Toujours s’assurer que la caméra est éteinte avant d’y insérer une carte mémoire. -
Page 18: Mise En Route
MISE EN ROUTE INSTALLATION DE L’APP VOSKER GRATUITE L’App VOSKER vous permet de connecter et de contrôler votre caméra à distance en utilisant un téléphone intelligent ou une tablette. Les options comprennent l’affichage du statut de la caméra, des photos, un contrôle complet de la caméra à... - Page 19 CONFIGURATION DE L’APP L’Application VOSKER vous permet de configurer tous les paramètres de la caméra. Ces nouveaux paramètres prendront effet la prochaine fois que la caméra se connectera pour mettre à jour son statut. Voici les paramètres les plus importants.
- Page 20 Mode - VIDÉO (une photo est prise automatiquement avant chaque vidéo.) Délai : Permet de choisir l’intervalle de temps avant que la caméra ne détecte à nouveau et puisse enregistrer la prochaine vidéo. Photo pré-vidéo: Lorsque cette option est activée, une photo est prise immédiatement avant chaque vidéo.
- Page 21 La caméra maintenant a mis à jour son statut dans l’application VOS- KER avec ses dernières informations. La caméra est maintenant prête à prendre des photos et à les transmettre à votre application VOSKER lors de la prochaine synchronisation. Les synchronisations sont défi-...
- Page 22 éléments en arrière-plan pour réfléchir le flash IR de la caméra. IMPORTANT • AVANT LA FIN DE L’ESSAI GRATUIT DE 30 JOURS Dans l’application VOSKER, activez votre plan sous l’onglet Compte. Pour plus de détails sur les plans disponibles, consultez l’onglet Compte ou le lien ci-dessous.
- Page 23 CET APPAREIL EST CONFORME À LA SECTION 15 DES RÉGLEMENTATIONS DE LA FCC. Son fonctionnement est soumis aux deux conditions suivantes : (1) cet appareil ne doit pas créer d’interférences nuisibles et (2) cet appareil doit tolérer les interférences reçues, ce qui inclut les interférences qui risquent de provoquer un fonctionnement indésirable.
- Page 24 à tous nos clients une expérience positive et un service hors pair. Manuel d’utilisation, mise à jour logiciel & FAQ disponible au: www.vosker.com Assistance en ligne au VOSKER.COM support@vosker.com USA : 1-888-986-7537 | Canada & INTL : 1-866-986-7537 Rejoignez la communauté...
- Page 25 SCHNELLSTARTANLEITUNG...
- Page 26 1x Montieren 1x Befestigungsgurt 1x Schnellstartanleitung 1X Die Micro SIM-Karte ist bereits aktiviert und in der Kamera eingelegt Hinweis: peicherkarte und Batterien separat erältlich. Bedienungsanleitung, neuste Softwareversion & FAQ verfügbar auf: www.vosker.com KOMPONENTEN 1. Antenne 12. Batteriegehäuse und Micro-SIM-Kartensteckplatz 2. Sonnenkollektor 13.
- Page 28 Einstellungen, Allgemein, über das Gerät, Sim Barcode. Die SIM-ID-Nummer wird auf dem Bildschirm angezeigt und Sie können sie mit der VOSKER-App scannen. Sie benötigen diese Num- mer, um die Registrierung der V200-Kamera abzuschließen und sich bei der Anwendung anzumelden.
- Page 29 LEGEN EINE SD-KARTE EIN Legen Sie eine SD/SDHC Speicherkarte (bis zu 32 GB) in den Kartenschacht ein. Wenn ein klicken zu hören ist, wurde die Karte korrekt eingelegt. Stellen Sie immer sicher, dass die Kamera ausgeschaltet ist, bevor Sie die SD-Karte einlegen.
- Page 30 STARTEM INSTALLIEREN SIE DIE KOSTENLOSE VOSKER APP Die VOSKER App ermöglicht Ihnen, Ihre Kamera mit Ihrem Smart- phone oder Tablet zu verbinden und zu steuern. Features, wie den Kamerastatus und Bilder abzufragen, die vollständige Kontrolle über Ihre Kamera und Vieles weiteres.
- Page 31 Namen der Kamera mit dem weißen Balken mit einem Scroll-Menü am oberen Rand des Bildschirms wählen. DIE APP KONFIGURIEREN Die VOSKER App ermöglicht es Ihnen alle Kameraeinstellungen zu konfigurieren. Die vorgenommen Einstellungen werden bei der nächsten automatischen Statusabfrage wirksam. Hier sind die wich- tigsten Einstellungen und Weitere sind in der App verfügbar.
- Page 32 Modus - VIDEO Verzögerungszeit : Hier stellen Sie die Verzögerungszeit zwischen den einzelnen Aufnahmen ein. Zusätzliche Bild: Zusätzliches Bild : Wenn diese Option aktiviert ist, nimmt die Kamera unmittelbar vor jedem Video ein Foto auf. Videolänge : Hier stellen Sie die Dauer einer Aufnahme ein. EINSTELLUNGEN ÜBERTRAGEN Erste Übertragungszeit: Wählen Sie die Uhrzeit, zu der die Kamera die erste Synchronisation durchführt.
- Page 33 30 Sekunden lang, damit der Benutzer den Bereich verlassen kann, ohne fotografiert oder aufgenommen zu werden. Die Kamera hat nun ihren Status in der VOSKER-App mit den neuesten Informationen aktualisiert. Die Kamera kann jetzt Bilder aufnehmen und bei der nächsten Synchronisierung an Ihre VOSKER App übertragen.
- Page 34 Schritts übertragen hat. Schalten Sie die Kamera aus und wiederholen Sie die Schritte 1 bis 5. Hilfe Wenn das Problem weiterhin besteht, lesen Sie bitte den Hilfeabschnitt der VOSKER-App. DIE MONTAGE DER KAMERA Installieren Sie die Kamera mit oder ohne Halterung: Empfohlene Installationshöhe Die Kamera sollte sich in einem angemessenen Abstand von dem Bereich befinden, den Sie sichern möchten.
- Page 35 DIESES GERÄT ERFÜLLT DIE BESTIMMUNGEN VON TEIL 15 DER FCC-REGELN. Der Betrieb ist nur zulässig, wenn die folgenden beiden Bedingungen erfüllt sind: (1) Dieses Gerät darf keine schädlichen Interferenzen erzeugen und (2) dieses Gerät muss empfangene Interferenzen aufnehmen, auch wenn diese zu Betriebsstörungen führen können.
- Page 36 Wir bemühen uns, allen Kunden eine positive und benutzerfreund- liche Erfahrung zu bieten, die einen bleibenden Eindruck hinterlässt. Bedienungsanleitung, neuste Softwareversion & FAQ verfügbar auf: www.vosker.com Live Chat-Unterstützung bei VOSKER.COM UNTERSTÜTZUNG support@vosker.com USA : 1-888-986-7537 | Canada & INTL : 1-866-986-7537 Werden Sie Mitglied in der Community...
Need help?
Do you have a question about the V200 Series and is the answer not in the manual?
Questions and answers