Advertisement
AUTOMATIC SUCTION SWIMMING POOL VACUUM CLEANER
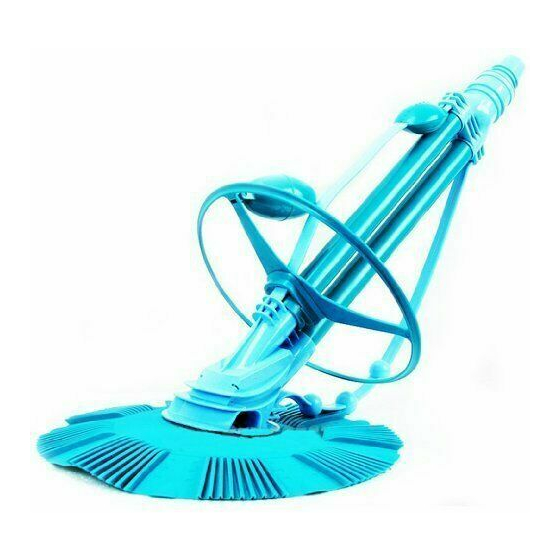
ITEM: 75036-XP & 75037-XP
OWNER'S MANUAL AND SAFETY INSTRUCTIONS
SAVE THIS MANUAL: KEEP THIS MANUAL FOR SAFETY WARNINGS, PRECAUTIONS, ASSEMBLY,
OPERATING, INSPECTION, MAINTENANCE AND CLEANING PROCEDURES. WRITE THE PRODUCT'S
SERIAL NUMBER ON THE BACK OF THE MANUAL NEAR THE ASSEMBLY DIAGRAM (OR MONTH
AND YEAR OF PURCHASE IF PRODUCT HAS NO NUMBER)
FOR QUESTIONS PLEASE CALL OUR CUSTOMER SUPPORT: (909) 628 0880 MON-FRI 9AM TO 3PM PST
Advertisement
Table of Contents
Troubleshooting

Summary of Contents for Xtreme Power 75036-XP
- Page 1 AUTOMATIC SUCTION SWIMMING POOL VACUUM CLEANER ITEM: 75036-XP & 75037-XP OWNER’S MANUAL AND SAFETY INSTRUCTIONS SAVE THIS MANUAL: KEEP THIS MANUAL FOR SAFETY WARNINGS, PRECAUTIONS, ASSEMBLY, OPERATING, INSPECTION, MAINTENANCE AND CLEANING PROCEDURES. WRITE THE PRODUCT’S SERIAL NUMBER ON THE BACK OF THE MANUAL NEAR THE ASSEMBLY DIAGRAM (OR MONTH...
-
Page 2: Important Safety Information
IMPORTANT SAFETY INFORMATION GENERAL SAFETY WARNINGS Read all safety warnings and instructions. Failure to follow the warnings and instructions may result in electric shock, fire and/or serious injury. Save all warnings and instructions for future reference. SAFETY The warnings, precautions, and instructions discussed in this instruction manual cannot cover all possible conditions and situations that may occur. -
Page 3: Features And Specifications
FEATURES AND SPECIFICATIONS 75036-XP: Automatic Pool Cleaner Stingray 75036-XP: Automatic Pool Cleaner In/Above In/Above Ground Ground Complete Set This automatic pool cleaner is perfect for your in- The Deluxe Inground Pool Cleaner can clean your ground or above-ground pools regardless size, shape inground pool from top to bottom automatically. - Page 4 ASSEMBLY Step 1: Attaching the Seal To install the seal, locate the words “Up” or “Top” and face them towards the main body. Slip the seal over the foot pad, flat side down towards the pool floor and pull gently until it seats itself on the other side in its groove as illustrated in Figure 2.
-
Page 5: Standard Installation
ASSEMBLY Twist and push the female ends into the male ends into the pool to wet them. See Figure 5. Continue until you’ve connected all the sections you need. After connecting the hose weights to the hose described in Table A, connect the hose to the cleaner. -
Page 6: Installation
INSTALLATION 1. Turn the pool pump off. 2. Close the main drain and all suction lines except the line from the skimmer to which the cleaner will be connected. 3. Remove the skimmer basket 4. Press the 2” hose cone into the vacuum connection in the bottom of the skimmer as shown in Figure 8. -
Page 7: Eyeball Diverter Positions
INSTALLATION 1. Hose too light: If the hose rises towards the surface at an angle greater than 45° move the weights closer to the cleaner or move the first two weights closer to each other. 2. Hose Too Heavy: If the hose sags downward at an angle less than 45°, move the weights away from the cleaner or separate the first two weights away from each other. -
Page 8: Troubleshooting And Maintenance
TROUBLESHOOTING AND MAINTENANCE VI. Troubleshooting Because of the individual characteristics of your pool, some additional adjustments may be required to get the best performance from your cleaner. If the cleaner is not moving or pulsating: Check to ensure that the main drain and all suction lines are closed except for the suction line to which the cleaner is attached. - Page 9 TROUBLESHOOTING AND MAINTENANCE If the cleaner stays at the shallow end of the steps: Check the return line water flow and redirect as necessary with an eyeball diverter. Check the automatic regulator valve for its proper installation and ensure it is not clogged with debris. Check that the hose is long enough to reach the furthest end of the pool, including the pool steps.
-
Page 10: Troubleshooting
TROUBLESHOOTING Disclaimer of Liability – About Your Pool and the Cleaner There are a multitude of factors that contribute to the life of your pool. The Automatic Pool Cleaner is a passive product that will have no impact on the life of your pool. Please be aware that over time, deterioration, discoloration and brittleness of any pool finish can be caused separately by, or in combination with, age, an imbalance in pool water chemistry, improper installation among other factors. - Page 11 TROUBLESHOOTING...
-
Page 12: Parts List
PARTS LIST... -
Page 13: Warranty
WARRANTY PLEASE READ THE FOLLOWING CAREFULLY THE MANUFACTURER AND/OR DISTRIBUTOR HAS PROVIDED THE PARTS LIST AND ASSEMBLY DIAGRAM IN THIS MANUAL AS A REFERENCE TOOL ONLY. NEITHER THE MANUFACTURER OR DISTRIBUTOR MAKES ANY REPRESENTATION OR WARRANTY OF ANY KIND TO THE BUYER THAT HE OR SHE IS QUALIFIED TO MAKE ANY REPAIRS TO THE PRODUCT, OR THAT HE OR SHE IS QUALIFIED TO REPLACE ANY PARTS OF THE PRODUCT.
Need help?
Do you have a question about the 75036-XP and is the answer not in the manual?
Questions and answers