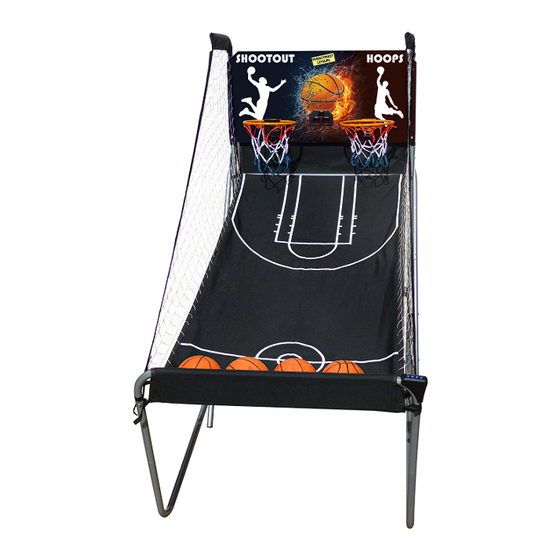
Summary of Contents for Mightymast Leisure Shoot Out Hoops
- Page 3 3. Some parts on the Parts List page are pre-assembled (P1-P3). 4. If any parts are missing please contact Mightymast Leisure immediately. Step 1 Attach the Board Tubes #2 to the Left Tube #3 & Right Tube #4 using the spring lock as shown in Figure 1. Attach the...
- Page 4 Step 2 Attach the Horizontal Frame Brace U Tube #5 to the Left Vertical Support Tube #3 & Right Vertical Support Tube #4 using bolts #26, washers #22 & nuts #27 as shown in Figure 3A. Important: Tubes #2 & #3 when assembled must be attached to the left hand side of the Horizontal Frame Brace U Tube #5.
- Page 5 Step 5 Attach the Ramp Tubes #9 to the Left Mounting Tube #6 & Right Mounting Tube #8 using bolts #32, washers #22, lock pin loop #33 & nuts #27 as shown in Figure 5. Now insert the lock pins #33 into the pivot joint to lock the game into playing position.
- Page 6 Step 6 Attach the Ramp L Tubes #10 to the Ramp Tubes #9 using the spring locks as shown in Figure 6. Step 7 Attach the Rim Assemblies #17 & Rim Support Plates #18 to the Backboard #21 using the bolts #23 & nuts #27. Then attach the Paddle with Sensors #15 &...
- Page 7 Step 8 Attach the Electronic Scorer Face Plate #30 to the Backboard #21 & connect with the Electronic Scorer #14 using bolts #29 as shown in Figure 8. Step 9 Loop the Nets #20 through the Net Hooks on the Rims #17 as shown in Figure 8A if not already pre-fitted. Step 10 Slide the elastic straps &...
- Page 8 Place the Horizontal Tube #12 in front of the lower sleeve of the Ball Return Netting #13 & then attach it to the Front Horizontal Ramp U Tube #11 using bolts #24, washers #22 & nuts #27 as shown in Figure 9E Step 11 With the help of another adult attach the Backboard #21 to the front of the Board L Tubes #1 using bolts #25, washers #22 &...
- Page 9 Step 12 Connect the Sensor Wire of Paddle to the Electronic Scorer #14 as shown in Figure 11. Connect the Control Wire to the Electronic Scorer #14 as shown in Figure 11 & 11A. This game is battery operated. You can now insert 3x AA batteries into the battery compartment on the back of the Electronic Scorer #14.
- Page 10 Step 13 Now attach the Control Box #16 to the corner of the Ramp U Tube #11 using the plastic bolt #35 as shown in Figure 12A. Run the rest of the Control Wire #37 through the loops on the Ball Return with Side Netting #13. Place the Control Wire on the Ramp U Tube #11 using the self-stick straps.
- Page 11 Step 15 Electronic Scorer Operation – Unscrew the bolt using a screwdriver & open the battery box. Insert 3x AA batteries (not included) in the order of polarity as shown on the inside cover. Then close the cover using a screwdriver. Turn the power ON using the ON/OFF switch.
-
Page 12: Troubleshooting
Press ‘SELECT UP’ & ‘DOWN’ to select a game. Press ‘SELECT UP’ & ‘DOWN’ to enter selected game mode. Press ‘SOUND’ to switch sound ON/OFF whilst playing. Press ‘PAUSE’ to pause or start time counting. Press & hold the button ‘ON/OFF’ 3 seconds to turn off scorer. Press &... - Page 13 Press ‘PLAY’ to restart this game. Battle Back Press ‘PLAY’ to enter game 3. Press ‘UP/DOWN’ to select playing time – 30/45/60 seconds. Press ‘PLAY’ to begin the game. Shots made in ‘HOME’ frame are plus 2 points for ‘HOME’ & minus 2 points for ‘VISITOR’. Shots made in ‘VISITOR’...
- Page 14 Shot made in ‘VISITOR’ frame 2 points scored for ‘VISITOR’, all shots counts 3 points in the last 10 seconds. The player with the most points wins once the time runs out. Press ‘PLAY’ to restart this game. For sales & service please contact: Mightymast Leisure Ltd 58 Bentwaters Park Rendlesham, Woodbridge Suffolk. IP12 2TW...


Need help?
Do you have a question about the Shoot Out Hoops and is the answer not in the manual?
Questions and answers