Subscribe to Our Youtube Channel
Summary of Contents for FLORABEST HG01829
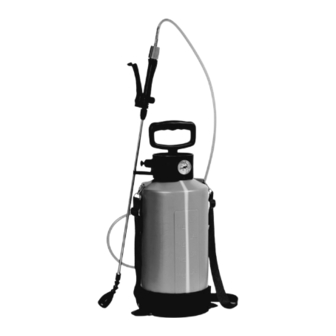
- Page 1 ® GARDEN PRESSURE SPRAYER GARDEN PRESSURE SPRAYER DRUCKSPRÜHER Operation and Safety Notes Bedienungs- und Sicherheitshinweise IAN 296238...
- Page 2 GB / IE / NI Operation and Safety Notes Page DE / AT / CH Bedienungs- und Sicherheitshinweise Seite...
-
Page 5: Table Of Contents
Introduction ......................Page 6 Proper use ........................Page 6 Description of parts and features ................Page 6 Technical data ......................Page 6 Included items ......................Page 7 Safety advice .....................Page 7 General safety advice....................Page 7 Before use ......................Page 8 Bringing into use .....................Page 9 Attaching the spray tube ...................Page 9 Filling the pressure sprayer tank ................Page 9 Building up the operating pressure ................Page 9 Spraying ........................Page 9... -
Page 6: Introduction
Garden Pressure Sprayer - Disinfectants - Fertilisers - Solvents or liquids containing solvents Introduction - Oil - Easily flammable fluids We congratulate you on the purchase of - Corrosive fluids such as acids or lye. your new product. You have chosen a high quality product. -
Page 7: Included Items
Carrying Do not carry out any method: At the operator‘s side, using repairs or modifications to the pressure the carrying strap sprayer. Do not change or repair any Volume flow: Jet stream: max. 0.75 l / min components. Misty spray: max. 0.70 l / min W ash your hands and face after each Waterfall stream: max. -
Page 8: Before Use
Not for use with corrosive Protect from frost and store away substances! from frost. Do not spray on electrical devices, Store at 0 °C–40 °C in a dry, electrical cables or wires. dust-free location. When pumping, always watch Do not spray on people! the manometer to check the operating pressure. -
Page 9: Bringing Into Use
Bringing into use Building up the operating pressure Attaching the spray tube (Fig. B–D) M ove the pump handle up and down until the pressure sprayer has been A ttach the nozzle to the spray pipe pumped up to a pressure not exceeding T urn the union nut anticlockwise to the maximum permissible operating... -
Page 10: Cleaning And Care
gauge (see “Building up the operat- Fasten the suction hose onto the hose ing pressure”). connection on the cover and the P ull the safety valve upwards as far handle of the spray pipe once more. as it will go to release the residual pres- Tighten the union nut securely. -
Page 11: Disposal
Spray nozzle does not spray. required as your proof of purchase. This No pressure present. warranty becomes void if the product has Generate pressure using the pump. been damaged, or used or maintained im- The spray nozzle is blocked. properly. Clean the spray nozzle. - Page 12 Einleitung .......................Seite 13 Bestimmungsgemäßer Gebrauch ................Seite 13 Teilebeschreibung ......................Seite 13 Technische Daten .......................Seite 13 Lieferumfang ......................Seite 14 Sicherheitshinweise ..................Seite 14 Allgemeine Sicherheitshinweise ................Seite 14 Vor der Inbetriebnahme ................Seite 15 Inbetriebnahme ....................Seite 16 Spritzrohr montieren ....................Seite 16 Tank des Drucksprühers füllen ..................Seite 16 Betriebsdruck erzeugen ....................Seite 16 Sprühen ........................Seite 16 Reinigung und Pflege...
-
Page 13: Einleitung
Drucksprüher Als nicht bestimmungsgemäß gilt insbesondere das Versprühen von: - Pflanzenschutzmitteln Einleitung - Unkrautvertilgungsmitteln - Desinfektionsmitteln Wir beglückwünschen Sie zum Kauf Ihres - Düngemitteln neuen Produkts. Sie haben sich damit für ein - Lösungsmitteln oder lösungsmittelhaltigen hochwertiges Produkt entschieden. Machen Flüssigkeiten Sie sich vor der ersten Inbetriebnahme mit - Öl... -
Page 14: Lieferumfang
VERLETZUNGS- Einsatztemperatur: 0–40 °C Trageweise: seitlich mit Trageriemen GEFAHR! Es besteht die Gefahr von Volumendurchfluss: Düsenstrahl: Hautverletzungen durch Kontakt mit dem max. 0,75 l / min Sprühmittel. Tragen Sie beim Versprühen Sprühnebel: geeignete Schutzkleidung, Handschuhe max. 0,70 l / min und Atemschutz. -
Page 15: Vor Der Inbetriebnahme
Kegelstrahl: 1.75 zulässiger Volumenstrom bis zu 1,75 l / min. Betriebsdruck: max. ca. 2,5 bar bei max. 2,5 bar! Brausestrahl: Keine ätzenden Stoffe verwenden! Volumenstrom bis zu 1,0 l / min. bei max. 2,5 bar! Sprühen Sie nicht auf elektrische Geräte, elektrische Kabel und Vor Frost schützen und frostfrei Leitungen. -
Page 16: Inbetriebnahme
Der Druck darf innerhalb von 30 Minuten Befüllen Sie nun den Tank. nicht mehr als ca. 0,5 bar abfallen. Hinweis: Befüllen Sie den Tank nur mit Pumpen Sie den Drucksprüher auf ca. soviel Flüssigkeit, wie Sie für den Einsatz 2 bar auf. benötigen (nicht mehr als max. -
Page 17: Reinigung Und Pflege
Hinweis: Wenn der Druck im Behälter Öffnen Sie die Verschraubung des nicht mehr zum Sprühen ausreicht, Deckels und ziehen das Steigrohr pumpen Sie den Behälter wieder heraus. maximal bis zum zulässigen Betriebsdruck Reinigen Sie den Saugschlauch von 2,5 bar auf. Sie können den Arbeits- das Steigrohr unter fließendem Wasser. -
Page 18: Entsorgung
= Störung durch unsere im Folgenden dargestellte = Mögliche Ursache Garantie nicht eingeschränkt. = Abhilfe Sie erhalten auf dieses Produkt 3 Jahre Im Behälter baut sich kein Garantie ab Kaufdatum. Die Garantiefrist Druck auf. beginnt mit dem Kaufdatum. Bitte bewahren Die Pumpe ist nicht fest geschraubt. - Page 19 OWIM GmbH & Co. KG Stiftsbergstraße 1 DE-74167 Neckarsulm GERMANY Model-No.: HG01829 Version: 01 / 2018 Last Information Update · Stand der Informationen: 10 / 2017 · Ident.-No.: HG01829102017-GB / IE / NI IAN 296238...


Need help?
Do you have a question about the HG01829 and is the answer not in the manual?
Questions and answers