
Related Manuals for LOFTNESS Battle Ax Light


Summary of Contents for LOFTNESS Battle Ax Light
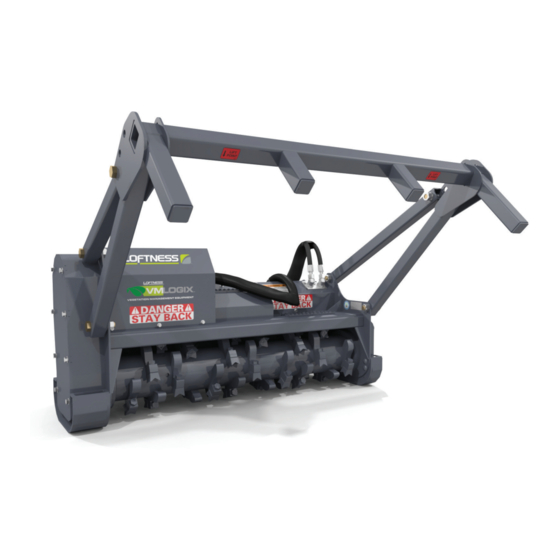
- Page 1 Battle Ax Light Skid Loader Mulching Head 51 • 61 Owner’s Manual and Parts Book (Originating w/Serial Number 93-101 thru 93-124) Model Number: Serial Number: Date of Purchase: 203417 Rev. A 12.04.19...
- Page 3 All Loftness products have a one (1) year limited warranty. The XLB10 Grain Bag Loader has a two (2) year limited warranty. If any Loftness product is used as rental equipment the limited warranty period is for only 30 days from the delivery date to the original customers.
-
Page 5: Table Of Contents
Battle Ax Light - Skid Loader (Example) ........ - Page 6 Metric Hardware and Lock Nuts ..........52 Battle Ax Light - Skid Loader OM...
-
Page 7: Ordering Code
Ordering Code Ordering Code Battle Ax Light - Skid Loader (Example) The ordering code will consist of two numbers (machine size), three letters (machine type), one letter (cutter type), one number (motor size), one letter (sheaves and belt combination), and one letter (pusher bar). An example for a Battle Ax Light - Skid Loader of this type would be as shown below. - Page 8 Battle Ax Light - Skid Loader OM...
-
Page 9: Introduction
Efficiently cuts and mulches up to 6" diameter material. Intermittently cuts larger diameter material. Lifting or tilting the Battle Ax Light increases the risk of flying debris. Because of the high speed of the teeth, the life of the teeth will be reduced if it is operated in rocky terrain or in areas where many obstacles are present. -
Page 10: Battle Ax Light Features
• Heavy Duty Bearing Block • 3-Band V-Belt • Tapered-Lock Sheaves • Skid Shoes • Steel Chain Deflectors • Adjustable Shear Bar Built-in depth gauges - controls cutting depth. • • Hydraulic Hoses Battle Ax Light - Skid Loader OM... -
Page 11: Safety Instructions
Prohibition symbols such as if used, STOP are RED. • Disengage all power to the attachment. • Shut off engine and remove the key. Wait until the rotor has stopped completely before inspecting the attachment. Battle Ax Light - Skid Loader OM... -
Page 12: Safety Rules
(if equipped), • Make sure the operator’s area is clear of any when operating the attachment. distracting objects. Keep work areas clean and free of grease and oil to avoid slipping or falling. Battle Ax Light - Skid Loader OM... -
Page 13: Hydraulic Safety
Operators are responsible to be aware of safety hazard areas and follow instructions on warning, caution, or danger decals applied to the machine. • Know the area before operating the machine. Be aware of power lines or other equipment. Battle Ax Light - Skid Loader OM... -
Page 14: Safety Decal Locations
Note: Pusher bar Note: Pusher bar removed on side removed on side view for clarity. view for clarity. See the following page for detailed images of the safety decals called out above. Battle Ax Light - Skid Loader OM... - Page 15 Instructions and Pressure Ratings that apply to the components used on this unit. The dealer/owner will be responsible for any damage caused by improper connection to the power unit. Part No. N28385 Part No. 200491 Part No. N20661 Part No. 4256 Battle Ax Light - Skid Loader OM...
-
Page 16: Battle Ax Light Identification
(behind cover) Rotor Bearing Guard Rotor Skid Cutting Teeth (left side) Pressure Gauge Hydraulic Control Valve Drive Belt Cover Drive Belt (behind cover) Hydraulic Hoses Mounting Plate Skid (right side) Step Deflector Chains Battle Ax Light - Skid Loader OM... -
Page 17: Set-Up Instructions
25-7/8 in. pusher tube (6) attached to the left side of the machine. The Battle Ax Light is shipped with the pusher bar in Remove the nut (7), lock washer (8), and bolt (9) securing an upright position. For shipping purposes, the left side the pusher tube to the machine frame. -
Page 18: Installing The Battle Ax Light To The Loader
(4) onto the bolt on the opposite side of the pusher tube. plate under the top flange (1) on the Battle Ax Light mounting plate. Be careful not to damage the locking Align the bottom end of the pusher tube with the hole (5) levers on the loader mounting plate. -
Page 19: Hydraulic Connections
Pressurized fluids can penetrate the skin. Disconnect and lock out power source before disconnecting and/or connecting hydraulic hoses. Raise the Battle Ax Light off the ground and place blocks (1) underneath the skids. Lower the Battle Ax Light down on the blocks. Rotor... -
Page 20: Checking Rotor Speed
RPM. If it is outside this recommended range, it before assembly and tightening. FAILURE may be necessary to disconnect the Battle Ax Light and TO DO SO COULD RESULT IN SEVERE test the hydraulic output of the loader with a flow meter DAMAGE TO THE MACHINE! to see if it corresponds with the factory specifications. -
Page 21: Operating Instructions
Slowly increase engine speed to high idle. is in operation, or engine is running. Do not Move the loader and Battle Ax Light forward and begin carry passengers. mowing. WARNING: Do not operate the attachment NOTE: Various mowing conditions, and desired finished above the rated RPM. -
Page 22: Clearing Jams
Disengage hydraulic power to rotor before moving logs and brush with pusher bars. Raise the loader lift arms and tilt the Battle Ax Light forward until the push bar extensions are over the log or item being moved. Lower the lift arms and position the log between push bar extensions and the Battle Ax Light. -
Page 23: Maintenance
NOTE: Lubricate the grease point every “X” hours indicated on the decal adjacent to the grease point. Machine Loose Bolts See “Battle Ax Light Identification” on page 10 for Hoses and Wiring Every component location and identification. Oil Leaks Rotor Bearing... -
Page 24: Overhung Load Adapter
Remove the plug from the port (1) located on the top of the overhung load adapter, and the plug from the lower port (2) located on the back side. Partially tilt the Battle Ax Light back towards the skid steer to drain the hydraulic oil. Reinsert the lower plug and tighten. -
Page 25: Removing Belt Cover
CAUTION: The belt cover is heavy. Support the cover when removing. When maintenance/repairs are complete, return the cover back into position and tighten and secure all bolts. Battle Ax Light - Skid Loader OM... -
Page 26: Removing Motor Cover, Manual Holder Cover, And Hose Cover
Remove the three bolts (4) securing the manual holder cover (5) to the motor cover. Carefully lift the cover off of the frame, being cautious not to pinch or damage the pressure gauge hose under the motor cover. Battle Ax Light - Skid Loader OM... -
Page 27: Skid Removal/Replacement
Motor Cover, Manual Holder Cover, and Hose Cover” on page 20. Lift the Battle Ax Light off of the ground about 6 inches. Place blocks under the rotor (not under teeth) to support the Battle Ax Light when lowered. Do not place blocks Loosen the four overhung load adapter support nuts (1) under the skids. -
Page 28: Tooth Removal And Installation
NOTE: The teeth can either be removed from the attachment or remain installed for sharpening. WARNING: Rotor must be stabilized to prevent accidental rotation any time the rotor is exposed for service work. Battle Ax Light - Skid Loader OM... -
Page 29: Storage
Adjust belt tension. See “Belt Adjustment” on page • Replace all damaged, worn or missing decals. • Install the Battle Ax Light on an loader and test for proper operation. WARNING: DO NOT allow ANY people or animals within 300 feet of the work area while operating this machine. -
Page 30: Motor & Sheave Selection Chart
2407 Belt 203410 Model Code “C” 2575 2500 Top Sheave 6.8" N11421 2672 2204 1.5" Taperlock 8126 Bottom Sheave 8.0" N17045 2765 2282 1.75" Taperlock 8127 Belt 203410 2860 2361 Model Code “D” Battle Ax Light - Skid Loader OM... -
Page 31: Troubleshooting
Travel speed too fast. Reduce ground speed. Rotor Will Not Turn Faulty drive line bearing. Replace bearing(s). Faulty rotor bearing. Replace bearing(s). Belt damaged. Replace belt. Belt slipping. Clean or replace belt. Adjust tension. Battle Ax Light - Skid Loader OM... - Page 32 Battle Ax Light - Skid Loader OM...
-
Page 33: Parts Identification
Parts Identification PARTS IDENTIFICATION Battle Ax Light - Skid Loader OM... -
Page 34: Covers, Manual Holder
Covers, Manual Holder * 51" model uses 3 bolts to secure the hose cover, 61" uses 4 bolts to secure. ** For parts breakdown of item 1, Motor Cover (203233), see page 34. Battle Ax Light - Skid Loader OM... - Page 35 BOLT, 3/8" X 1-1/4" SER FLG N19600 HOLDER, 01-315A STND.MANUAL 4340 BOLT, 1/4" X 3/4" GRADE 5 4050 NUT, 1/4" LOCK 203214 LH BEARING COVER 203234 51" HOSE COVER ASSEM 203258 61" HOSE COVER ASSEM Battle Ax Light - Skid Loader OM...
-
Page 36: Rotor, Skid Shoes
ROTOR, 51" BATTLE AX W/SHANKLESS ASSEM 203252 ROTOR, 61" BATTLE AX W/SHANKLESS ASSEM 203530 ROTOR, 51" BATTLE AX W/PLANER ASSEM 203532 ROTOR, 61" BATTLE AX W/PLANER ASSEM 203217 BA SKID LIGHT LH SKID SHOE Battle Ax Light - Skid Loader OM... -
Page 37: Cutter Bar, Deflector Chains
Parts Identification Cutter Bar, Deflector Chains NOTE: Underside of Battle Ax Light shown. QTY. PART # DESCRIPTION 4375 PIN, ROLL 3/16" X 1" 4301 WASHER, 7/16" FLAT N49273 ROD, CARBIDE 51" CHAIN N49076 ROD, CARBIDE 61" CHAIN CHAIN, CARBIDE AX REAT (51") N15589 (61") -
Page 38: Pusher Bar
PUSHER, 61" W/ DECALS 203236 TUBE, PUSHER 37.5" W/ BUSHING 203237 TUBE, PUSHER 25.8" W/ BUSHING N64492 BOLT, 1-14 X 4" GR. 8 FN. THR 4166 WASHER, 1" LOCK 4490 NUT, 1"-14UNF STANDARD Battle Ax Light - Skid Loader OM... -
Page 39: Motor Mount
4513 BOLT, 1/2" X 1-1/4" GRADE 8 4486 WASHER, 1/2" FLAT 4250 NUT, STANDARD 1/2" N37780 WASHER, NORD-LOCK 1/2" SP 203168 MOTOR MOUNT WLDMT N27483 BOLT, 1/2" X 5" GR 5 FL TH Battle Ax Light - Skid Loader OM... -
Page 40: Motor Cover (203233)
BOLT, BHCS #10-32 X 1 N16332 FLANGE, MOUNT GAUGE N16335 FLANGE, MOUNT #10 N16331 FLANGE, MOUNT GAUGE #8 N16133 NUT, NYLON INSERT #8 N16334 NUT, NYLON INSERT #10 N16162 ELBOW, 1/4" BLK 90 DEG STREET Battle Ax Light - Skid Loader OM... -
Page 41: Lubrication
Left side rotor bearing lubrication. QTY. PART # DESCRIPTION N17007 GREASE ZERK, 1/8" NPT 4304-10 BULKHEAD, FITTING-GREASE HOSE 4304 HOSE, GREASE 1/8" X 15" 4471 ELBOW, 1/8" 45 DEG.STREET N25125 ELBOW, 90 DEG - 4FJIC - 4MJIC Battle Ax Light - Skid Loader OM... -
Page 42: Belt And Sheave, 3/B Bsl "A" (8.6" Top, 6.2" Bottom)
203410 BELT, 3/B 52" N16134 SHEAVE, 3B X 8.6" PD TAPERLOCK 8126 BUSHING, 1-1/2" TAPERLOCK KEYED 7121-02 KEY, 3/8" X 1-3/4" 8127 BUSHING, 1-3/4 KW TAPERLOCK N34043 SHEAVE, 3B X 6.2 TPL 2517 Battle Ax Light - Skid Loader OM... -
Page 43: Belt And Sheave, 3/B Bsl "B" (8" Top, 6.8" Bottom)
DESCRIPTION 203410 BELT, 3/B 52" N17045 SHEAVE, 3B X 8.0 TPL 2517 8126 BUSHING, 1-1/2" TAPERLOCK KEYED 7121-02 KEY, 3/8" X 1-3/4" 8127 BUSHING, 1-3/4 KW TAPERLOCK N11421 SHEAVE, TAPERLOCK 6.8 PD 3-BAND Battle Ax Light - Skid Loader OM... -
Page 44: Belt And Sheave, 3/B Bsl "C" (7.4" Top, 7.4" Bottom)
Belt and Sheave, 3/B BSL “C” (7.4" Top, 7.4" Bottom) QTY. PART # DESCRIPTION 203410 BELT, 3/B 52" N34689 SHEAVE, 3B X 7.4 TPL 2517 8126 BUSHING, 1-1/2" TAPERLOCK KEYED 7121-02 KEY, 3/8" X 1-3/4" 8127 BUSHING, 1-3/4 KW TAPERLOCK Battle Ax Light - Skid Loader OM... -
Page 45: Belt And Sheave, 3/B Bsl "D" (6.8" Top, 8" Bottom)
DESCRIPTION 203410 BELT, 3/B 52" N11421 SHEAVE, TAPERLOCK 6.8 PD 3-BAND 8126 BUSHING, 1-1/2" TAPERLOCK KEYED 7121-02 KEY, 3/8" X 1-3/4" 8127 BUSHING, 1-3/4 KW TAPERLOCK N17045 SHEAVE, 3B X 8.0 TPL 2517 Battle Ax Light - Skid Loader OM... -
Page 46: Rotor Assembly With Shankless Tooth; 51" (203124), 61" (203252)
ROTOR, 51" BATTLE AX W/SHANKLESS TOOTH 203251 ROTOR, 61" BATTLE AX W/SHANKLESS TOOTH 201359 BUSHING, 1-3/4"ID X 2-1/4"OD 4075 WASHER, 2-5/8" OD 4076 WASHER, 1/2" EXT CNTSK LOCK 4468 BOLT, 1/2-20UNF X 1-1/4 FL HD Battle Ax Light - Skid Loader OM... -
Page 47: Rotor With Shankless Tooth; 51" (203123), 61" (203251)
ROTOR, 51" BA SPIRAL W/O CUTTER 8" 203250 ROTOR, 61" BA SPIRAL W/O CUTTER 8" TOOTH, SHANKLESS (51") N156042 (61") WASHER, 3/4 NORDLOCK (51") N16474 (61") BOLT, 3/4 X 2-1/2 FN TH GR 8 (51") N16349 (61") Battle Ax Light - Skid Loader OM... -
Page 48: Rotor Assembly With Planer Teeth; 51" (203530), 61" (203532)
ROTOR, 51" BATTLE AX W/PLANER TOOTH 203531 ROTOR, 61" BATTLE AX W/PLANER TOOTH 201359 BUSHING, 1-3/4"ID X 2-1/4"OD 4075 WASHER, 2-5/8" OD 4076 WASHER, 1/2" EXT CNTSK LOCK 4468 BOLT, 1/2-20UNF X 1-1/4 FL HD Battle Ax Light - Skid Loader OM... -
Page 49: Rotor With Planer Teeth; 51" (203529), 61" (203531)
ROTOR, 51" BA SPIRAL W/O CUTTER 8" 203250 ROTOR, 61" BA SPIRAL W/O CUTTER 8" TOOTH, SHANKLESS (51") 202506 (61") WASHER, 3/4 NORDLOCK (51") N16474 (61") BOLT, 3/4 X 2-1/2 FN TH GR 8 (51") N16349 (61") Battle Ax Light - Skid Loader OM... -
Page 50: Motor Assembly; 51" (203261), 61" (203418)
Machine Direction 13 - To Pressure Guage Rear View Machine Direction 22 - Pressure 23 - Return * For parts breakdown of item 24, Overhung Load Adapter (N16416), see page page 46. 1,26 Battle Ax Light - Skid Loader OM... - Page 51 HOSE, 3/4" X 44.5" -12FJIC -90SH12FJIC - (51" Model) 203430 HOSE, 3/4 "X 54.5" -12FJIC -90SH12FJIC - (61" Model) 203265 MOTOR, 40CC (2.42 CI) N16416 ADAPTER, OVERHUNG LOAD MOTOR #2 N31536 BOLT, 1/2 X 1-3/4 12 PT GRD8 Battle Ax Light - Skid Loader OM...
-
Page 52: Overhung Load Adapter (N16416)
DESCRIPTION N14151 SEAL, FRONT (1.50" I.D. X 2.13" O.D. X .312" THK) N14152 CUP, BEARING N14153 CONE, BEARING N14154 SHAFT N14156 RING, RETAINING N14157 SEAL, REAR (55MM X 90MM X 10MM) N14158 GASKET Battle Ax Light - Skid Loader OM... -
Page 53: Machine Decals And Signs
The dealer/owner will be responsible for any damage caused by improper connection to the power unit. Part No. 4334 Part No. N23506 Part No. N68716 WARNING SKIN PUNCTURE HAZARD. HYDRAULIC LINES. Protect hands and body from high pressure fluids. N23506 Battle Ax Light - Skid Loader OM... - Page 54 Machine Decals and Signs (Cont’d) Part No. 203264 Part No. N33105 Part No. N13517 Part No. 4138 Part No. N28010 Part No. N13721 Part No. N28576 - (Large) Part No. N28577 - (Small; on Thumb) Battle Ax Light - Skid Loader OM...
-
Page 55: Appendix
1.75 in. Piloted Double Taper Rotor Tip Diameter 13.5 in. (34.3 cm) Mount Universal Skid Steer Shear Bar Adjustable Knives Shankless or Planer Teeth Skid Shoes Stationary Deflector Steel Chain Anti-Wrap Protection Bearing Battle Ax Light - Skid Loader OM... -
Page 56: Dimensions
Overall Depth (C) (without pusher) 30.0 in. (76.2 cm) Overall Height (D) (without pusher) 30.875 in. (78.4 cm) Number Of Teeth Crated Weight (with pusher) ~1,454 lbs. (659.5 kg) ~1,606 lbs. (728.5 kg) Battle Ax Light - Skid Loader OM... -
Page 57: Torque Specifications
Appendix Torque Specifications Inches Hardware and Lock Nuts Battle Ax Light - Skid Loader OM... -
Page 58: Metric Hardware And Lock Nuts
Appendix Torque Specifications (Cont’d) Metric Hardware and Lock Nuts Battle Ax Light - Skid Loader OM... - Page 60 Loftness Specialized Equipment, Inc. 650 So. Main Street • PO Box 337 • Hector, MN 55342 Tel: 320.848.6266 • Fax: 320.848.6269 • Toll Free: 1.800.828.7624 Printed in USA © Loftness 2019...
Need help?
Do you have a question about the Battle Ax Light and is the answer not in the manual?
Questions and answers