Table of Contents
Advertisement
Quick Links
Advertisement
Table of Contents

Related Manuals for eyemodule eyemodule2

Summary of Contents for eyemodule eyemodule2
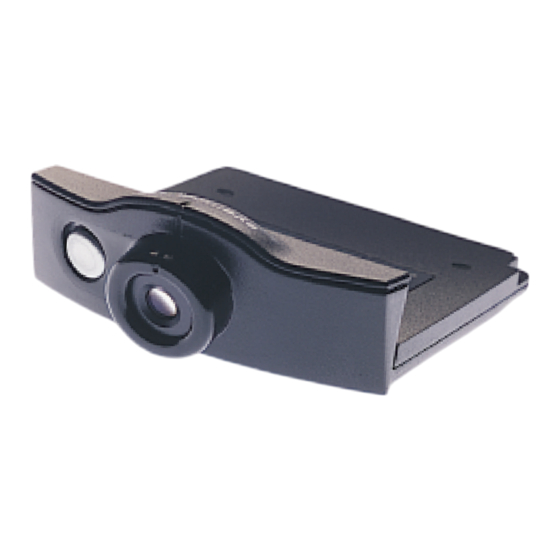
- Page 1 Digital Camera for the Handspring Visor handheld ™ ™...
-
Page 2: Table Of Contents
Introduction....... . 1 Getting Started ......2 Icons and Buttons . -
Page 3: Introduction
Handspring Visor ™ ™ handhelds into a convenient image capture device. Insert the eyemodule2 digital camera into the Springboard ™ expansion slot and you’re ready to capture and view images and Mini-Movies, label them, and beam them to other compatible ®... -
Page 4: Getting Started
Capture button Up button Down button Insert the eyemodule2 digital camera into To freeze the image, press once on the Capture If you want to save the frozen image, press the Springboard expansion slot. After a brief button next to the lens. (You may also press the... -
Page 5: Icons And Buttons
Image Capture Mode (page 6) eyemodule2 Capture button Tap here to downsize a Full Size image. Tap here to open Timer screen. Capture Timer icon List Mode icon Movie Capture Mode (page 8) Thumbnail Mode icon Indicates that the five second limit is enabled. -
Page 6: Capturing Images
Tap here to set the Capture Timer (page 10). You may also press the Up button to capture an image. eyemodule2 user guide www.eyemodule.com... -
Page 7: Capturing Mini-Movies
Alternatively, you can start and stop filming by capture B&W Mini-Movies. pressing the Up button. Pressing the Down button cancels filming. Note: Mini-Movie capture consumes a lot of memory. Keep your movies short to save memory space. eyemodule2 user guide www.eyemodule.com... -
Page 8: Setting The Capture Timer
Note: The Mini-Movie Capture Timer is not able to on to perform each capture if the time between capture multiple Mini-Movies. captures exceeds Visor auto-off time. If your Visor handheld runs out of memory during the sequence, it will stop capturing images. eyemodule2 user guide www.eyemodule.com... -
Page 9: View Mode
Tap the Delete icon to delete the current item. slider track. You can also press the Up or Down buttons to Tap here to turn looping on and off. view the previous or next image or Mini-Movie. eyemodule2 user guide www.eyemodule.com... -
Page 10: Slide Show
The image category can be changed. “Slide Show” . Tap here to attach a note to the image. Tap the screen (or press the Up or Down button) to stop the slide show and return the Visor handheld to View Mode. eyemodule2 user guide www.eyemodule.com... -
Page 11: Thumbnail Mode
(Downsizing a Full Size image on a B&W Visor handheld will convert the image to B&W.) Tap here to beam all selected items (page 18). Tap here to delete all selected items. eyemodule2 user guide eyemodule2 user guide www.eyemodule.com www.eyemodule.com... -
Page 12: Beaming Images
For instructions on beaming multiple images, You can also install the application see page 17. on another Visor handheld by briefly inserting the eyemodule2 digital camera. Align the infrared ports as shown on the next page. While in View Mode, tap the Beam icon ( ) to begin transmission. -
Page 13: Bringing Images To Your Computer
HotSync custom settings window To modify the eyemodule2 conduit First, be sure that the Visor HotSync ® settings, access the custom settings window from the HotSync Manager operation functions properly. Then or from the Palm Desktop application. -
Page 14: Setting Preferences
QuickTime movies Tap here to change the mode into which the can be found in the folder named eyemodule2 program will launch when the button “eyemodule” that is placed in your on the module is pressed. hard drive’s top level during installation. -
Page 15: Bringing Images To Your Visor Handheld
Note: To avoid an error, be sure any files that did can hold: Size right on your handheld. not originally come from an eyemodule2 digital - Over 50 Full Size color images or • Attach notes to images. camera are 640x480 (Full Size) or 160x120 (Palm - Over 150 Palm Size color images or Size) JPEG files. -
Page 16: Tips And Troubleshooting
The complete Limited Warranty during shipment, please contact the place of purchase. still as possible while capturing. This is • Be sure the eyemodule2 digital camera is can be found on your CD. Note: This equipment has been tested and found to comply especially important in low light situations. - Page 17 Design by IDEO is a trademark of IDEO Product Development. Handspring, Springboard, Visor, and the Handspring and Springboard logos are trademarks or registered trademarks of Handspring, Inc. eyemodule is a trademark of Blocks Products. PalmOS, Graffiti, and HotSync are registered trademarks of Palm Computing, Inc. Windows is a registered trademark of Microsoft Corporation.
Need help?
Do you have a question about the eyemodule2 and is the answer not in the manual?
Questions and answers