Table of Contents
Advertisement
Advertisement
Table of Contents

Subscribe to Our Youtube Channel
Related Manuals for FliteBoard FliteBoard AIR

Summary of Contents for FliteBoard FliteBoard AIR
- Page 1 User Guide...
- Page 2 SERIOUS INJURY OR DEATH, IT IS ESSENTIAL TO READ AND FOLLOW ALL OF THE INSTRUCTIONS AND WARNINGS IN THE USER GUIDE PRIOR TO ASSEMBLY, SETUP OR USE. BY USING A FLITEBOARD YOU AGREE THAT YOU DO SO AT YOUR OWN RISK.
- Page 3 Fliteboard User Guide Safety & Disclaimer Warning Flite Controller screen guide Propulsion system Pairing Flite Controller with Fliteboard Hydrofoil system Arm motor / unlock Flite Controller Get Fliteboarding Warranty and Compliance Preparation Warranty Select a suitable riding location Repairs Arm the Flite Controller...
- Page 4 Propulsion System All safety & disclaimer informa- The Fliteboard propulsion system tion is subject to change at the includes a powerful spinning sole discretion of Fliteboard. For propeller. up-to-date product information visit support.fliteboard.com KEEP BODY, FINGERS AND TOES AWAY FROM THE FLITEBOARD’S SPINNING PROPELLER.
- Page 5 Warranty Repairs Fliteboard comes with a Limited If subjected to damage, Warranty which covers defects in the epoxy construction boards materials or workmanship of the (Fliteboard and Fliteboard PRO) product and aligns to relevant can be repaired by your local consumer laws of the location of surfboard repair specialist.
- Page 6 TAKE IT OUT IMMEDIATELY HANDS. AND PUT IT IN A SAFE AND OPEN AREA. MAINTAIN A SAFE DISTANCE FROM FLITECELL UNTIL IN CASE OF A FLITEBOARD OR IT IS COMPLETELY DRY. NEVER FLITECELL FIRE, EXTINGUISH USE FLITECELL AGAIN AND WITH: DISPOSE OF FLITECELL PROPERLY.
- Page 7 Shipping Compliance Shipping batteries can be illegal and dangerous if not done in ac- cordance with dangerous goods shipping regulations. Always consult an appropriate specialist before shipping your Flitecell. Refer to the included MSDS regarding shipping your Flitecell by air or sea.
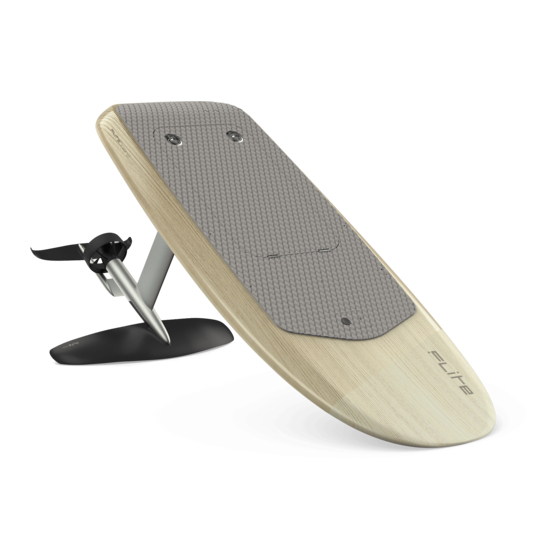
- Page 8 What’s in the box You will receive your Fliteboard in three separate shipment packages. Box 1: Fliteboard Within the included padded board bag you will find either Fliteboard, Fliteboard PRO or Fliteboard AIR (depending upon your choice) Fliteboard travel bag...
- Page 9 Box 2: Flitecell Flitecell travel case Flitecell Explore...
- Page 10 Box 3: Flite eFoil travel bag Within the included travel case you will find the following components: eFoil travel bag eFoil system including: — Flitebox — Flite propulsion system — Fuselage tail 2 options for the charger to choose from Cruiser Wing Flyer Wing Rear Stabiliser Wing...
- Page 11 Box 3: Accessories pouch Within the included accessories pouch you will find the following components: Accessories pouch Tef-Gel O-Ring + spare Stabiliser Wing shims Flite Controller Flite Controller x3 styles USB wall charger and charging cable 35mm 30mm 30mm 25mm M6 Hex key Flyer wing Cruiser wing...
-
Page 12: Getting Started
Getting started The best way to learn to Fliteboard is to find a Fliteschool in your area. Locate your nearest Fliteschool at fliteboard.com/fliteschool Watch the Fliteboard video guides at fliteboard.com/video In order to operate the product correctly avoiding damage or serious injury it is essential to read and follow all instructions and warnings in the user guide prior ro assembly, setup or use. - Page 13 Charging Flite Controller Remove Flite Controller from the accessories pouch. (Located in the eFoil bag). Remove Flite Controller USB Wall Charger and Charging Cable from the accessories pouch. Carefully peel out the rubber cover on the underside of Flite Controller. Attach the magnetic charging plug, ensuring the gold charging pins are connected.
- Page 14 DO NOT CHARGE NEAR FLAMMABLES OR EXPLOSIVES. DO NOT DISASSEMBLE THE CHARGER: THERE IS A DANGER OF HIGH VOLTAGE IN CHARGER CASE. FLITEBOARD DOES NOT BEAR ANY RESPONSIBILITY FOR INCORRECT USE OF THE CHARGER. USERS MUST OPERATE THE CHARGER FLITECELL LIGHTWEIGHT 15A SHOWN...
- Page 15 Charging Flitecell Remove Flitecell from its travel bag. Place Flitecell in a cool dry location away from flammable or hot items. Connect Flitecell charger plugs to Flitecell terminals ensuring to connect the orange (positive) connector to the orange terminal first and the black (negative) connector to the black terminal.
- Page 16 Flitecell Chargers Flitecell Lightweight 15A Flitecell Fast 20A Flitecell Premium 25A...
- Page 17 Flitecell Charger Indicator Guides Flitecell Lightweight 15A Issue Cause Solution Contact Fliteboard After connecting the Technical Centre or Charger and Flitecell, Possible fuse blown Fliteboard Support Charger does not work. Indicator 2 displays green Reconnect Charger Charger and Flitecell Flitecell isn’t charged...
- Page 18 Connect eFoil to Fliteboard Remove the Fliteboard from its bag and place upside down on the bag or other protective surface. Locate the Flitebox cavity on the bottom of the board and ensure the 4 retaining screws are removed. Check to ensure the orange o-ring is inserted, properly seated in the Flitebox cavity o-ring groove, clean and free of sand, grit or water.
- Page 19 Connect the fuselage tail With the board upside down and the eFoil connected, take the 20cm long aluminium fuselage tail from the travel bag and insert into the fin under the propeller guard. Add a thin layer of Tef-Gel from the tube supplied to the thread of the supplied 12mm fastener bolt and carefully tighten using the hex key using torque of 6 Nm.
- Page 20 CORROSION AND DAMAGE TO YOUR EFOIL FASTENER INSERTS. TEF-GEL PRO TIP After extensive testing the Fliteboard team have determined that the No. 3 Shim sets the board for the best overall balance and foot positions when riding. We have supplied 4 degree and 5 degree Shims for you to experiment with to customise your ride, however most riders will prefer the 3 degree position.
- Page 21 Locate the 2nd Flitecell data connector coming from the Flitebox and carefully connect it to the data socket on the left side of Flitecell. DO NOT APPLY ANY FORCE! BE CAREFUL NOT TO TWIST THE CABLE. IF ALIGNED CORRECTLY, NO GREAT FORCE IS REQUIRED. Take Flitecell by the handle and carefully lower it into the board cavity, ensuring to move cables out of the way first.
- Page 22 ‘beep beep beep’ which signifies that the Flitecell and board have automatically turned on. If Fliteboard is connected correctly the lid should be securely closed, and a light will be visible on the Receiver located near the front of the board deck grip.
- Page 23 Flite Controller overview — (Minus) button LCD display screen + (Plus) button Magnetic charge connection point Throttle trigger Mode button Pairing and arming point Wrist strap Turn on and connect Flite Controller Turn on Flite Controller by holding down the + button AND Mode (bottom) button together for 3 seconds.
- Page 24 Flite Controller screen guide Motor locked Motor armed Ready to arm. Motor unlocked with 5 Flitecell 100% charged. seconds to squeeze the Power Level set to level 1. throttle trigger. Current Speed / Power Distance Speed 1.3 Km/h Traveled 30.4 kms Power level 1 Remaining 24.7 kms.
- Page 25 Charge remaining Efficiency 60 kWh/km Flitecell 98% Flite Controller 66% Diagnostics Battery Warning Flitecell Ampere hours 25 50% Flitecell charge RPM 2.1 remaining. Single vibration. ESC Temp 40 Degrees Flitecell Temp 40 Degrees Over Current Warning Over Temperature Warning...
- Page 26 Pairing Flite Controller with Fliteboard receiver Hold the + button for 5 seconds until the words ‘looking for new pair’ on the screen appear. Hold the base of Flite Controller on the arming pad on the board receiver (same position for pairing and arming). The light should change to blue temporarily when Flite Controller is in the correct position.
- Page 27 Propeller. ALWAYS verify the propeller is clear and in a safe location before activating the motor. You can activate the motor on land to test the function of the Fliteboard, however you MUST ensure that no one is near the propellor during testing. Correct angle on arming pad...
- Page 28 Get Fliteboarding Fliteboard recommends that first time riders have at least one lesson with a certified Fliteschool. Select a suitable riding location A location with deep enough water is essential. The Wings and eFoil should never make contact with anything below the surface, including a sand bottom.
- Page 29 Arm Flite Controller Before taking your board to the water, first test out arming Flite Controller. Turn on Flite Controller by holding the bottom button and the top right button for 3 seconds The motor can become active once the remote is paired so it is best to do this in the water.
- Page 30 Lie on the board, positioned so that you can touch the front of the Fliteboard with your hand (or the front handle if using the Fliteboard AIR). Verify Flite Controller is set so you see power level ’1’ displayed on the the lock screen.
- Page 31 Getting to your knees Once comfortable lying on the board, arming the motor, changing speed and riding the board lying down, it’s time to get to your knees. Depending on your weight, board and conditions, you may wish to move to your knees on power level 3, 4, 5 or 6. You want to be traveling fast enough that you won’t nose dive or sink, but not so fast that you are bouncing over chop, planing quickly or starting to foil.
- Page 32 Standing up Check that you have clear flat water in front of you with no obstacles or other vessels. Select a speed where the board feels stable. The ideal speed depends on your weight and board choice, but between 8kph and 12kph is a good speed to stand up.
- Page 33 Foiling for the first time Like learning to ride a bike for the first time, learning to foil is challenging as it requires your brain to learn a new way to balance. There is also potential for you to fall on the Wings if not careful. Wear appropriate safety equipment including a Helmet and PFD, take your time and follow these steps.
- Page 34 Foiling pro tips If you shift your weight too far to one side, it is not possible to recover. Jump away from the board in the direction you are falling. This takes you SAFELY away from the foil. Keep your weight forward and press down through your front knee. Confirm your feet are in the correct position.
- Page 35 Ensure the board and deck grip are dry before storage. Take extra care not to scratch the carbon board bottom and wings. Place your Fliteboard in the provided bag, then store in a clean and dry environment. Keep the board and bag out of the sun.
- Page 36 Fliteboard AIR Post Ride Wash the inflatable bladder with warm soapy water and dry before storage. The inflatable bladder can remain inflated, or be deflated and stored on or off the carbon insert to suit your storage preference. Regular Maintenance The Inflatable bladder can be repaired using the supplied repair kit.
- Page 37 CONFIRM THAT WATER IS NOT PRESENT BEFORE CHARGING AND USING A BATTERY THAT HAS BEEN IMMERSED IN WATER. IF A BATTERY HAS BEEN DROPPED OR DAMAGED, CONTACT FLITEBOARD IMMEDIATELY AND DO NOT USE THE BATTERY. Regular Maintenance Examine the charger regularly for damage to the cord, plug, enclosure or other parts.
- Page 38 DO NOT store the Flitecell near heat sources such as a furnace or heater. DO NOT leave the Flitecell inside of a vehicle on hot days. The ideal storage temperature is 22°C-28°C. Do NOT store the Flitecell whilst charging. Disconnect the charger when not in use.
- Page 39 Fliteboard the Flitecell has taken in water refer to the section below. cavity Once dried and reassembling, take care that the Fliteboard Cavity Seal is properly compressed when closing the Fliteboard Lid. Flitecell has an indicator for water damage. If water has penetrated the casing, regularly check the circular water indicator on the side of your Flitecell.
-
Page 40: Technical Specifications
9.95 1550 x 600 Fliteboard 11.85 1735 x 650 Fliteboard AIR 11.85 1930 x 770 Fliteboard & Fliteboard PRO Materials Carbon Fibre, Innegra, aircraft grade aluminium, high quality wood laminates and composites. Fliteboard AIR materials Type Inflatable Materials Grey Selytech Composite Super Light... - Page 41 eFoil system Input power 5,000 Watts Max output power at shaft 3,700 Watts Nominal voltage 50.4v Maximum current 100 AMPS Motor type Brushless Motor speed 4650 rpm Propeller peak Protections Overheating, overcurrent Propeller diameter 142mm Propeller guard 155mm Flite Controller Communication Type Bluetooth Speed Control...
- Page 42 Flitecell Sport Size 315mm x 305mm x 80mm Capacity 30Ah / 1.5KWh Weight 10kg Protection IP67 Cell Type Samsung SDI Lithium-Ion 3500mAh Chemistry LiNiCoAlO2 Max charge voltage 58.8v Min voltage Nominal voltage Max Discharge Current 140a Rated continuous discharge current 100a Rated charge current Rated cycles...
- Page 43 Flitecell Explore Size 390mm x 305mm x 80mm Capacity 40Ah / 2.1KWh Weight 13.9kg Protection IP67 Chemistry LiNiCoAlO2 Max charge voltage 58.8v Min voltage Nominal voltage 50.4v Rated continuous discharge current 100a Rated charge current Rated cycles >80% capacity 600-800 Cycles Temperature discharge limits 0-70 Degrees C...
- Page 44 6/4 Banksia Drive support@fliteboard.com Byron Bay NSW 2481 fliteboard.com Australia 190530_25.3...
Need help?
Do you have a question about the FliteBoard AIR and is the answer not in the manual?
Questions and answers