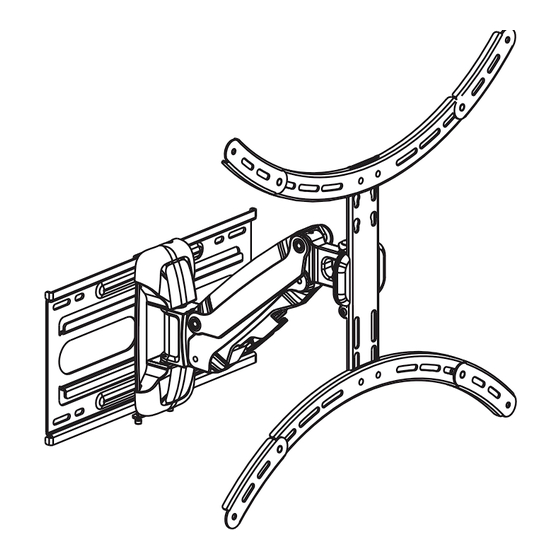
Table of Contents
Advertisement
Table of Contents:
Caution / Warning -------------------------------------------------------------------------------------------- 2
Overview of TV Mount & Tools Needed -------------------------------------------------------------- 3
Parts Diagram & Accessory Parts Included ---------------------------------------------------------- 4
Step 1: Attaching the Bracket Base Plate ------------------------------------------------------------- 5
Step 2-A: Mounting the Wall Bracket Plate to Concrete Wall ---------------------------------- 6
Step 2-B: Mounting the Wall Bracket Plate to Wood Wall -------------------------------------- 7
Step 3: Mounting the Arm to the Connect Plate --------------------------------------------------- 8
Step 4: Attaching TV Brackets ----------------------------------------------------------------------------- 9
Step 5: TV Bracket Extension Installation ----------------------------------------------------------- 10
Step 6: How to Adjust the Wall Mount --------------------------------------------------------------- 11
For the latest version of this document, please visit us on the web at www.SumarUSA.com
Sumar International, Covina, CA 91723 | support@SumarUSA.com
Advertisement
Table of Contents

Summary of Contents for sumar SM8006
-
Page 1: Table Of Contents
Step 5: TV Bracket Extension Installation ----------------------------------------------------------- 10 Step 6: How to Adjust the Wall Mount --------------------------------------------------------------- 11 For the latest version of this document, please visit us on the web at www.SumarUSA.com Sumar International, Covina, CA 91723 | support@SumarUSA.com... -
Page 2: Caution / Warning
Caution / Warning I would like to see a revised version of the Caution / Warning text. - Page 3 Overview of Parts & Tools Vesa Compatibility Supported Weight Supported Screen Size Extension Range Tilting Angle ADDITIONAL TOOLS (Not Included): 3/8 (10mm) # 2 Phillips Concrete Drill Bit Screw Driver Stud Finder 7/32 (5.5mm) Wood Drill Bit Electric Drill Tape Measure Socket Wrench Hammer Pencil...
-
Page 4: Overview Of Tv Mount & Tools Needed
Diagram & Accessory Parts Included Connection Plate Plastic Cover 18” Wall Bracket Plate Safety Bolts PARTS: Safety Bolts M4X12MM M5X12MM M6X12MM M6X16MM 4 pcs 4 pcs 4 pcs 4 pcs 2 pcs 4 pcs 4 pcs 4 pcs Plastic Covers 4 pcs 4 pcs Level... -
Page 5: Parts Diagram & Accessory Parts Included
Step 1: Attaching the TV Mount Plate Attach the Television Mount Plate to the Arm using Washer & Nut with the Wrench Supplied (C2). Place the plastic covers on. WARNING: Hand tighten Bolts, Nuts & Screws first. -
Page 6: Step 1: Attaching The Bracket Base Plate
Step 2-A: Mounting to Concrete Wall Use STEP 2-A ONLY when mounting to Concrete / Extermal Wall or Surface. Drill a pilot hole before the final hole. The drill depth should be the length of the anchor. 2” 7/32” Option 1: The wall plate can be installed directly to the concrete wall. Option 2: The adaptor for the wall plate can be added for horizontal adjustments. -
Page 7: Step 2-A: Mounting The Wall Bracket Plate To Concrete Wall
Step 2-B: Mounting to Wood Wall Use STEP 2-B ONLY when mounting to WOOD Stud / Internal Wall or Surface. Drill depth should match the length of the mounting bolt. 2” 1/4” Fig 1-2 The wall mount arm base can be installed directly in the Concrete Wall. Mark the 4 holes cross-section pattern as in (Figure 1). -
Page 8: Step 2-B: Mounting The Wall Bracket Plate To Wood Wall
Step 2-B: Mounting to Wood Wall (cont.) Figure 3 & 4 The 18” wall bracket plate can be added for better installation. Mark the 4 holes square pattern as in (Figure 2B-3). Using the TV Wall Bracket as the template holes. Drill ¼... -
Page 9: Step 3: Mounting The Arm To The Connect Plate
Mounting Arm to the Connect Plate Place the Wall Mount Arm Base onto the Connection plate and use the washer and lug nuts to secure. The Connection Plate can be adjusted by shifting it from left to right. To lock the Connection Plate in position, tighten the 2 safety bolts. -
Page 10: Step 4: Attaching Tv Brackets
Step 4: Attaching Brackets to TV A – Attach the brackets to the TV B – Attach the Brackets to the TV with recessed back Option 1-A Flat TV VESA mount Fig (4-1) Depending on TV brand, select A1, A2, A3, or A4. A1, A2 required washer (A5) Tighten all the screws Option 1-B... -
Page 11: Step 5: Tv Bracket Extension Installation
Step 5: TV Bracket Extension Installation If the LCD hole pattern is larger than the TV Bracket, you are required to use the TV Bracket Extender to install. VESA size 500x600 required TV Bracket Extender, Use the washer & Nut to secure it. -
Page 12: Step 6: How To Adjust The Wall Mount
Step 6: How to Adjust the Wall Mount Arm Tension Adjustment B Tilt Adjustment C) Cable management clip, cable routing access points...

Need help?
Do you have a question about the SM8006 and is the answer not in the manual?
Questions and answers