Advertisement
Available languages
Available languages
Quick Links
Advertisement

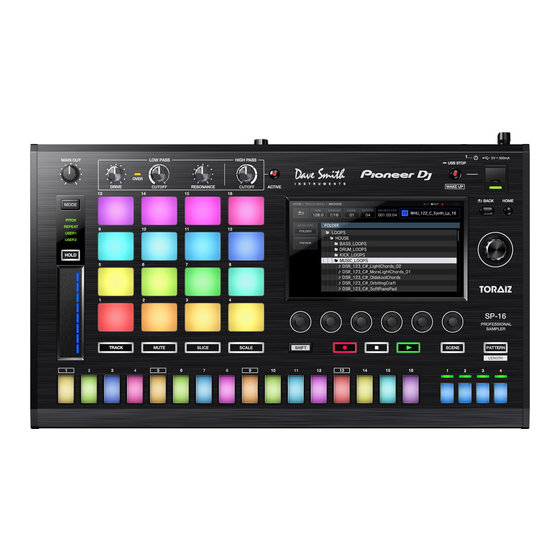
Related Manuals for TORAIZ SP-16

Summary of Contents for TORAIZ SP-16
- Page 1 English | Español | Français | Deutsch 日本語 Italiano | Nederlands | Português |...
- Page 2 This document explains how to use the sound pack (demonstration project file) we’ve provided. Confirm the firmware version To use the project file on the TORAIZ SP-16, the firmware version 1.40 or greater must be installed. To check the machine’s firmware version number: 1.
- Page 3 Load the project file from a USB memory device Copy the decompressed project files to a USB memory device for use on the TORAIZ SP-16. ① Create a PIONEER DJ SAMPLER folder and Projects sub folder in the USB memory device. Paste or drag the decompressed project file into the folder.
- Page 4 Load the project file to the TORAIZ SP-16’s built-in memory You can add the project file to the TORAIZ SP-16's built-in flash memory. ① Connect the TORAIZ SP-16 to a computer using a USB cable. ② Press the UTILITY icon to open the UTILITY window.
- Page 5 ⑥ After disconnecting the machine from the computer, press CANCEL. Press CANCEL The project file should now be available in the TORAIZ SP-16’s built-in flash memory. To use a copied project, select it in the PROJECT window and then again in the OPEN window (refer to step ③...
- Page 6 Confirmar la versión de firmware Para usar el archivo de proyecto en el TORAIZ SP-16, debe estar instalada la versión de firmware 1.40 o superior. Para verificar el número de versión del firmware del hardware: 1. Pon en marcha el TORAIZ SP-16.
- Page 7 ② Inserta el dispositivo de memoria USB en el TORAIZ SP-16. ③ Presiona el icono PROJECT para abrir la ventana de PROJECT. Prensiona PROJECT ④ En la ventana PROJECT, selecciona OPEN. Selecciona OPEN. ⑤ Selecciona el archivo de proyecto descomprimido para cargarlo en el TORAIZ SP-16. Selecciona los proyectos...
- Page 8 Carga el archivo de proyecto en la memoria integrada del TORAIZ SP-16 Puedes añadir el archivo de proyecto a la memoria flash incorporada del TORAIZ SP-16. ① Conecta el TORAIZ SP-16 a un ordenador con un cable USB. ② Presiona UTILITY en la ventana HOME para abrir la ventana UTILITY.
- Page 9 ⑥ Después de desconectar el TORAIZ del ordenador, presiona CANCEL. Presiona CANCEL El archivo de proyecto ahora debería estar disponible en la memoria flash incorporada del TORAIZ SP-16. Para usar un proyecto copiado, selecciónalo en la ventana PROJECT y luego nuevamente en la ventana OPEN (consulta el paso ③...
- Page 10 Confirmer la version du firmware Pour utiliser le fichier projet sur le TORAIZ SP-16, la version 1.40 ou ultérieure du firmware doit être installée. Pour vérifier le numéro de version du firmware de votre machine : 1. Allumez le TORAIZ SP-16.
- Page 11 ② Insérez le périphérique de stockage USB dans le TORAIZ SP-16. ③ Appuyez sur l’icône PROJECT pour ouvrir la fenêtre PROJECT. Appuyez sur PROJECT ④ Dans la fenêtre PROJECT, sélectionnez OPEN. Sélectionnez OPEN. ⑤ Sélectionnez le fichier projet décompressé pour le charger dans le TORAIZ SP-16. Sélectionnez les projets...
- Page 12 Charger le fichier projet dans la mémoire intégrée du TORAIZ SP-16 Vous pouvez ajouter le fichier projet à la mémoire flash intégrée du TORAIZ SP-16. Branchez le TORAIZ SP-16 à un ordinateur en utilisant un câble USB. Appuyez sur l’icône UTILITY pour ouvrir la fenêtre UTILITY.
- Page 13 Après avoir débranché la machine de l’ordinateur, appuyez sur CANCEL (annuler). Appuyez sur CANCEL Le fichier projet devrait désormais être disponible dans la mémoire flash intégrée du TORAIZ SP-16. Pour utiliser un projet copié, sélectionnez-le dans la fenêtre PROJECT puis à nouveau dans la fenêtre OPEN (référez-vous à...
- Page 14 Diese Anleitung erklärt den Gebrauch des mitgelieferten Sound-Packs (Demoprojektdatei). Feststellen der Firmwareversion Um die Projektdatei auf dem TORAIZ SP-16 verwenden zu können, muss die Firmwareversion 1.40 oder höher installiert sein. So überprüfst du die Firmware-Versionsnummer des Geräts: 1. Schalte den TORAIZ SP-16 ein.
- Page 15 Laden der Projektdatei von einem USB-Laufwerk Kopiere die entpackten Projektdateien zur Verwendung mit dem TORAIZ SP-16 auf ein USB-Laufwerk. ① Lege auf dem USB-Laufwerk einen Ordner mit dem Namen PIONEER DJ SAMPLER an und darin einen Unterordner “Projekte”. Füge die kopierten Projektdateien in diesen Ordner ein oder ziehe sie mit der Maus dorthin.
- Page 16 Laden der Projektdatei in den integrierten Speicher des TORAIZ SP-16 Du kannst die Projektdatei in den eingebauten Flash-Speicher des TORAIZ SP-16 laden. Schließe den TORAIZ SP-16 mit einem USB-Kabel an einen Computer anschließen. Drücke das UTILITY-Icon, um das Fenster UTILITY zu öffnen.
- Page 17 Nach dem Trennen vom Computer drückst du CANCEL. Drücke CANCEL Die Projektdatei sollte jetzt im eingebauten Flash-Speicher des TORAIZ SP-16 verfügbar sein. Um ein kopiertes Projekt zu verwenden, wählst du es im Fenster PROJECT aus und dann noch einmal im Fenster OPEN (siehe Anleitung zur Verwendung der Projektdatei in Schritt ③...
- Page 18 Questo documento spiega come utilizzare il sound pack (file di progetto dimostrativo) fornito. Confermare la versione del firmware Per utilizzare il file di progetto nel TORAIZ SP-16, deve essere installato un firmware di versione 1.40 o superiore. Per controllare il numero di versione del firmware dell'apparecchiatura: 1.
- Page 19 Caricare il file di progetto da un dispositivo di memoria USB Copiare i file di progetto decompressi in un dispositivo USB da utilizzare con il TORAIZ SP-16. ① Creare una cartella PIONEER DJ SAMPLER e una sotto-cartella Projects (Progetti) nel dispositivo di memoria USB.
- Page 20 Caricare il file di progetto nella memoria integrata nel TORAIZ SP-16 Si può aggiungere il file di progetto nella memoria flash integrata nel TORAIZ SP-16. Collegare il TORAIZ SP-16 a un computer con un cavo USB. Premere l'icona UTILITY per aprire la finestra UTILITY.
- Page 21 Premere CANCEL (ANNULLA). Ora il file di progetto dovrebbe essere disponibile nella memoria flash integrata nel TORAIZ SP-16. Per utilizzare un progetto copiato, selezionarlo nella finestra PROJECT (PROGETTO) e poi di nuovo nella finestra OPEN (APRI; per istruzioni sull'utilizzo del file di progetto, si rinvia al passo ③ della sezione intitolata "Load the project file from a USB memory device", "Caricamento del file di progetto da un...
- Page 22 In dit document leggen we uit hoe je het geleverde soundpack (voorbeeldprojectbestand) gebruikt. Bevestig de firmwareversie Om het projectbestand op de TORAIZ SP-16 te kunnen gebruiken, moet de firmwareversie 1.40 of hoger geïnstalleerd zijn. Zo controleer je het versienummer van de firmware van het apparaat: 1.
- Page 23 Het projectbestand vanaf een USB-opslagapparaat laden Kopieer de uitgepakte projectbestanden naar een USB-opslagapparaat om deze te gebruiken op de TORAIZ SP-16. ① Maak een PIONEER DJ SAMPLER-map en een submap Projecten aan op het USB-opslagapparaat. Plak of sleep het uitgepakte projectbestand naar de map.
- Page 24 Het projectbestand naar het ingebouwde geheugen van de TORAIZ SP-16 laden Je kunt het projectbestand toevoegen aan het ingebouwde flashgeheugen van de TORAIZ SP-16. Sluit de TORAIZ SP-16 met een USB-kabel aan op een computer. Druk op het UTILITY-pictogram om het UTILITY-venster te openen Druk op UTILITY ...
- Page 25 Druk op CANCEL nadat je het apparaat hebt losgekoppeld van de computer. Druk op CANCEL Het projectbestand zou nu beschikbaar moeten zijn in het ingebouwde flashgeheugen van de TORAIZ SP-16. Als je een gekopieerd project wilt gebruiken, moet je het project selecteren in het PROJECT-venster en vervolgens opnieuw in het OPEN-venster (zie stap ③...
- Page 26 Este documento explica-lhe como usar o Sound Pack (ficheiro do projeto de demonstração) que fornecemos. Confirmar a versão de firmware Para usar o ficheiro de projeto no TORAIZ SP-16, tem de ter instalada a versão de firmware 1.40 ou superior. Para verificar o número de versão de firmware da máquina: 1.
- Page 27 Carregar o ficheiro de projeto de um dispositivo de memória USB Copie os ficheiros de projeto descomprimidos para um dispositivo de memória USB para utilizar no TORAIZ SP-16. ① Crie uma pasta PIONEER DJ SAMPLER e uma subpasta Projetos no dispositivo de memória USB. Cole ou arraste o ficheiro de projeto descomprimido para a pasta.
- Page 28 Carregar o ficheiro de projeto na memória interna do TORAIZ SP-16 Pode adicionar o ficheiro de projeto na memória flash interna do TORAIZ SP-16. Ligue o TORAIZ SP-16 a um computador usando um cabo USB. Pressione o símbolo FERRAMENTAS para abrir a janela FERRAMENTAS.
- Page 29 Depois de desligar a máquina do computador, pressione CANCELAR. Pressione CANCELAR O ficheiro do projeto deverá estar agora disponível na memória flash interna do TORAIZ SP-16. Para usar um projeto copiado, selecione-o na janela PROJETO e depois novamente na janela ABRIR (consulte o passo ③...
- Page 30 はじめに この度は TORAIZ SP-16 および DJS-1000 をご購入いただきありがとうございます。 本書は、弊社が提供しているサウンドパック(デモプロジェクトファイル)を使用する際の手順書です。 ファームウェアバージョンを確認する TORAIZ SP-16 でプロジェクトファイルを利用するには、TORAIZ SP-16 のファームウェアバージョンが 1.40 以上である必要があります。TORAIZ SP-16 のファームウェアバージョンは以下の方法で確認できます。 [TORAIZ SP-16 のバージョン確認方法] 1.TORAIZ SP-16 の電源を ON してください。 2.HOME 画面で UTILITY を押すと、UTILITY 画面が表示されます。 3.ロータリーセレクターで画面をスクロールさせると、下から 2 番目に Version No.が表示されます。 ※ Version 1.40 以上であることを確認してください。古いバージョンをお使いの場合はこちらより最新のフ...
- Page 31 プロジェクトファイルを USB メモリーからロードする 解凍したプロジェクトファイルを USB メモリーにコピーして TORAIZ SP-16 および DJS-1000 で使用します。 ① USB メモリーに/PIONEER DJ SAMPLER/Projects というフォルダを作成し、解凍したプロジェクトファイ ルをコピーしてください。 [Windows] [Mac] ② プロジェクトファイルをコピーした USB メモリーを TORAIZ SP-16 または DJS-1000 に挿入します。 ③ [PROJECT]ボタンを押して[PROJECT]画面を開きます。 [PROJECT]ボタンを押す ④ [PROJECT]画面の[OPEN]を選択し、[OPEN]画面を開きます。 [OPEN]を選択 ⑤ [OPEN]画面のプロジェクトの中から解凍したプロジェクトを選択して TOARAIZ SP-16 または DJS-1000 にロードします。...
- Page 32 プロジェクトファイルを TORAIZ SP-16 内蔵フラッシュメモリーからロードする TORAIZ SP-16 の内蔵フラッシュメモリーにプロジェクトファイルをコピーして使用することができます。 (これは TORAIZ SP-16 のみの機能になります。) TORAIZ SP-16 の USB 端子とコンピューターを USB ケーブルで接続します。 [UTILITY]ボタンを押して[UTILITY]画面を開きます。 [UTILITY]ボタンを押す [UTILITY]画面の[USB MASS STORAGE MODE]を選択し[OK]ボタンを押します。 [USB MASSSTORAGE MODE]を選択 [OK]ボタンを押す コンピューターから本機の内蔵フラッシュメモリーにアクセスできるようになります。...
- Page 33 ・接続を切る場合は、コンピューターから切断の操作の後、ポップアップメニューに従って接続を切ってく ださい。 ・コンピューターとの通信中にケーブルを抜いたり、本機の電源をオフにしないでください。本機の管理デ ータが消去されることがあります。 解凍したプロジェクトファイルを本機内蔵フラッシュメモリーの/PIONEER DJ SAMPLER/Projects とい うフォルダにコピーしてください。 [Windows] [Mac] ※ 本機の内蔵フラッシュメモリーの空き容量が少ない場合、プロジェクトファイルをコピーできないこと があります。内蔵フラッシュメモリーのサンプル音源などをコンピューターに移動するなどして、空き 容量を増やしてください。 コピーが完了したら、コンピューターから本機を切断してください。 コンピューターから本機を切断した後、[CANCEL]ボタンを押してください。 [CANCEL]ボタンを押す これで本機内蔵フラッシュメモリーへのプロジェクトファイルのコピーが完了になります。 コピーしたプロジェクトを使用するには[PROJECT]画面-[OPEN]画面で該当プロジェクトを選択してくだ さい。(手順はプロジェクトファイルを使用するの③以降を参照ください。) 商標および登録商標について TORAIZ ロゴは、AlphaTheta 株式会社の商標です。 その他記載されている会社名および製品名等は、各社の登録商標または商標です。 © 2020 AlphaTheta 株式会社 禁無断転載...
Need help?
Do you have a question about the SP-16 and is the answer not in the manual?
Questions and answers