Table of Contents
Advertisement
Advertisement
Table of Contents

Summary of Contents for Hanchen BSM Series
- Page 1 Operation Instruction BSM Series Electronic Precision Balances...
-
Page 2: Table Of Contents
Contents Application· · · · · · · · · · · · · · · · · · · · · · · · · · · · · · · · · · · · · · · · · · · · · · · · · · · ·1 Safety Precautions·... -
Page 3: Application
BSM Series Electronic balance: fast weighing, simple operation, to predigest and accelerate the normal weighing process greatly. In order to ease your weighing work, BSM series also with the following function to meet your work needs: Weighing unit transfer ... -
Page 4: Safety Precautions
Safety Precautions Safety Instructions Please read these operating instructions carefully before using your balance to prevent damage to the equipment. Do not use this equipment in hazardous areas/locations. △ The balance housing may be opened only by authorized technicians who have been △... -
Page 5: Getting Started
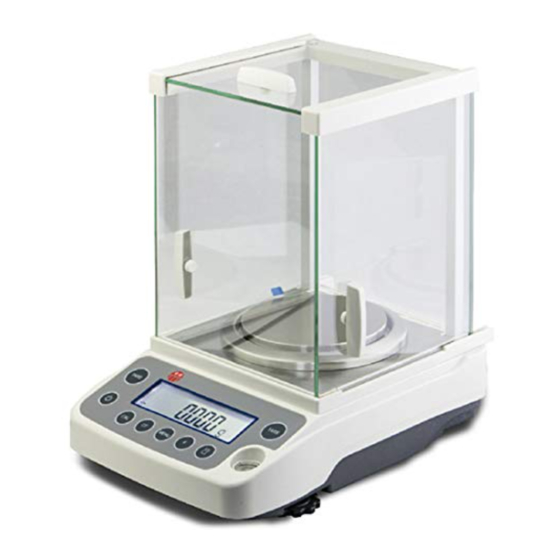
Getting Started Storage and Shipping Conditions Do not expose the balance to extreme temperatures, moisture, shocks, blows or vibration. Unpacking the Balance After unpacking the equipment, please check it immediately for any external damage. If damage is evident, refer to the instructions under “Safety Inspection" in the chapter entitled “Care and Maintenance."... - Page 6 Getting Started Installation Place components inside the chamber in the following order: Shield ring Pan support Weighing pan Place components inside the chamber in the following order: Weighing pan...
- Page 7 Getting Started Connecting the Balance to AC Power/Safety Precautions Use only original BSM power adapter. Insert the right-angle plug from the AC adapter into the jack on the balance. The AC adapter rated to Class can be plugged into any wall outlet without additional Ⅱ...
- Page 8 Getting Started Leveling the Balance Purpose: To compensate for unevenness at the place of installation Only the 2 front feet are adjusted to level the balance whose weighing capacity is below 2kg. Turn the 2 front feet as shown in the diagram until the air bubble is centered within the circle of the level indicator.
-
Page 9: Function Instruction
Function Instruction Overview of Display and Operating Elements Display/Panel instruction Position Designation 1. Weight units display. 2. Weight units display; additional information display. 3. Weight digits display. 4. Symbol for stand-by mode. 5. Tare/Zero key. 6. On /off key. 7. Calibration key. Start calibration/adjustment routine. 8. -
Page 10: Operation
Operation Basic weighing function Purpose The basic weighing function can be used alone or in combination with an application program(counting, weighing in percent, etc.). Features Taring the balance Printing weights Before using the balance at the first time, calibrate and adjust it at the place of use; For details, see “Calibration and Adjustment”... - Page 11 Operation Example Simple Weighing Settings: Application program: . (default setting) Step Key(or instruction) Display/Data output 1. Switch on the balance. [ ] Self-test is performed, followed by automatic initial tare function. 2. Place container on the balance (in this example,52 g). 3.
-
Page 12: Calibration And Adjustment
Operation Calibration and Adjustment Purpose Calibration is the determination of the difference between the weight result and the true weight(mass) of a sample. Calibration does not entail making any changes within the balance. Adjustment is the correction if any difference between the measured value display and the true weight(mass) of the sample, or the reduction of the difference to allowable level within the maximum permissible error limits. -
Page 13: External Calibration
Operation External Calibration The weight required for calibration/adjustment is defined in the factory settings (see “Specifications”). Step Key (or instruction) Display/Data output Zero the balance [TARE] Start calibration [CAL] PLEASE WAIT The balance will show “PLEASE WAIT”, after stable it will Display prompted calibration weight g CAL (In this sample, 200g) -
Page 14: Application Programs
Application Programs Application Programs Function Keys [F]key: Start application program/store component Toggle between units press and hold for 2 seconds change reference quantity (counting), reference percentage (weighing in percent) or number of measurements (animal weighing) [CF] key: End application program; delete Calculated values are alternately indicated with the following symbols: Percent = %... -
Page 15: Counting
Application Programs Counting Menu code: . . Display symbol: pcs Purpose With the Counting program you can determine the number of parts that each have approximately equal weight. To do this, a known number of parts (the reference sample quantity) is weighed first, and the individual piece weight (reference weight) is calculated from this result. - Page 16 Application Programs Example Counting parts of equal weight Settings: Menu: Counting program (menu code: . . ) Reference pieces:20 pieces(code . . ) Step Key (or instruction) Display/Data output 1.switch on the balance [ ] 2. Tare the balance. [TARE] 3.
-
Page 17: Weighing In Percent
Application Programs Weighing in Percent: Menu code: . . ) Purpose This application program allows you to obtain weight readouts in percent which are in proportion to a reference weight. Features Storage parameter (rounding-off factor) for storing the reference weight to calculate the percentage can be configured. - Page 18 Application Programs Example: Determining residual weight in percent Settings: Menu: Weighing in percent program (menu code: . . Reference percentage: ref 100% (Code: Step Key (or instruction) Display/Data output 1.Switch on balance. [ ] Tare the balance. [TARE] 3.Dislay refrence percentage. [F]>2 sec 4.Place on the weight, as reference percentage...
-
Page 19: Density Determination
Application Programs Density Determination: Menu code: . . ) Purpose This application program lets you determine the density of solid substance using the buoy- ancy method. You can have results displayed with one decimal place, or no decimal places: see “Configuration.” Note: the sample holder and suspension wire used in the example below are not included with the balance/scale. - Page 20 Application Programs Example: Determining the density of a solid sample. Settings: Menu: Density determination (menu code: . . Accuracy of result: 1 decimal point (Code: Step Key (or instruction) Display/Data output 1.Switch on balance. [ ] 2.Attach sample holder to suspension wire 3.Tare the balance.
-
Page 21: Animal Weighing/Averaging
Application Programs Animal Weighing/Averaging(Menu code: . . ) Purpose weights of unstable samples (e.g., live animals) or to determine weights under unstable ambient conditions. With this program, the balance calculates the weight as the average of a defined number of individual weighing operations (also referred to as “subweighing operations"). Features ... - Page 22 Application Programs Example Determining animal weight with automatic start of 10 subweighing operations Settings: : . . Menu: Animal weighing program (menu code Step Key (or instruction) Display/Data output 1. Switch on the balance. [ ] TARE 2. Tare the balance. [...
-
Page 23: Toggling Between Weight Units
Application Programs Toggling between weight units (Menu code: . . ) With this application program you can switch the display of a weight value back and forth between two weight units. Configure the “Toggle Weight Units" application in the Setup menu: : . -
Page 24: Balance Setting
Balance Setting Setting the Parameters (Menu Codes) Example: Adapting the balance to “very unstable" ambient conditions (menu code: . . ). Step Key (or instruction) Display/Data output 1. Switch off the balance. [ ] 2. Switch the balance on. [ ] 3. -
Page 25: Parameter Settings
Balance Setting Parameter Settings (Overview) o Factory setting √ User-defined setting Menu level 1 Menu level 2 Menu level 3 Menu level 4 Setup 1. Weighing 1.1Adapt filter 1.1.1 Very stable conditions 1.1.2 Stable conditions 1.1.3 Unstable conditions 1.1.4 Very unstable conditions 1.3Application 1.3.1 digit... - Page 26 Balance Setting Parameter Settings (Overview) o Factory setting √ User-defined setting Menu level 1 Menu level 2 Menu level 3 Menu level 4 Setup 6. Print for 6.1 Manual/Auto 6.1.1 Manual without stability Weighing with [ ] key 6.1.2 Manual after stability with [ ] key 6.1.3 Automatic without stability...
-
Page 27: Troubleshooting Guide
Troubleshooting Guide Troubleshooting Guide Error codes are shown on the main display for 2 seconds. The program then returns automatically to the weighing mode Display Cause Solution No AC power is available Check the AC power supply segments appear on the The power supply is not Plug in the power supply display... -
Page 28: Care And Maintenance
Care and Maintenance Repairs Repair work must be performed by trained service technicians. Any attempt by untrained persons to perform repairs may lead to hazards for the user. Cleaning Unplug the AC adapter from the wall outlet (mains supply). If you have an interface cable connected to the balance port, unplug it from the port. -
Page 29: Overview
Over-view BSM Series Balance Manual Calibration(0.1mg) ASIN B01MU940MZ B01N4MGT4H Model Unit BSM-120.4 BSM-220.4 Accuracy class Scale interval (d) Verification scale interval (e) Maximum capacity (Max) Overload Alarm Max +9d Max +9d Zero range 0≤m≤50g 0≤m≤50g ±0.5mg ±0.5mg m≤200g < Maximum allowed tolerance m≤120g... - Page 30 Display update External calibration weight (of at least 100(E 200(E accuracy class…) Net weight, approx. Pan size (inner diameter) Ф90 Ф90 Weighing chamber height (from pan to cover) Dimensions (W+D+H) 210×280×350 210×280×350 AC power source/ Power V~ AC adapter,,AC(100~240)V requirements Frequency (50~60)Hz DC power source...
- Page 31 200g 200g 200g 200g 200g < < < < < m≤220g m≤320g m≤420g m≤520g m≤420g ±15mg ±15mg ±15mg ±15mg ≤15mg 0≤m≤50g ≤5mg Repeatability 50g<m≤200g ≤10mg error 200g 200g 200g 200g 200g < < < < < m≤220g m≤320g m≤420g m≤520g m≤420g ≤15mg ≤15mg...
- Page 32 Weighing chamber height (from pan to cover) Dimensions 210×280×350 (W+D+H) AC power source/ V~ AC adapter,,AC(100~240)V Power requirements Frequency (50~60)Hz DC power source /Power requirements Power consumption Manual Calibration(10mg) ASIN B076D7JX1L B076D7JL42 B076DFFRQ5 B076D89CTV B076DCQFRM Model BSM-2200.2 BSM-3200.2 BSM-4200.2 BSM-5200.2 BSM-6200.2 Accuracy class Scale interval (d) Verification scale...
- Page 33 0≤m≤500g ±50mg Maximum 500g<m≤2000g ±100mg allowed tolerance 2000g 2000g 2000g 2000g 2000g < < < < < m≤2200g m≤3200g m≤4200g m≤5200g m≤6200g ±150mg ±150mg ±150mg ±150mg ±150mg 0≤m≤500g ±50mg Repeatability 500g<m≤2000g ±100mg error 2000g 2000g 2000g 2000g 2000g < < <...
- Page 34 Pan size (inner 180×180 diameter) Weighing chamber height (from pan to cover) Dimensions 210×280×80 (W+D+H) AC power source/ AC adapter, AC(100~240)V Power requirements Frequency (50~60)Hz DC power source /Power requirements Power consumption...
Need help?
Do you have a question about the BSM Series and is the answer not in the manual?
Questions and answers