
Subscribe to Our Youtube Channel
Summary of Contents for McLaughlin VX30 Series
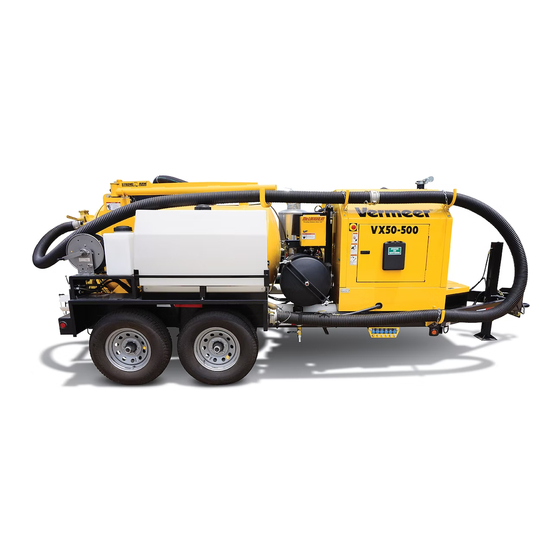
- Page 1 VX30 / VX50 Gen3 / ECO50 Vacuum Excavators Operator’s and Maintenance Manual EN_o-m1_00 original instructions Serial No. 5001 - Order No. 105400ES7 Cabled Assembly No. E850014...
- Page 2 OTICE TO WNER Replacement manuals are free of charge by registering your used McLaughlin machine by contacting Vermeer Corporation. To request printed McLaughlin manuals, or to register a used McLaughlin machine, contact the Data Analytics Department by telephone: 800-829-0051 or 641-628-3141; email: dataalanalytics@vermeer.com; internet: www.vermeer.com...
- Page 3 REAR RADEMARKS VERMEER and VERMEER Logo are trademarks of Vermeer Manufacturing Company. MCLAUGHLIN, MCLAUGHLIN Logo, and STRONG ARM are trademarks of McLaughlin Group, Inc. KUBOTA is a trademark of Kubota, Ltd. DYNABLAST is a trademark of Kockner-Humboldt-Deutz. SHO-ME is a trademark of Able 2 Products Company, Inc.
- Page 4 Vermeer dealer. The warranty repair or replacement must be made by a Vermeer independent authorized dealer at the dealer’s location. McLaughlin will pay for replacement parts and such authorized dealer’s labor in accordance with McLaughlin’s labor reimbursement policy on CORE SAWS and VACUUM EXCAVATORS. McLaughlin will pay for replacement parts ONLY on PIERCING TOOLS.
- Page 5 The warranties contained herein shall NOT APPLY TO: (1) Any defect which was caused (in McLaughlin’s sole judgment) by other than normal use and service of the Industrial Equipment, or by any of the following; (i) accident (ii) misuse or negligence (iii) overloading (iv) lack of reasonable and proper...
- Page 6 (12) Depreciation damage caused by normal wear, lack of reasonable and proper maintenance, failure to follow operating instructions, misuse, lack of proper protection during storage is not covered by this Limited Warranty. (13) Accessory systems and electronics not of McLaughlin’s manufacture are warranted only to the extent of such manufacturer’s respective Limited Warranty, if any.
- Page 7 NO DEALER WARRANTY. The selling dealer makes no warranty of its own and the dealer has no authority to make any representation or promise on behalf of McLaughlin or to modify the terms or limitations of this warranty in any way.
- Page 8 This page intentionally left blank.
-
Page 9: Receiving And Delivery Report
Receiving and Delivery Report EALER Check or perform the following: Engine ___ Check battery electrolyte level and state of charge. ___ Check air cleaner condition. ___ Check engine oil level. ___ Check engine operation. ___ Check gauges for proper operation. General ___ Check that all optional and loose items are included with the machine. - Page 10 ___ Check condition of safety signs and operating decals. ___ Check operation of highway lights. ___ Check that towing hitch and safety towing chains are installed. ___ Check brakes for proper operation. ___ Check that breakaway brake switch is installed and functions. ___ Check all phases of operation.
-
Page 11: Delivery
ELIVERY Check and perform the following with the customer: Machine ___ Review all sections of the Operator’s and Maintenance Manual. ___ Grease or oil all lubrication points. Review of Operation Review and demonstrate with the owner the various aspects of the vacuum excavation system: ___ overview of how the vacuum/excavation system works ___ vacuum/excavation system safety ___ filling spoil tank... -
Page 12: Dealer/Owner Information
EALER WNER NFORMATION dealer owner address address city city state / province state / province zip / postal code zip / postal code country country phone number phone number email address email address iv Receiving and Delivery Report VX30/VX50 Gen3/ECO50 Vacuum Excavators... -
Page 13: Identification Numbers - Record
DENTIFICATION UMBERS ECORD Machine Model Number Serial Number VIN Number (Trailered Units) VX30/VX50 Gen3/ECO50 Vacuum Excavators Receiving and Delivery Report v... - Page 14 Engine Model Number Serial Number Kubota Series 03 49-hp Kubota Series 05 24.8-hp • located on mounting • located below exhaust manifold High CFM surface of injection pump over crankcase, flywheel side vi Receiving and Delivery Report VX30/VX50 Gen3/ECO50 Vacuum Excavators...
-
Page 15: Table Of Contents
Table of Contents Receiving and Delivery Report......i Tank Valves ....... . 20-11 Dealer Prep . - Page 16 Shutdown Procedure ......23-1 Prepare the Machine ......40-14 Stopping the Machine .
- Page 17 Machine - Clean....... . .50-22 Machine Components - Check/Clean... . . 60-25 Spoil Tank - Clean .
- Page 18 Belts - Inspect ....... 60-44 Belt Maintenance ......60-54 Maintenance - 1000 Service Hours or Yearly .
-
Page 19: Safety Messages
Safety Messages Section 10: General safety messages appear in this Safety Messages section. Specific safety messages are located in appropriate sections of the manual where a potential hazard may occur if the instructions or procedures are not followed. A signal word “DANGER”, “WARNING”, or “CAUTION” is used with the safety alert symbol. Safety signs with signal word “DANGER”, “WARNING”, or “CAUTION”... - Page 20 WARNING: Read manual. Death or serious injury may result. Read and understand all safety and operating instructions before operating any equipment. WARNING: Check machine before operating. Machine must be in good operating condition and all safety equipment installed and functioning properly. WARNING: Always wear personal protective equipment (PPE).
- Page 21 WARNING: Engine exhaust can asphyxiate or poison, resulting in death or serious injury. Operate machine outdoors. If it is necessary to operate engine in an enclosed area, properly vent exhaust gases. WARNING: Moving parts. Death or serious injury may result. Stop engine before servicing.
- Page 22 WARNING: FIRE OR EXPLOSION POSSIBLE. Do not vacuum flammable or combustible substances. WARNING: Pressurized fluid can penetrate body tissue and result in serious injury or death. Leaks can be invisible. Keep away from any suspected leak. Relieve pressure in the hydraulic system before searching for leaks, disconnecting hoses, or performing any other work on the system.
- Page 23 WARNING: Entanglement hazard. Rotating pulleys and belts could cause serious injury. Do not operate without guards in place. DANGER: Suffocation hazard. Vacuum hoses will cause death or serious injury. Keep hoses and tools away from face and body. DANGER: Crushing weight. Spoil and door will cause death or serious injury. Stay away from door when dumping.
- Page 24 WARNING: Crushing weight. Death or serious injury could result. Empty tank before servicing. Always install safety bar when working on raised tank. DANGER: Explosion hazard! Contents under pressure! Relieve tank pressure before opening. Failure to comply will result in death or serious injury.
- Page 25 DANGER: Electrocution hazard. Death or serious injury will result if boom approaches or touches energized overhead electrical power lines. Keep boom away from overhead utilities. Use caution when operating boom. WARNING: Electric shock or gas explosion can kill. Locate Utilities. Call 811.
- Page 26 WARNING: Never direct high pressure spray toward any live electrical equipment or outlets. A severe shock and personal injury may result. WARNING: When Regen Active Icon is displayed, the exhaust gas temperature could exceed 1100°F (600°C) during regeneration. High temperature may cause fire, burn, or explosion hazards, which may result in death or personal injury.
- Page 27 WARNING: Flammable fumes. Fumes may explode or catch fire. Keep away from sparks and open flame. Battery acid. Battery acid can burn skin and eyes. Protect face, hands and body when servicing. WARNING: Battery post, terminals, and related accessories contain lead and lead compounds, chemicals known to the state of California to cause cancer and reproductive harm.
-
Page 28: Crystalline Silica
RYSTALLINE ILICA WARNING: Breathing crystalline silica puts workers at increased risk of developing serious silica-related diseases including: silicosis, lung cancer, kidney disease, Chronic Obstructive Pulmonary Disease (COPD). Death or serious illness could result. Avoid exposure to crystalline silica dust according to OSHA guideline 29 CFR 1926.1153. Breathing crystalline silica dust over time can cause silicosis, a disabling, non-reversible, and sometimes fatal disease of the lungs. -
Page 29: Fire Extinguisher
Be aware of and follow the guidelines of United States OSHA 29 CFR 1926.55 and 1926.1153, or other applicable regulatory guidelines. This includes having a jobsite plan for mitigating hazards. A jobsite plan can include jobsite dust reduction measures including water spray, vacuum, or other •... - Page 30 This page intentionally left blank.
-
Page 31: Diesel Fuel Requirements
Section 12: Diesel Fuel Requirements IESEL ULFUR ONTENT Tier 3/Stage IIIA Engines: Use diesel fuel with sulfur content less than 5,000 ppm or (5000 mg/kg). Diesel fuel with a sulfur content of less than 1,000 ppm (1000 mg/kg) is strongly recommended. Contact your engine dealer if local fuel supplies have a sulfur content greater than 5,000 ppm (5000 mg/kg). - Page 32 This page intentionally left blank.
-
Page 33: Intended Use
Section 15: Intended Use The McLaughlin VX30/VX50 Gen3 and ECO50 Vacuum Excavators are designed solely for use in removing earth, mud, and soil materials in excavation, using suction. These systems use pressurized water to break up materials to be vacuumed. - Page 34 This page intentionally left blank.
-
Page 35: Controls
Controls Section 20: AUGES Vacuum Pressure ........Water Pressure. - Page 36 (VX50) Hydraulic Filter Bypass Gauge ..... . Change hydraulic filter when needle reaches red area on gauge. (VX50) Hydraulic Fluid Level Gauge ......20-2 Controls VX30/VX50 Gen3/ECO50 Vacuum Excavators...
-
Page 37: Indicators
NDICATORS VX30 Indicators High Engine Coolant Temperature Red light comes ON when coolant temp. exceeds prescribed level. Remove engine load, idle engine at least 5 minutes, then turn engine OFF. Refer to Engine Operation Manual. Low Engine Oil Pressure Red light comes ON when engine oil pressure drops below prescribed level. -
Page 38: Vx50/Eco50 Lcd Display
VX50/ECO50 LCD Display Refer to Electronic Controller, page 21-1, for information about the LCD Display (1). 20-4 Controls VX30/VX50 Gen3/ECO50 Vacuum Excavators... -
Page 39: Kubota Engine Controls
UBOTA NGINE ONTROLS Keyswitch (Engine Ignition) ......Counterclockwise from vertical ....engine preheat 1st position clockwise (vertical) . - Page 40 Emergency Stop Switch Push in ........turn engine OFF Pull out .
-
Page 41: Vx50/Eco50 Lcd Display Engine Screen
VX50/ECO50 LCD Display Engine Screen Refer to “Engine Screen,” page 21-4, for information about the LCD Display Engine Screen (1). VX30/VX50 Gen3/ECO50 Vacuum Excavators Controls 20-7... -
Page 42: Switches
WITCHES Tank Dump Switch ........Press top. - Page 43 Water Pump Switch (VX30) ....... Press top ........water pump ON Press bottom .
- Page 44 Antifreeze Switch (VX30) ....... . Press top and hold ..... . . antifreeze system ON Release switch to turn antifreeze system OFF Hydraulic Jack Switch (Option) .
-
Page 45: Valves
ALVES Tank Valves (1) Upper Gate/Inlet Valve ........Rotate clockwise . - Page 46 Reverse Flow Control Valve ......Rotate CW, secure pin in Pressure slot ..pushes air out of spoil .
- Page 47 Vacuum Relief Valve Valve controls the maximum amount of vacuum (negative pressure) in the system. Valve opens when vacuum limit is reached in the spoil tank. Pressure Relief Valve Valve controls the maximum amount of positive pressure in the system. VX30/VX50 Gen3/ECO50 Vacuum Excavators Controls 20-13...
-
Page 48: Water System Valves
Water System Valves Water Supply Valve Rotate in-line with valve body ..open - supply water to pump Rotate perpendicular to valve body ..close - shut off water Water Tank Drain Rotate in-line with valve body . - Page 49 Tank Cleanout Valve Rotate in-line with valve body..open - clean out spoil tank Rotate perpendicular to valve body ... . . close - not in use Antifreeze Tank Valve.
-
Page 50: Spoil Tank Safety Brace
POIL AFETY RACE Install red safety brace (1) over spoil tank lift cylinder (3) rod before working near or under the raised tank. Secure brace with safety snap pins (2). The brace does not need to be installed when dumping the spoil tank. Store beneath tank lid bar as shown when not in use. -
Page 51: Hose Reel
Hose Reel Lock Pin ........Pull out . -
Page 52: Remote Control - Boom (Option)
EMOTE ONTROL PTION Hydraulic Rotation Boom Power ON/OFF Boom Raise Boom Lower Boom Extend Boom Retract Boom Rotation CW Boom Rotation CCW Gate Valve Open/Close Battery Power Level Indicator Green light indicates sufficient battery power. (10) Signal Indicator Green flashing light indicates connectivity. Red light indicates no connection. -
Page 53: Manual Rotation Boom
Manual Rotation Boom Power ON/OFF Boom Raise Boom Lower Boom Extend Boom Retract Brake ON/OFF Gate Valve Open/Close Battery Power Level Indicator Green light indicates sufficient battery power. Signal Indicator Green flashing light indicates connectivity. Red light indicates no connection. VX30/VX50 Gen3/ECO50 Vacuum Excavators Controls 20-19... -
Page 54: Manual Override Boom Controls
Manual Override Boom Controls The Manual Override Boom controls provide a means to move the boom to storage position if remote control is inoperable or lost. Boom Raise/Lower Press top ........raise boom Press bottom . - Page 55 Boom Gate Open/Close Press top ........close gate Press bottom .
-
Page 56: Arrow Board (Optional)
RROW OARD PTIONAL The arrow board is located at the back of the machine, on top of the spoil VX30 tank. Flashing arrow lights alert oncoming motorists and direct traffic flow around the machine when working on or near a roadway. VX30 Arrow Board Controls The small yellow lights at the top of control panel display the selected light pattern. -
Page 57: Vx50 Arrow Board Control Screen
VX50 Arrow Board Control Screen Left Arrow ON/OFF Switch ....... Press to turn left arrow ON or OFF. -
Page 58: Lights
IGHTS Machine is equipped with a standard amber warning beacon. Optional red marker lights and work light, all mounted on the top of the spoil tank, are available. Warning Beacon Amber warning beacon flashes whenever engine ignition key is ON. Work Light Work light for use in low-light conditions is operated by a Work Light Switch mounted on the control panel. -
Page 59: Electronic Controller
Electronic Controller Section 21: VX50/ECO50 LCD D ISPLAY The “System Booting” screen displays for 3 seconds, then automatically switches to the main engine screen shown below. Antifreeze/Water ON/OFF Switch Icon displays Water On when water level is low in the fresh water tank. - Page 60 Request DPF Regen Press and hold for 1/2 second to request a DPF Regen. This switch is only visible when the engine is running, Regen conditions are met, and a Regen cycle is not in progress. Request DPF Regen Inhibit Press and hold 1/2 second to prevent automatic DPF Regen.
-
Page 61: Gauges
Gauges Not currently used. Refer to “Gauges,” page 20-1, for current vacuum pressure gauge. Fuel Level (VX50/ECO50) VX30/VX50 Gen3/ECO50 Vacuum Excavators Electronic Controller 21-3... -
Page 62: Engine Screen
Engine Screen Engine Oil Pressure Gauge Displays engine oil pressure. Engine Oil Pressure Indicator lights when oil pressure drops below prescribed level. Battery Charge Gauge Displays battery charge. Battery Charge Low Indicator lights when battery charge drops below prescribed level. Engine Tachometer Displays engine speed in RPM. -
Page 63: Indicators
Indicators Spoil Tank Full When lit, indicates the spoil tank is full of wet material. Engine shuts down if Spoil Tank Full Override is not on. When vacuuming dry materials, the Tank Full shutdown sensor does not function. Spoil Tank Full Override When lit, indicates the Spoil Tank Full Override is on. - Page 64 Fuel Sender Error When lit, indicates fuel sender signal is out of range. Full = 240 ohms, Empty = 33 ohms OK to Start Green light comes ON to indicate engine can be started/cranked. Displays where “Wait to Start” message appears at top of screen. (10) J1939 Error Red light comes ON to indicate a communications error with the engine ECU.
- Page 65 (12) DPF Regen Active/High Exhaust Temperature Displays to show that a regeneration is active, and to indicate higher than normal exhaust temperatures may exist due to DPF regeneration. Indicator turns off when regeneration is complete. Refer to Safety Messages, page 10-1, for associated warning.
- Page 66 This page intentionally left blank.
-
Page 67: Starting Procedure
Starting Procedure Section 22: WARNING: Read Operator’s Manual and safety signs before operating machine. WARNING: Entanglement hazard. Rotating pulleys and belts could cause serious injury. Do not operate without guards in place. TARTING THE NGINE Step 1: Open Upper Gate/Inlet Valve (1). Step 2: Ensure Reverse Flow Control Valve (2) is in NEUTRAL position. -
Page 68: Cold Weather Starting
Step 3: Turn ignition key to ON position and hold until Wait to Start indicator (3) changes to OK to Start indicator (4). Step 4: Turn ignition key to starting position to start engine. Release key once engine starts. Step 5: Check that oil pressure lamp (5) and charge lamp (6) are off. -
Page 69: Jump-Starting
TARTING Battery Explosion - Avoid WARNING: Battery fumes are flammable and can explode. Keep all burning materials away from battery. Battery explosion can blind. Acid can blind and burn. Tools and cable clamps can make sparks. Do not smoke. Shield eyes and face. Read instructions. Do not jump-start or charge a battery that is frozen or low on electrolyte. -
Page 70: Jump-Starting Procedure
Jump-Starting Procedure WARNING: Battery post, terminals, and related accessories contain lead and lead compounds, chemicals known to the state of California to cause cancer and reproductive harm. Wash hands after handling. Step 1: Turn Keyswitch OFF. Step 2: Connect jumper cables in the following order: DISCHARGED a. -
Page 71: Shutdown Procedure
Section 23: Shutdown Procedure TOPPING THE ACHINE NOTICE: For your safety and the safety of others, use the shutdown procedure before servicing, cleaning, unclogging, or inspecting the machine. A variation of this procedure may be used if instructed within this manual, or if an emergency requires it. Step 1: Reduce engine speed to idle. - Page 72 This page intentionally left blank.
-
Page 73: Transporting The Machine
However, NHTSA cannot become involved in individual issues between you, your dealer or McLaughlin Group, Inc. To contact NHTSA, you may either call the DOT Auto Safety Hotline toll-free at 1-888-DASH-2DOT (1-888-327- 4236), or file a report on-line at: https://www-odi.nhtsa.dot.gov/VehicleComplaint/, or write to: NHTSA, U.S. -
Page 74: Towing Vehicle Selection
OWING EHICLE ELECTION WARNING: Loss of steering or braking control can cause death or serious injury. Use a towing vehicle that is large enough for sufficient steering and braking control. • Towing Vehicle: The towing vehicle should have sufficient suspension capacity to resist downward loads at the hitch during transportation. -
Page 75: Trailer Breakaway Brake
RAILER REAKAWAY RAKE WARNING: Do not use breakaway device as a park brake. The trailer provided with the machine is equipped with a breakaway brake system. The breakaway brake engages if the trailer ever separates from the towing vehicle. VX30/VX50 Gen3/ECO50 Vacuum Excavators Transporting the Machine 30-3... -
Page 76: Prepare Machine For Transport
REPARE ACHINE FOR RANSPORT DANGER: ELECTROCUTION HAZARD. Death or serious injury will result if boom approaches or touches overhead electrical power lines. Keep boom away from overhead utilities. Use caution when operating boom. Before transporting the machine: • Ensure all machine components and tooling are stored properly. Secure all tools and accessories carried on the vehicle. -
Page 77: Vacuum Excavator Tools - Store For Transport
Vacuum Excavator Tools - Store for Transport Tools/Hoses Spray Wand and Lance Boom Hoses Place tools in storage tubes or brackets and secure with lock pins. Note that storage locations may vary by model and configuration. VX30 VX50 VX50 VX30/VX50 Gen3/ECO50 Vacuum Excavators Transporting the Machine 30-5... -
Page 78: Boom (Option) - Store For Transport
Boom (Option) - Store for Transport If equipped with a boom (1), stow and lock boom in transport position as follows: Step 1: Start machine, and move throttle to high speed. Hydraulic rotation boom: Step 2: Using remote control, retract boom, then raise boom until it clears any obstructions in travel path. -
Page 79: Strong Arm (Option) - Store For Transport
Strong Arm (Option) - Store for Transport WARNING: Swinging arm. Serious injury will result. Arm can swing when tank is raised. Always lock Strong Arm in position when not in use. NOTICE: Strong Arm is not available on skid units. STOWED POSITION Strong Arm (1) must be locked in transport position before transporting machine. -
Page 80: Attach To Towing Vehicle
TTACH TO OWING EHICLE WARNING: Safety towing chains may uncouple from towing vehicle if chain hook latches are damaged or missing. Do not tow vehicle with damaged or missing hook latches. NOTICE: It is recommended that towing vehicle be equipped with mud flaps. Hitch Height - Adjust Before attaching the machine to the towing vehicle, compare height of towing vehicle hitch to the trailer hitch. -
Page 81: Pintle Ring - Attach
Pintle Ring - Attach Pull up on release lever and pull back latch assembly (1) to open. Step 1: Place pintle ring over the hitch. Step 2: Step 3: Push latch assembly forward and down until release lever is in locked position. -
Page 82: Jack - Raise
Jack - Raise Turn handle (1) and raise jack. Step 1: Pull pin (2) at base of jack. Step 2: Step 3: Fully raise jack foot. Step 4: Insert pin. If equipped with hydraulic jack (3), use switch (4) to raise jack. 30-10 Transporting the Machine VX30/VX50 Gen3/ECO50 Vacuum Excavators... -
Page 83: Disconnecting From The Towing Vehicle
ISCONNECTING FROM THE OWING EHICLE DANGER: Crushing weight. Rolling or tilting trailer will cause death or serious injury. Chock towing vehicle and trailer wheels, and apply park brake before operating or servicing. Do not operate unless attached to the towing vehicle. Step 1: Park on a flat, level site before disconnecting vacuum unit from towing vehicle. -
Page 84: Skid Units - Truck/Trailer Mounting
NITS RUCK RAILER OUNTING Transport Vehicle Selection Truck or trailer selection requires careful study of both the gross weight involved, and the way the weight is distributed. Ensure transport vehicle is rated high enough to carry the system load. Truck Weight properly distributed to front and rear axles: •... - Page 85 WARNING: Not a lift point for equipment. Heavy load can fall and cause possible death or serious injury. Lift equipment at designated points. See equipment manual(s) for lift points. Safety signs are located on front and rear of trailer. Installation WARNING: Before mounting on a truck or trailer, read the truck or trailer manual for safety precautions and information.
-
Page 86: Transporting/Storing Machine In Freezing Conditions
RANSPORTING OR TORING ACHINE IN REEZING ONDITIONS NOTICE: Do not let water pump run dry. Ensure antifreeze level is visible at all times. Running the water pump dry will result in water pump damage. All vacuum excavators equipped with a water system must be filled with antifreeze if being transported or stored in freezing conditions. - Page 87 Step 7: Fill the antifreeze tank. Open Antifreeze ball valve (4). Open Upper Gate/Tank Inlet valve (5). Step 8: Step 9: Start engine, and set throttle at low speed. Step 10: Open Hose Reel ball valve (6). Step 11: Turn Water Pump Switch (7) on. VX30: Press and hold Antifreeze Switch (8).
- Page 88 Step 15: Open Lower Gate/Drain valve (10). Open Tank Cleanout valve. Press and hold Antifreeze Switch or Button on LCD screen. Step 16: Step 17: Watch fluid flow from Lower Gate/Drain valve. As soon as antifreeze emerges, release Antifreeze Switch/Button. Close Lower Gate/Drain valve and Tank Cleanout valve.
-
Page 89: Preparing Machine And Work Area
Section 40: Preparing Machine and Work Area PERATOR UALIFICATIONS WARNING: Read Operator’s and Maintenance Manual and safety signs before operating machine. Allow only responsible, properly instructed individuals to operate machine. Become familiar with the controls, operation and use of the machine under the supervision of a trained and experienced operator. -
Page 90: Personal Protective Equipment
ERSONAL ROTECTIVE QUIPMENT WARNING: Wear required personal protective equipment. Always wear a hard hat, wraparound eye protection or goggles, and hearing protection. When warranted wear full face shield, electrically insulated gloves, and electrically insulated boots. Wear close-fitting clothing and confine long hair. Avoid jewelry, such as rings, wristwatches, necklaces, or bracelets. - Page 91 Eye protection must consist of wraparound safety glasses or goggles, and if conditions warrant, a full face shield. WARNING: Thrown material can result in eye and face injuries. Use eye and face protection. NOTICE: Face shields must meet ANSI Standard Z87.1 - 2010 ‘Face shields’, and must be marked ‘Z87+’. Face shields are available from various sources, including Vermeer dealers.
-
Page 92: Sound Levels
OUND EVELS Sound pressure and sound power levels were determined according to test procedures specified in ISO 3744 and ISO 6394. Equivalent Continuous A-Weighted Sound Pressure: at Operator’s Ear ..........not available at time of printing at Operator’s Station . -
Page 93: Locate Buried Utilities
Locate Buried Utilities Call Your One-Call System First WARNING: Striking an electrical line can cause electrocution. Striking gas line can cause an explosion. Cutting a fiber optic cable could result in eye damage caused by laser light. Death or serious injury possible. Locate utilities before digging. - Page 94 Look for Evidence of Underground Placement Visually check for: • notices of underground placements • manhole covers • drop boxes • recent trenching activity Mark Excavation Area WARNING: When exposing utility lines for avoidance in a digging application, verify exposed line is the correct line.
-
Page 95: Striking A Utility
Striking a Utility WARNING: Striking an electrical line with a vacuum excavation tool or lance/wand can result in electrocution. Death or serious injury could result if not wearing electrically insulated gloves and boots. Ensure operators wear proper personal protective equipment. If strike occurs, do the following: •... - Page 96 DANGER: Working where flammable gas is present or striking a gas line could result in an explosion. Death or serious injury could result from flying debris, burns or force of explosion. Immediately shut off engine, evacuate area, and contact utility company. Do not return until utility company gives permission to do so.
-
Page 97: Electrocution Prevention
Electrocution Prevention DANGER: Electrocution is possible. Contact with electric lines will cause death or serious injury. Locate all underground utilities. Always wear proper personal protective equipment. DANGER: When vacuum excavating near energized electric lines, wear dielectric boots and gloves. Refer to the operating instructions, and take these precautions to prevent electrocution: •... - Page 98 Electrically Insulated Gloves If electrically insulated gloves are not available locally, they can be obtained through Vermeer Corporation. Rubber electrically insulated gloves, when in good condition and correctly used, help protect the wearer from death, serious injury, and electrical burns. Gloves must be at least Class 2, with a voltage rating of 17,000 volts or more.
- Page 99 Electrically Insulated Gloves - Inspect Visually inspect insulated gloves and leather protectors before each use. • Check for signs of physical damage or chemical deterioration such as swelling, softness, hardening, stickiness, ozone deterioration, or sun-checking from prolonged exposure to sunlight. •...
-
Page 100: Jobsite Assessment
Electrically Insulated Boots If electrically insulated boots are not available locally, they can be obtained through Vermeer Corporation. Rubber electrically insulated boots, when in good condition and correctly used, also protect the wearer from death, serious injury, and electrical burns. The boots must meet or exceed electrical hazard protection requirements when tested at 14,000 volts. - Page 101 When work is planned inside or around structures such as buildings, bridges, and low-hanging tree limbs, check for adequate overhead and side clearances. Be sure to account for the height of the boom or Strong Arm. WARNING: Engine exhaust can asphyxiate. If inhaled directly or continuously, the combustion fumes produced by the engine can be very dangerous and/or lethal for the human body.
-
Page 102: Prepare The Machine
REPARE THE ACHINE WARNING: Check machine before operating. Machine must be in good operating condition and all safety equipment installed and functioning properly. DANGER: Crushing weight. Rolling or tilting trailer will cause death or serious injury. Chock tires and apply parking brake before operating or servicing. Do not operate unless attached to the towing vehicle. -
Page 103: Water Pump & Blower Oil Level - Check
Water Pump & Blower Oil Level - Check Water Pump Fill Cap/Dipstick Blower/Vacuum Pump Fill Ports Fill at each breather port to middle of sight glass (A). Fill each gear end separately. Do not fill past middle of each sight glass. Watch for leaks. -
Page 104: Fresh Water Tank(S) - Fill
Fresh Water Tank(s) - Fill The vacuum excavating system may be equipped with water tank(s) as listed below. Ensure water tank(s) are at least half full before potholing. Fill tank with clean water through tank lid (1) or fill inlet (2). NOTICE: The water should not contain contaminants such as salt, calcium, or debris that might plug the nozzles. -
Page 105: Water Tank In-Line Strainer - Clean
Water Tank In-Line Strainer - Clean Clean water strainer daily before starting the machine, or during operation if water flow becomes restricted. Step 1: Close Water Supply valve (1). Step 2: Remove plug-and-cap fitting (2) from strainer housing. Step 3: Remove and clean screen (3) by flushing with water. - Page 106 This page intentionally left blank.
-
Page 107: Operating The Vacuum Excavator
Operating the Vacuum Excavator Section 50: EATHER RECAUTIONS Use antifreeze when the temperature drops below freezing. Immediately after using water tools, flush water system with antifreeze. Refer to “Transporting or Storing Machine in Freezing Conditions,” page 30-14, for instructions. PERATING EATURES Water Tank Low Level Sensor The water tank is equipped with a low water sensor switch (1). -
Page 108: Pressure Relief Valves
Pressure Relief Valves The system includes a Pressure Relief valve (2), preset to relieve positive system pressure at 5 psi (34 kPa). Vacuum Relief Valves The system includes a Vacuum Relief valve (3) preset to relieve vacuum (negative) system pressure at 15" HG standard, or 13" HG for high altitude conditions, with a tolerance of +/- 1"... -
Page 109: Additional Options
DDITIONAL PTIONS Additional machine options include: Hotbox Water Heater The hotbox (1) heats water up to 100°F (38°C) or 165°F (74°C) to improve digging in cold weather conditions. Arrow Board Flashing arrow board lights (2) alert oncoming motorists and direct traffic flow around the machine when working on or near a roadway. -
Page 110: Vacuum Hoses And Tooling - Connect
ACUUM OSES AND OOLING ONNECT Step 1: Remove vacuum hose from storage. Step 2: Install hose end into coupler on Upper Gate/Tank Inlet port (1). Lock cam levers. Step 3: If equipped with a boom, install hose end into coupler on end of arm. Lock cam levers. -
Page 111: Operating Instructions
PERATING NSTRUCTIONS WARNING: Read manual. Death or serious injury may result. Read and understand all safety and operating instructions before operating any equipment. WARNING: Striking an electrical line with a vacuum excavation tool or lance/wand can result in electrocution. Death or serious injury could result if not wearing electrically insulated gloves and boots. - Page 112 WARNING: Fire or explosion can kill. Do not vacuum hazardous or flammable material. Consult federal, state, and local regulations regarding classifications of hazardous material. WARNING: Do not operate unit where flammable gas is present. These instructions assume that all of the preparation procedures have been followed. Refer to Preparing Machine and Work Area, page 40-1.
-
Page 113: Operating Precautions
Operating Precautions • Verify that spoil tank rear door is shut, locked, and properly sealed. • Open Upper Gate/Inlet valve (1) to vent tank before starting engine. Close valve after engine has started. • Ensure Lower Gate/Drain valve (2) is closed. High pressure water can cut utility lines. -
Page 114: Material Disposal
Material Disposal • Know the contents of the material being excavated or remediated. • Know the local regulations for disposal of liquid material and/or mud. Know the place and plan for disposal of the material in the spoil tank. • Operation - Potholing Perform potholing excavation using the rotary nozzle lance (1) with vacuum tooling, or optional “one-man”... - Page 115 Step 1: Follow all instructions in “Prepare the Machine,” page 40-14, to correctly position machine. Step 2: Follow the “Starting Procedure,” page 22-1. Follow necessary traffic control measures. Step 3: Step 4: If potholing in a grassy area: Use a spade or other appropriate digging tool to loosen and remove the grass plug over the area to be excavated.
- Page 116 WARNING: High pressure water can penetrate skin. Serious injury possible. Keep nozzles away from body. Wear protective clothing. Fluid injected under the skin must be removed immediately by a surgeon familiar with this type of injury. Place Reverse Flow Control (6) in Step 6: Vacuum position.
- Page 117 Step 10: As digging continues to expose the utility, be aware of changes in soil conditions. A soft area that allows faster penetration typically means the tool is approaching the utility. Step 11: When resistance is encountered, stop. Remove the tool from the pothole and identify the utility or obstruction.
-
Page 118: Operation - Vacuum Excavation
Operation - Vacuum Excavation During vacuum excavation, the vacuum tool uses a powerful air stream to remove wet or dry material. DANGER: Vacuum can suffocate or damage vision or hearing. Keep hose end away from face. Step 1: Follow all instructions in “Prepare the Machine,” page 40-14, to correctly position machine. - Page 119 Step 5: Place Reverse Flow Control (2) in Vacuum position. Open Upper Gate/Tank Inlet Valve. Step 6: As long as vacuum hose is connected to the spoil tank and the engine is running, the vacuum tool will be vacuuming. To stop vacuuming, turn off engine.
-
Page 120: Unplugging Vacuum Hose
Unplugging Vacuum Hose Reverse flow is used to unclog hoses if a clog occurs, or to remove debris from the spoil tank. Step 1: When vacuuming, set Reverse Flow Control (1) to Vacuum position. If a clog occurs, close Gate/Inlet valve to the obstructed hose on spoil tank or Step 2: boom, if equipped. - Page 121 Removing Debris From Spoil Tank To transfer material from spoil tank to a designated area: Attach hose to Lower Gate/Drain valve (1). Step 1: Step 2: Ensure Reverse Flow Control is in NEUTRAL position. Step 3: Start engine, and run in high speed. Step 4: Move Reverse Flow Control to Pressure position.
-
Page 122: Boom (Vx50/Eco50 Option)
Boom (VX50/ECO50 Option) DANGER: ELECTROCUTION HAZARD. Death or serious injury will result if boom approaches or touches overhead electrical power lines. Keep boom away from overhead utilities. Use caution when operating boom. The hydraulic telescoping boom (1) maintains hose length during extension and allows remote controlled boom operation plus a remote controlled hydraulic valve for vacuum shutoff. - Page 123 Step 5: Using remote control, lower boom so the first section of hose can be easily attached. Attach first section of hose. Raise boom to attach second section of hose. Attach hose handle to the Step 6: lowest section of hose at an easy operating position. Position remote control for easy access. The boom is now ready for operation.
-
Page 124: Strong Arm (Option)
Strong Arm (Option) WARNING: Swinging arm. Serious injury will result. Arm can swing when tank is raised. Always lock Strong Arm in position when not in use. NOTICE: Strong Arm is not available on skid units. The Strong Arm (1) is used for manually maneuvering the suction hose as well as supporting the weight of the hose. -
Page 125: Dumping Spoil Tank
UMPING POIL DANGER: Crushing weight. Spoil and door will cause death or serious injury. Stay away from door when dumping. DANGER: Crushing weight. Rolling or tilting trailer will cause death or serious injury. Chock tires and apply park brake before operating or servicing. Do not operate unless attached to the towing vehicle. - Page 126 NOTICE: Before beginning vacuum operations, a plan and site for disposing of material in the spoil tank should be established. Before arriving at the disposal site, verify fresh water tank (if equipped) Step 1: has adequate water for cleanup. After arriving at disposal site, engage park brake and chock wheels. Step 2: Step 3: Open the Upper Gate/Tank Inlet valve (1) to relieve tank pressure.
- Page 127 Step 12: Open cyclonic separation door (7), and remove debris. Close door. Check air filter. Open or remove air cleaner door (8) and inspect air filter Step 13: element. If dirty, remove element and clean with low-pressure water. The spray wand (9) may be used. Install element after it has dried. Clean air filter element at least once daily.
-
Page 128: Machine - Clean
ACHINE LEAN DANGER: Crushing weight. Rolling or tilting trailer will cause death or serious injury. Chock tires and apply park brake before operating or servicing. Do not operate unless attached to the towing vehicle. WARNING: High pressure water can penetrate skin. Serious injury possible. Keep nozzles away from body. -
Page 129: Spoil Tank - Clean
Spoil Tank - Clean Ensure spoil tank has been emptied before proceeding. Follow the “Starting Procedure,” Step 1: page 22-1. Step 2: With the spoil tank empty, unlock and raise tank door, then raise the tank. Step 3: Install safety bar (1) over tank cylinder (2) rod. Secure bar with safety snap pins (3). - Page 130 Step 9: Clean unit using the spray wand (7) and/or automatic tank cleanout if equipped. Turn nozzle to raise or lower spray pressure. Step 10: Carefully clean door seal with the spray wand. NOTICE: Door seal may be damaged if spray wand is held too close to the seal or sprayed with high pressure.
-
Page 131: Cyclone Separator - Clean
Cyclone Separator - Clean Open and clean cyclone separator housing (1) after dumping the spoil tank. Wipe housing clean with a towel. Do not spray water into the housing while the engine is running. Hotbox - Flush to Remove Rust/Scale If equipped with hotbox water heater, flush machine for approximately 2 minutes to remove any loose rust or scale which could clog the outlet nozzle or affect normal pump operation. -
Page 132: Tools And Hoses - Clean
Tools and Hoses - Clean Clean all tools and hoses prior to storage. Debris buildup on tools and hoses will reduce performance. Step 1: Connect dirty tool and hoses to spoil tank inlet. Connect spray wand to the high pressure water hose. Step 2: Step 3: Start engine and operate at high speed. -
Page 133: Vacuum Gauge - Reset
Vacuum Gauge - Reset Vacuum gauge (1) pointer may not reset at zero, due to internal case pressure. Reset gauge if it shows a vacuum when the machine is turned off and tank ports are open. Step 1: Open control panel or gauge mounting panel. Move lever on top of gauge to Open position. - Page 134 This page intentionally left blank.
-
Page 135: Maintenance
Section 60: Maintenance WARNING: Failure to use shutdown procedure can result in unexpected hazard(s). Death or serious injury could result due to entanglement, crushing, cutting, or other hazardous contact. Follow Shutdown Procedure after operating, before performing any service or maintenance, and before transporting. Refer to Shutdown Procedure, page 23-1. -
Page 136: Safety Signs - Maintain
Step 1: Turn Ignition Keyswitch off. Follow Shutdown Procedure, page 23-1. Remove positive (+) battery cable from battery post. Unplug all electrical connectors. Step 2: AFETY IGNS AINTAIN Safety signs and decals located on your machine contain important and useful information that will help you operate your equipment safely and correctly. -
Page 137: Recommended Fluids
ECOMMENDED LUIDS Refer to Specifications, page 70-1, for fluid and lubricant requirements. ATER AINTENANCE Refer to the Pump Operation Manual supplied with machine for instructions. LOWER AINTENANCE Refer to the Blower Operation Manual supplied with machine for instructions. OTBOX AINTENANCE Refer to the Hotbox Operation Manual supplied with machine for instructions. -
Page 138: Maintenance Interval Chart
AINTENANCE NTERVAL HART = Initial maintenance on new machine. Regular maintenance interval may be different. Initial = Regular maintenance interval. NOTICE: Severe service operations can accelerate component wear. Factors for severe service include, but are not limited to, dusty environments, high load factors and extended periods at low idle. Engines that operate under severe conditions may need more frequent maintenance intervals in order to ensure maximum reliability and retention of full service life. - Page 139 Maintenance Intervals - Service Hours 10 or 50 or Add’l. Service Daily Weekly Periodic Req’d. Tank Pivot Tube - Grease Trailer Manual Jack - Grease Reverse Flow Valve - Grease Strong Arm Pivot - Grease Tank Lift Cylinders - Grease ...
- Page 140 Maintenance Intervals - Service Hours 10 or 50 or Add’l. Service Daily Weekly Periodic Req’d. Engine Oil - Change - V1524 Radiator Hoses and Clamp Bands - Check Engine Air Intake Line - Check Electric/Hydraulic Power Pack - Maintain ...
- Page 141 Maintenance Intervals - Service Hours 10 or 50 or Add’l. Service Daily Weekly Periodic Req’d. Engine Turbocharger - Check 3000 Engine Fuel Injection Pump - Check - V1524 3000 Engine EGR System - Check - V2403 3000 Engine DPF - Clean - V2403 3000 Engine Air Cleaner Element - Replace Yearly...
- Page 142 Maintenance Intervals - Service Hours 10 or 50 or Add’l. Service Daily Weekly Periodic Req’d. Engine Fuel System - Air Bleed - V1524 Battery - Replace Belts - Maintain Boom Cleanout Cover - Remove/Check for Clogs ...
-
Page 143: Maintenance - 10 Service Hours Or Daily
- 10 S AINTENANCE ERVICE OURS OR AILY Engine Maintenance Before starting the engine for the day, perform the daily maintenance tasks in this section. An Engine Operation Manual is supplied with each machine. Refer to the manual for engine service requirements and instructions. Engine Oil Level - Check Engine Oil Dipstick Engine Oil Fill... -
Page 144: Fluid Levels - Check
Fluid Levels - Check Check fluid levels daily before operating the machine. Refer to “Lubricants,” 70-1, for fluid specifications. page Also inspect the machine and make any necessary adjustments and repairs before starting the engine. Fuel Tank - Fill WARNING: Fuel and fumes can explode and burn. Fill fuel tank outdoors. Clean up spilled fuel. - Page 145 Coolant Level - Check WARNING: Hot fluid under pressure can erupt and scald if opened. Allow to cool before opening. Allow cooling system to cool down. Step 1: Step 2: Remove fill cap (1) after radiator has cooled. Step 3: Fill when coolant is below LOW level in overflow tank (2).
- Page 146 Hydraulic Fluid Level - Check Clean hydraulic fluid is very important. Do not spill dirt or contaminants into tank. Filter all hydraulic fluid through a 10-micron filter before adding it to the tank. Check hydraulic fluid level. Keep tank filled to sight glass/upper half of sight gauge with required fluid.
- Page 147 Water Pump & Blower Oil Level - Check WARNING: Never attempt to change or add oil while blower or water pump is running. Personal injury or equipment failure will result. Allow unit to cool down before attempting any maintenance. Water Pump Fill Cap/Dipstick Fill to dot on oil gauge.
-
Page 148: Machine - Clean
Machine - Clean Clean machine daily at end of operation. Door Seal - Clean Clean door seal daily and after emptying the tank. Tools - Clean/Check Remove dirt and mud from tools daily. Do not allow mud to build up on the inside of the tool, which will restrict the flow of debris and reduce tool performance. -
Page 149: Pintle Hitch - Inspect
Pintle Hitch - Inspect Inspect pintle hitch for cracks, damage, or wear. If wear exceeds 3/16" (5 mm) from the original surface profile, replace pintle ring (1). Check mounting bolts for signs of loosening or damage. Torque 3/4-10 x 2-1/2" Grade 5 bolts to 200 ft-lb (271 Nm). -
Page 150: Vacuum Air Filter - Check/Clean
Vacuum Air Filter - Check/Clean WARNING: Cover will blow off when removing wing nuts with pressure in tank. Relieve tank pressure before opening cover. 0 P S I Check vacuum air filter cleanliness. Check filters after 10 hours of potholing or after every tankful of dry vacuuming. -
Page 151: Maintenance - 50 Service Hours Or Weekly
- 50 S AINTENANCE ERVICE OURS OR EEKLY Engine Maintenance • Initial engine oil and oil filter - change/replace. • Engine fuel pipes and clamp bands - check. • Engine fuel/water separator - drain - V2403. Refer to the Engine Operation Manual supplied with the machine for instructions. Engine Oil Dipstick Engine Oil Fill Engine Oil Drain Plug... -
Page 152: Boom (Option) - Check/Maintain
Boom (Option) - Check/Maintain • Check boom PVC (1) for deep gouges and cracks. • Ensure packing gland (2) is adjusted properly for full seal. • Clean boom. Spray water into boom end hose while in vacuum mode to remove rocks or debris from the center section, to help prevent PVC tube (1) damage. -
Page 153: Machine - Grease
Machine - Grease Tank Pivot Tube Two shots ........two grease points Trailer Manual Jack Two shots . - Page 154 Reverse Flow Valve Four shots ....... one remote grease point Strong Arm Pivot One shot .
- Page 155 Tank Lift Cylinders Two shots ....one grease point at bottom of each cylinder Engine Shaft Two shots ........two grease points VX30/VX50 Gen3/ECO50 Vacuum Systems Maintenance - 50 Service Hours or Weekly 60-21...
- Page 156 Boom Cylinders Two shots ....three cylinders, two grease points each Extend/Retract Cylinder Boom Gate Valve Cylinder Raise/Lower Cylinder 60-22 Maintenance - 50 Service Hours or Weekly VX30/VX50 Gen3/ECO50 Vacuum Systems...
- Page 157 Boom Bearing Two shots ........per bolt spacing Rotate boom while greasing to properly lubricate.
- Page 158 Boom Brake Pin One shot ........one grease point (10) Boom Tube Seal Two shots .
-
Page 159: Machine Components - Check/Clean
Machine Components - Check/Clean • Clean water tank shutdown switch using low pressure water to prevent float from sticking. • Check water tanks for any foreign debris such as sand or dirt. If present, use vacuum to remove. • Wash out gate valve gates (1) to prevent damage to gate. -
Page 160: Pressures - Check
Pressures - Check Fluid Pressure View pressures on the water pressure gauge during operation of the following tools. View standby water pressure when tool is not in use. • Standby Water Pressure: 2900–3100 psi (200–214 bar) • Rotary Lance: 2700–3000 psi (186–207 bar) •... -
Page 161: Water Pump Oil - Initial Change
Water Pump Oil - Initial Change WARNING: Never attempt to change or add oil while water pump is running. Personal injury or equipment failure will result. Allow unit to cool down before attempting any maintenance. Oil Fill Cap/Dipstick Oil Drain Change oil every 500 hours after initial oil change. -
Page 162: Maintenance - 100 Service Hours Or Monthly
- 100 S AINTENANCE ERVICE OURS OR ONTHLY Engine Maintenance • Engine Fuel Filters - Clean - V1524 • Engine Fuel/Water Separator - Drain - V1524 • Engine Air Cleaner - Clean/Service - V1524 • Engine Fan Belt Tension - Adjust - V1524 •... -
Page 163: Blower Oil - Initial Change
Blower Oil - Initial Change WARNING: Never attempt to change or add oil while blower is running. Personal injury or equipment failure will result. Allow unit to cool down before attempting any maintenance. Oil Fill Ports Fill at each breather port to middle of sight glass (2). Fill each gear end separately. -
Page 164: Machine Components - Check/Maintain
Parts Manual for replacement parts). Frame - Check frame and contact Vermeer or McLaughlin immediately if you notice any bends, cracks, or breaks. Highway Lights - With lights plugged into towing vehicle, check that the taillights and license plate light are operating properly. -
Page 165: Emergency Stop Switch - Check
Safety Signs - Maintain Safety signs and decals located on your machine contain important and useful information that will help you operate your equipment safely and correctly. Refer to the Parts Manual for locations. To assure that all safety signs and decals remain in place and in good condition, follow these instructions: •... -
Page 166: Hydraulic System - Check
Hydraulic System - Check WARNING: Pressurized fluid can penetrate body tissue and result in serious injury or death. Leaks can be invisible. Keep away from any suspected leak. Relieve pressure in the hydraulic system before searching for leaks, disconnecting hoses, or performing any other work on the system. -
Page 167: Amber Beacon - Check
Amber Beacon - Check Check that amber beacon flashes when engine ignition Keyswitch is on. If beacon does not function properly, contact your Vermeer dealer. Tires and Rims - Check WARNING: Tire explosion can result if the following procedures are not performed: •... -
Page 168: Maintenance - 200 Service Hours
- 200 S AINTENANCE ERVICE OURS Engine Maintenance • Engine Oil - Change - V1524 • Radiator Hoses and Clamp Bands - Check • Engine Air Intake Line - Check An Engine Operation Manual is supplied with each engine. Refer to the manual for engine service requirements. Refer to “Engine Maintenance,”... -
Page 169: Battery Electrolyte Level And Terminals - Check
Battery Electrolyte Level and Terminals - Check WARNING: Battery fumes are flammable and can explode. Keep all burning materials away from battery. Battery explosion can blind. Acid can blind and burn. Tools and cable clamps can make sparks. Do not smoke. Shield eyes and face. Read instructions. •... - Page 170 WARNING: Battery post, terminals, and related accessories contain lead and lead compounds, chemicals known to the state of California to cause cancer and reproductive harm. Wash hands after handling. Clean Battery Terminals and Check Electrolyte Level Step 1: Remove NEGATIVE (-) cable (1), then remove POSITIVE (+) cable (2). Remove the hold-down bracket (3) and battery.
-
Page 171: Maintenance - 250 Service Hours
- 250 S AINTENANCE ERVICE OURS Engine Maintenance • Engine Air Cleaner - Clean/Service - V2403 • Engine Fan Belt Tension - Adjust - V2403 An Engine Operation Manual is supplied with each engine. Refer to the manual for engine service requirements. Refer to “Engine Maintenance,”... -
Page 172: Brakes, Electric - Test/Adjust
Brakes, Electric - Test Electrical current from the tow vehicle controls the brakes. To function properly, the brakes must be correctly adjusted, and the electrical components must be reliable. Step 1: Engage brakes while coasting at 20–30 mph (30–50 km/h) in a traffic-free area. The trailer braking force should easily be noticed in the tow vehicle. -
Page 173: Brake Controller (Optional) - Test/Adjust
Step 4: Install dirt plug. Remove blocking and jack. Step 5: Step 6: Repeat above steps for the other brakes. Brake Controller (Optional) - Test/Adjust Refer to manufacturer’s procedures to test and adjust the brake controller. If your towing vehicle is already equipped with an electric brake controller, it must be capable of automatic and manual brake application. -
Page 174: 60-40 Maintenance - 400 Service Hours
- 400 S AINTENANCE ERVICE OURS Engine Maintenance • Engine Oil and Filter - Change/Replace. Refer to “Engine Maintenance,” page 60-17. • Fuel/Water Separator - Clean An Engine Operation Manual is supplied with each engine. Refer to the manual for engine service requirements. - Page 175 Fuel Filters - Replace WARNING: Fuel and fumes can explode and burn. Shut off engine before refueling. Keep heat, flames, and sparks away from fuel. Always clean up spilled fuel. Fuel Filter Final Fuel Filter VX30/VX50 Gen3/ECO50 Vacuum Systems Maintenance - 500 Service Hours 60-41...
-
Page 176: Blower Oil - Change
Blower Oil - Change WARNING: Never attempt to change or add oil while blower is running. Personal injury or equipment failure will result. Allow unit to cool down before attempting any maintenance. Oil Fill Port Fill at each breather port to middle of sight glass (2). Fill each gear end separately. -
Page 177: Water Pump Oil - Change
Water Pump Oil - Change WARNING: Never attempt to change or add oil while water pump is running. Personal injury or equipment failure will result. Allow unit to cool down before attempting any maintenance. Oil Fill Cap/Dipstick Oil Drain Plug Change water pump oil every 500 service hours or every 3 months, whichever comes first. -
Page 178: Maintenance - 600 Service Hours Or Twice Yearly
- 600 S AINTENANCE ERVICE OURS OR WICE EARLY Wheel Bearings - Grease Step 1: Remove center rubber plug from the end of the grease cap. Step 2: Place a standard grease gun onto the grease fitting at the end of the spindle. -
Page 179: Maintenance - 1000 Service Hours Or Yearly
- 1000 S AINTENANCE ERVICE OURS OR EARLY Engine Maintenance • Engine Valve Clearance - Check Refer to the Engine Operation Manual supplied with the machine for instructions. - 1500 H AINTENANCE OURS Engine Maintenance • Engine Fuel Injection Nozzle Injection Pressure - Check •... -
Page 180: Maintenance - 3000 Hours
- 3000 H AINTENANCE OURS Engine Maintenance • Engine Turbocharger - Check • Engine Fuel Injection Pump - Check - V1524 • Engine EGR System - Check - V2403 • Engine DPF - Clean - V2403 Refer to the Engine Operation Manual supplied with the machine for instructions. AINTENANCE EARLY Engine Maintenance... -
Page 181: Hydraulic Oil Cooler
Hydraulic Oil Cooler Flush hydraulic oil cooler (1) fins yearly or sooner as required. VX30/VX50 Gen3/ECO50 Vacuum Systems Maintenance - Yearly 60-47... -
Page 182: Maintenance - Two Years
AINTENANCE EARS Engine Maintenance • Engine Closed Breather Rubber Piping - Replace • Engine Differential Pressure Sensor Piping - Replace • Engine Coolant Rubber Piping - Replace • Engine Oil Separator Rubber Piping - Replace - V2403 • Engine DPF Related Rubber Piping - Replace - V2403 •... - Page 183 WARNING: Hot fluid under pressure can erupt and scald if opened. Allow to cool before opening. To refill: Step 1: Allow cooling system to cool down. Step 2: Remove fill cap (1) after radiator has cooled. Fill when coolant is below LOW level in overflow tank (2). Fill with a Step 3: 50/50 mixture of coolant and distilled or deionized water until overflow tank level is between LOW and FULL marks.
-
Page 184: Maintenance - As Required
AINTENANCE EQUIRED Engine Maintenance • Fuel System - Air Bleed - V1524 Refer to the Engine Operation Manual supplied with each machine for service requirements. Battery - Replace WARNING: Battery post, terminals, and related accessories contain lead and lead compounds, chemicals known to the state of California to cause cancer and reproductive harm. -
Page 185: Boom Cleanout Cover - Remove/Check For Clogs
Step 1: Access battery by opening engine compartment door. Remove NEGATIVE (-) cable (1). Then remove POSITIVE (+) cable (2). Step 2: Step 3: Loosen nuts (3) and remove hold-down bracket (4). Step 4: Remove battery. Step 5: Apply a light coating of petroleum jelly around the base of each terminal of the new, fully charged battery. -
Page 186: Nozzles - Inspect/Clean/Replace
Nozzles - Inspect/Clean/Replace Inspect nozzles on all water tools. Replace damaged nozzles. Always replace a nozzle with a nozzle of the same type and orifice size. Consult Parts Manual for replacement part number. (1) Nozzle To inspect/clean/replace: Remove nozzle. Step 1: Step 2: Blow out nozzle. -
Page 187: Lights - Replace
Lights - Replace Highway Lights Unplug light connector from terminal. Step 1: Step 2: Remove light from grommet (1). Step 3: Replace light. Plug light connector into terminal. Step 4: Additional Lights Replace as needed: Trailer Marker Lights Marker Lights Arrow Board Lights VX30/VX50 Gen3/ECO50 Vacuum Systems Maintenance - As Required 60-53... -
Page 188: Belt Maintenance
Belt Maintenance Sheaves - Inspect WARNING: Do not clean the sheaves while the machine is running. Shut off engine before removing or installing sheaves. Take sheaves off machines to inspect, clean and repair them. WARNING: Do not install damaged or worn sheaves on equipment. Repair or replace them. •... -
Page 189: Slip Hook - Replace
Belt Alignment - Check Use a straightedge (1) to check belt alignment when installing new belts, performing maintenance, or replacing the sheaves. Proper belt alignment is essential to maintain long belt life. When checking sheave alignment, the straightedge should touch the sheaves at the four points indicated with arrows. -
Page 190: Towing Chain - Replace
Towing Chain - Replace Replace towing chain (1) if the chain has been dragged, kinked, or damaged. Storage Preparing for Storage • Park machine on level ground and chock the wheels. Use the jack to support the tongue. If possible, store machine in a dry, protected place. - Page 191 Storing Machine in Freezing Conditions Refer to “Transporting or Storing Machine in Freezing Conditions,” page 30-14, for procedure. Blower Corrosion Protection 24-hour Storage: Step 1: Follow the “Starting Procedure,” page 22-1. Move Reverse Flow Control to Pressure position. Step 2: Step 3: Allow engine to run for 10–15 minutes to completely dry out blower.
- Page 192 • Rotate blower shaft (10–25 turns) weekly during storage. Inspect the blower shaft near shaft seal area monthly, and spray with rust inhibitor if needed. • For long term storage (over six months), contact blower manufacturer Customer Service for recommendations. Removing from Storage •...
-
Page 193: Troubleshooting
Troubleshooting Section 65: NGINE YSTEM Refer to the Engine Operation Manual, supplied with each machine, for troubleshooting procedures. ACUUM XCAVATOR Symptom Cause Solution Rear door on tank not sealed Clean door seal. Close door completely. Suction line plugged Unplug suction line. Float ball stuck against the seal Remove float ball from seal. - Page 194 This page intentionally left blank.
-
Page 195: Specifications
Specifications Section 70: UBRICANTS Lubricant/Recommendation Capacity Specification/Notes Engine Oil (with Filter) With filter: Engine must be level when checking engine oil. Kubota V1524B4-1VC1: API Class 1.8 gal (6.7 L) SAE30, SAE10W-30 or SAE15W-40 - Above 77°F (25°C) CJ-4 SAE10W30 or SAE15W-40 - 14 to 77°F (-10 to 25°C) SAE 10W30 - Below 14°F (-10°C) Kubota V2403-CR-E4B: API Class 2.5 gal (9.5 L) - Page 196 Lubricant/Recommendation Capacity Specification/Notes Vermeer Ultra LC Grease As required EP NLGI Grade 2 with additives to protect against wear, rust and oxidation. Fittings and grease applicator nozzle must be clean before applying grease. Replace all missing fittings. General Lubricating Oil As required SAE 10W30 Vermeer Ultra Gold 10W30...
-
Page 197: Machine Specifications
ACHINE PECIFICATIONS General/Tow VX30Gen3-300 VX30Gen3-500 VX30Gen3-500 LT VX30Gen3-800 VX30Gen3-800 LT Empty Weight* 5330 lb/2417 kg 5700 lb/2585 kg 5570 lb/2526 kg 6720 lb/3048 kg 6620 lb/3002 kg Length 188" (478 cm) 214" (544 cm) 214" (544 cm) 237" (602 cm) 237"(603 cm) Width 98"... - Page 198 General/Tow VX50Gen3-500 VX50Gen3-500 LT VX50Gen3-800 VX50Gen3-800 LT Empty Weight* 6370 lb/2890 kg 6250 lb/2835 kg 7270 lb/3298 kg 7170 lb/3252 kg Empty Weight* w/ Boom 7640 lb (3465 kg) 8240 lb (3738 kg) Length 204" (518 cm) 204" (518 cm) 237"...
- Page 199 General/Tow ECO50-500 ECO50-800 Empty Weight* 5450 lb/2472 kg 6085 lb/2760 kg Empty Weight* w/ Boom 6650 lb (3016 kg) 7285 lb (3304 kg) Length 175" (445 cm) 203" (516 cm) Width 97" (246 cm) 97" (246 cm) Height 66" (168 cm) 68"...
-
Page 200: Capacities
Capacities Spoils tank VX30Gen3-300: 300 gal (1136 L) VX30Gen3-500 LT: 425 gal (1609 L) VX30Gen3-500, VX50Gen3-500, 500 LT, ECO50-500: 500 gal (1893 L) VX30Gen3-800, 800 LT, VX50Gen3-800, 800 LT, ECO50-800: 800 gal (3028 L) Fresh water tank(s) (total) VX30Gen3-300, 500 LT, VX50Gen3-500 LT: (2) 50 gal (379 L) VX30Gen3-500, 800 LT, VX50Gen3-500, 800 LT, ECO50-500: (2) 125 gal (946 L) VX30Gen3-800G, VX50Gen3-800G, ECO50-800: (2) 205 gal (1552 L) Water pump pressure... - Page 201 Engine: VX30Gen3-300, 500, 500 LT, 800, 800 LT Model Kubota V1524B4-1VC1 Tier 4 Maximum power 24.8 hp (18.5 kW) @ 3600 rpm Cooling medium/capacity 1.3 gal (5.0 L) Use a mixture 50/50 Extended Life (ELC) Nitrite Free (NF) coolant and distilled or deionized water to -34°F (-37°C) protection Recommended: Shell Rotella ELC NF coolant, Chevron Delo ELC NF, Exxon Mobil Delvac ELC NF.
-
Page 202: Material Density Chart
ATERIAL ENSITY HART Material weight of water is 8.3 lb/gal. Material weight of water with bentonite is 8.5–8.7 lb/gal. Material Weight - lb/gal Specific lb per lb per kg per Gravity cu ft cu yd cu m 0% H 25% H 50% H 75% H Earth, loam, dry, excavated... -
Page 203: Variables Affecting Water Volume
Variables Affecting Water Volume The following factors will affect the volume of water required for excavation: Material type • • Material purity • Compaction • Water content PSI of water wand • • GPM of water flow • CFM of vacuum •... - Page 204 This page intentionally left blank.
- Page 205 NDEX Controls, 20-1 Additional Options, 50-3 Crystalline Silica, 10-10 Amber Beacon - Check, 60-33 Cyclone Separator - Clean, 50-25 Antifreeze Dilution Chart, 70-9 Arrow Board (Optional), 20-22, 50-3 Attach to Towing Vehicle, 30-8 Dealer Prep, i Dealer/Owner Information, iv Delivery, iii Battery - Replace, 60-50 Diesel Fuel - Sulfur Content, 12-1 Battery Electrolyte Level and Terminals - Check, 60-35...
- Page 206 Fluid Levels - Check, 60-10 Fresh Water Tank(s) - Fill, 40-16 Lights - Replace, 60-53 Lights, 20-24 Locate Buried Utilities, 40-5 Gauges, 20-1, 21-3 Lubricants, 70-1 Hitch Height - Adjust, 30-8 Machine - Clean, 50-22, 60-14 Hose Reel, 20-17 Machine - Grease, 60-19, Machine - Grease, 60-2 Hotbox - Flush to Remove Rust/Scale, 50-25 Machine Components - Check/Clean/Maintain, 60-25, 60-30 Hotbox (Option) Maintenance, 60-3, 60-32, 60-43...
- Page 207 Material Density Chart, 70-8 Recommended Fluids, 60-3 Material Disposal, 50-8 Remote Control - Boom (Option), 20-18 Reporting Safety Defects, 30-1 Review of Operation, iii Nozzles - Inspect/Clean/Replace, 60-52 Safety Chain/Electrical Connector/Breakaway Cable - Attach, 30-9 Operating Features, 50-1 Safety Messages, 10-1 Operating Instructions, 50-5 Safety Signs - Maintain, 60-2 Operating Precautions, 50-7...
- Page 208 Tires and Rims - Check, 60-33 Vacuum Hoses and Tooling - Connect, 50-4 Tires, 70-3, 70-4 Vacuum Hoses and Tools - Check, 40-17 Tools and Hoses - Clean, 50-26 Vacuum Relief Valves, 50-2 Towing Chain - Replace, 60-56 Valves, 20-11 Towing Vehicle Selection, 30-2 Variables Affecting Water Volume, 70-9 Trailer Breakaway Brake, 30-3...
- Page 209 Revision History Revision Date Page(s) Description o-m1_00 10/19 1st edition manual released. When operated in California, any off-road diesel vehicle may be subject to the California Air Resources Board In-Use Off-Road Diesel Vehicle Regulation. It therefore could be subject to retrofit or accelerated turnover requirements to reduce emissions of air pollutants.
- Page 210 CALIFORNIA CALIFORNIA Proposition 65 Warning Proposition 65 Warning Battery posts, terminals and related Diesel engine exhaust and some of accessories contain lead and lead its constituents are known to the compounds, chemicals known to the State of California to cause cancer, State of California to cause cancer birth defects, and other and reproductive harm.
Need help?
Do you have a question about the VX30 Series and is the answer not in the manual?
Questions and answers