Table of Contents
Advertisement
Quick Links
Nitronic AG
CH - 2555 Bruegg
Tel.
Switzerland
Fax
75
Coax Stripping Machine
Publisher:
Nitronic AG
Mattenstrasse 11
CH-2555 Brügg
Phone
+41 32 373 7070
Fax:
+41 32 373 7075
Web:
www.nitronic.ch
info@nitronic.ch
Email:
+41 32 373 7070
+41 32 373 70
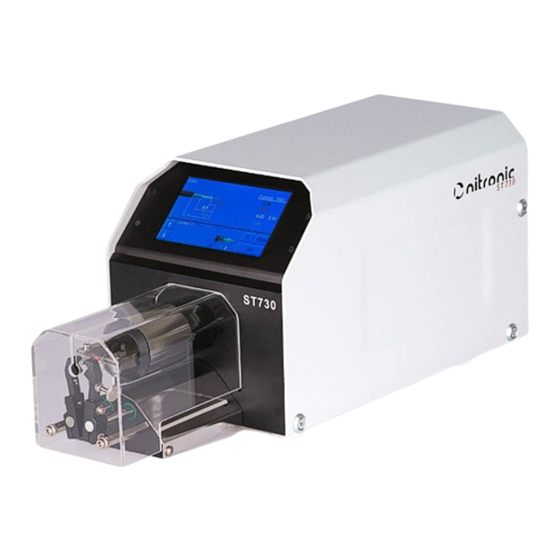
ST730T
Operating manual
Stand: V1.1 preliminary
Subject to change without notice!
www.nitronic.ch
-
1 -
Advertisement
Table of Contents
Troubleshooting

Summary of Contents for Nitronic ST730T
- Page 1 Nitronic AG Mattenstrasse 11 CH – 2555 Bruegg Tel. +41 32 373 7070 Switzerland +41 32 373 70 Coax Stripping Machine ST730T Operating manual Stand: V1.1 preliminary Subject to change without notice! Publisher: Nitronic AG Mattenstrasse 11 CH-2555 Brügg Phone...
-
Page 2: Table Of Contents
Tel. +41 32 373 7070 Switzerland +41 32 373 70 Machine Description ......................6 Unpacking the ST730T....................... 6 Touchscreen, Connections ....................7 Touchscreen ........................7 Additional Functions ..................... 8 Basic settings of the machine ..................9 Fig. 1. Rear panel ....................10 Connections ........................ - Page 3 10. Copying of Steps (Copy Step) ................. 24 Basic settings ........................25 1.Toggle units Millimeter / Inch ................25 To toggle the units on the Nitronic ST730T from mm to inch, proceed as listed below 2. Micro Coax Mode ....................25 3. Autobaud OFF....................25 4.
- Page 4 Nitronic AG Mattenstrasse 11 CH – 2555 Bruegg Tel. +41 32 373 7070 Switzerland +41 32 373 70 Fig. 13. Trigger contact ..................33 Fig. 14. Pull off protective ring ................33 Fig. 15. Positioning carriage .................. 34 Fig. 16. Shift stripping blades outwardly ..............34 Fig.
- Page 5 Nitronic AG Mattenstrasse 11 CH – 2555 Bruegg Tel. +41 32 373 7070 Switzerland +41 32 373 70 Spare parts list ......................... 52 Wear parts ........................52 Options ..........................52 Block diagram ........................53 Index ........................... 54 www.nitronic.ch...
-
Page 6: Machine Description
• The stripping diameters can be precisely adjusted with an accuracy of up to 1/1000 mm. • The ST730T is easy to operate and enables the user to be familiar with the process within a few minutes. -
Page 7: Touchscreen, Connections
Nitronic AG Mattenstrasse 11 CH – 2555 Bruegg Tel. +41 32 373 7070 Switzerland +41 32 373 70 Touchscreen, Connections Touchscreen Cable Recalling data of an already programmed cable. Step Select individual processing steps. Length Programming of the current strip length. -
Page 8: Additional Functions
Nitronic AG Mattenstrasse 11 CH – 2555 Bruegg Tel. +41 32 373 7070 Switzerland +41 32 373 70 Additional Functions function key Code Activating and setting the password entry. DelCounter Reset the counter for produced cables. Swap Step Exchanging Step with another Step. -
Page 9: Basic Settings Of The Machine
Nitronic AG Mattenstrasse 11 CH – 2555 Bruegg Tel. +41 32 373 7070 Switzerland +41 32 373 70 Basic settings of the machine Inch Toggling units “mm” / “Inches” Micro Coax Resolution of the length until 0.01mm/0.00004inches Mode Resolution of diameter until 0.001mm/0.000004inches... -
Page 10: Connections
+41 32 373 70 Connections Fig. 1. Rear panel Main switch to turn the ST730T ON or OFF. Mains Connection • Mains connection (6), single-phase with protective earth (2P + E) (Fig. 1). • 100, 115V, 230V / 50 - 60 Hz •... -
Page 11: Set Up
• Replace the safety cover (2) and fasten screws (3) (Fig. 2). • Place the ST730T on a bench so that its front edge is flush with the edge of the bench. This way the stripping debris can fall into a waste basket. -
Page 12: Setting The Mains Voltage
+41 32 373 70 Setting the Mains Voltage Turn OFF the ST730T with the main switch (A) and disconnect the power cord. • Use a screwdriver to pull out the fuse holder (8). • Remove the voltage selector (7) and place it in the de- sired position of the fuse holder (8). -
Page 13: Operation
Operation Testing of Functionality Provided with the ST730T are two cable samples with different insulation thicknesses. One end of each cable was stripped with the machine for testing at the factory. The respective stripping values are stored in programs Cable 1, Cable 2, Cable 3 (for the thinner cable) and Cable 4 and Cable 5 (for the thicker cable). -
Page 14: Programming
Nitronic AG Mattenstrasse 11 CH – 2555 Bruegg Tel. +41 32 373 7070 Switzerland +41 32 373 70 Programming Processing Steps The programmed steps (step 1, step 2 etc.) are processed in ascending order. The selection of the process sequence is achieved by programming of the respective steps. -
Page 15: Programming Of (Step) In Graphic Mode
Nitronic AG Mattenstrasse 11 CH – 2555 Bruegg Tel. +41 32 373 7070 Switzerland +41 32 373 70 Programming of (Step) in graphic mode To ensure a quick and speedy 3-step processing cycle is to be programmed as follows: 1. Turn the unit ON Toggle the main switch to I 2. -
Page 16: Step 0
Nitronic AG Mattenstrasse 11 CH – 2555 Bruegg Tel. +41 32 373 7070 Switzerland +41 32 373 70 5. Step 0 Programming: To optimize the stripping time use Step 0 to enter the outside diameter of the wire. After starting the stripping cycle, the stripping blades immediately close to the selected outside diameter before they start cutting with the programmed feed rate. -
Page 17: Step 3
Nitronic AG Mattenstrasse 11 CH – 2555 Bruegg Tel. +41 32 373 7070 Switzerland +41 32 373 70 6. Step 3 Program Step Selecting and Entering Choose the preset diameter (∅ ∅ ∅ ∅ 3.00) 3.00 – 4.65 – Enter and enter the cable diameter e.g. - Page 18 Nitronic AG Mattenstrasse 11 CH – 2555 Bruegg Tel. +41 32 373 7070 Switzerland +41 32 373 70 Wire : ..........Program : ... Inch Program - Lock : Step Length ParStrip Diameter Waybck Feed RTime Notes : www.nitronic.ch 18 -...
-
Page 19: List Of Programs (Example)
Nitronic AG Mattenstrasse 11 CH – 2555 Bruegg Tel. +41 32 373 7070 Switzerland +41 32 373 70 List of Programs (Example) Date : ..27. Mai 2014....Wire : Sample wire RG59....Program : ..C04..inch Program lock : Step... -
Page 20: Auxiliary Functions
Nitronic AG Mattenstrasse 11 CH – 2555 Bruegg Tel. +41 32 373 7070 Switzerland +41 32 373 70 Auxiliary Functions The following auxiliary functions can be used to optimize stripping quality and processing time. 1. Open blades prior to pull-off (Waybck) You can program the machine as such that the stripping blades open a little (in diameter) before the pull-off is carried out. -
Page 21: Feed Rate And Rotation Time (Feed Und Rtime)
The rotating during pull-off is deactivated by selcting the Rot-Symbol. 5. Counter The integrated piece counter of the ST730T shows on the display the number of cables pro- cessed. The quantity value remains in memory even after the machine has been switched off. www.nitronic.ch... -
Page 22: Memory Access Locking Code (Code)
Select the Del Counter 6. Memory access locking code (Code) Any set parameters programmed into the ST730T can be protected by entering a 3-digit freely selectable locking code. Make sure to write down the code! Otherwise, access to the memory is no longer possible. -
Page 23: Exchange Of An Steps With An Other Step (Swap Step)
Nitronic AG Mattenstrasse 11 CH – 2555 Bruegg Tel. +41 32 373 7070 Switzerland +41 32 373 70 The stored programs in this case must be numbered consecutively. Program Step Selecting and Entering Cable - 10 Select the first cable e.g. Cable 10 F –... -
Page 24: Copying Of Steps (Copy Step)
Nitronic AG Mattenstrasse 11 CH – 2555 Bruegg Tel. +41 32 373 7070 Switzerland +41 32 373 70 F – Copy Cable Select the Copy Cable. The display shows. Enter the cable number e.g. 30. 30 - Enter The display shows the confirmation that the copy process has been successfully completed. -
Page 25: Basic Settings
Switzerland +41 32 373 70 Basic settings 1.Toggle units Millimeter / Inch To toggle the units on the Nitronic ST730T from mm to inch, proceed as listed below Program Step Selecting and Entering Select the basic settings of the machine. -
Page 26: Rs232
Nitronic AG Mattenstrasse 11 CH – 2555 Bruegg Tel. +41 32 373 7070 Switzerland +41 32 373 70 Program Step Selecting and Entering Select the basic settings of the machine. Select the Autobaud OFF. 4. RS232 Activation of the interface. -
Page 27: Deleting Of Memory Contents (Del. Memory)
Nitronic AG Mattenstrasse 11 CH – 2555 Bruegg Tel. +41 32 373 7070 Switzerland +41 32 373 70 Select the basic settings of the machine. Select the Calib.Touch and follow the one-screen instruction. 7. Deleting of memory contents (Del. Memory) Stored programs can be cleared completely (all 999 programs). -
Page 28: Maintenance
Nitronic AG Mattenstrasse 11 CH – 2555 Bruegg Tel. +41 32 373 7070 Switzerland +41 32 373 70 Maintenance Service guidelines We shall not be held responsible or liable for any damage caused by wrong manipulation and con- trol as well as misuse of the machine. Therefore, we urge you to refrain from making modifications or changes to the ST730. -
Page 29: Fig. 8. Centering Guide Lever
Nitronic AG Mattenstrasse 11 CH – 2555 Bruegg Tel. +41 32 373 7070 Switzerland +41 32 373 70 • Pull the stripping blades (12) out. • Clean the centering chucks (13) (Fig. 9). Fig. 9. Remove stripping blades Do not mix up the centralizers (13)! •... -
Page 30: Fig. 11. Inserting The Adjusting Pin
Nitronic AG Mattenstrasse 11 CH – 2555 Bruegg Tel. +41 32 373 7070 Switzerland +41 32 373 70 Program Step Selecting and Entering Select the basic settings of the machine. Select the Calib.Baldes. Select the lenght 1.0 and the diameter 7.20. -
Page 31: Fig. 12. Centering Of The Stripping Blades Using The Adjusting Pin
Nitronic AG Mattenstrasse 11 CH – 2555 Bruegg Tel. +41 32 373 7070 Switzerland +41 32 373 70 Program Step Selecting and Entering Select the diameter 3.0. The blades together with the centralizers move to the previously set diameter, i.e. 3.00 mm. - Page 32 Nitronic AG Mattenstrasse 11 CH – 2555 Bruegg Tel. +41 32 373 7070 Switzerland +41 32 373 70 Select the diameter 7.20. The blades together with the centralizers move to the previously set diameter, i.e. 7.20 mm. Select Open. The blades open and the grippers release the adjusting pin.
-
Page 33: Centering The Centralizers
Nitronic AG Mattenstrasse 11 CH – 2555 Bruegg Tel. +41 32 373 7070 Switzerland +41 32 373 70 Centering the centralizers Turn OFF the machine and disconnect the mains cable. • Remove the safety cover (2) (Fig. 2, page 11). -
Page 34: Fig. 15. Positioning Carriage
Nitronic AG Mattenstrasse 11 CH – 2555 Bruegg Tel. +41 32 373 7070 Switzerland +41 32 373 70 • Move carriages (A) and (B) to the backmost posi- tion (Fig. 15). Fig. 15. Positioning carriage • Loosen locking nuts (A) of the wire catchers (B) slightly (Fig. -
Page 35: Fig. 18. Mount Calibration Kit Onto The Stripping Head
Nitronic AG Mattenstrasse 11 CH – 2555 Bruegg Tel. +41 32 373 7070 Switzerland +41 32 373 70 • Carefully install the calibration kit (25, as shown in Fig. 18) onto the stripping head. Make sure that the cross pin (26) of the calibration kit is positioned between the blade holders (11) and that the recesses (27) of the calibration kit line up with the eccentrics in the stripping head (Fig. -
Page 36: Fig. 21. Open Blade Holders
Nitronic AG Mattenstrasse 11 CH – 2555 Bruegg Tel. +41 32 373 7070 Switzerland +41 32 373 70 • Open the blade holders by turning the threaded spindle (28) counter-clockwise. • With the larger diameter forward slide brass sleeve (30) onto the pin of the calibration kit (Fig. -
Page 37: Centering The Grippers With The Calibration Kit
Nitronic AG Mattenstrasse 11 CH – 2555 Bruegg Tel. +41 32 373 7070 Switzerland +41 32 373 70 • Slide both stripping blades (12) carefully until they are in contact with the larger diameter of the brass sleeve (30) and carefully secure them with the set screws (10) (Fig. -
Page 38: Fig. 24. Brass Sleeve, 5.2 Mm
Nitronic AG Mattenstrasse 11 CH – 2555 Bruegg Tel. +41 32 373 7070 Switzerland +41 32 373 70 • Place brass sleeve (32) with a diameter of 5.2 mm onto the adjusting pin of the calibration kit (Fig. 24). • Loosen gripper mounting screws (33) and gripper holder screws (34) slightly (Fig. -
Page 39: Fig. 27. Adjust Distance Between Grippers
Nitronic AG Mattenstrasse 11 CH – 2555 Bruegg Tel. +41 32 373 7070 Switzerland +41 32 373 70 • Open the grippers to a distance of up to 9.5 mm and line up the fingers (40) of the grippers (4) (Fig. -
Page 40: Adjusting Of The Trigger Contact
Nitronic AG Mattenstrasse 11 CH – 2555 Bruegg Tel. +41 32 373 7070 Switzerland +41 32 373 70 Adjusting of the trigger contact Turn off the machine and disconnect the mains cable. • Remove safety cover (2) (Fig. 2, page 11). -
Page 41: Fig. 32. Adjust Trigger Contact
Nitronic AG Mattenstrasse 11 CH – 2555 Bruegg Tel. +41 32 373 7070 Switzerland +41 32 373 70 • Rotate the threaded spindle (28) until the distance between the cutting edges of blades (12) is 7 mm (Fig. 32). • Pull release contact (9) forward until the distance between trig- ger contact (9) and the cutting edges of blades (12) is 0.5 mm... -
Page 42: Adjusting The Clamping Force
Adjusting the clamping force The ST730T is shipped from the factory with the clamping force set at medium. This setting can be varied by moving of the magnet, i.e. reduced by approx. 40% or increased by 40%. This can be achieved as follows: •... -
Page 43: Fig. 38. Dismantle Stripping Shaft
Nitronic AG Mattenstrasse 11 CH – 2555 Bruegg Tel. +41 32 373 7070 Switzerland +41 32 373 70 • Unscrew and remove locknut (48) (Fig. 37). • Unscrew nut (49) of the stripping shaft (Fig. 37). If an L is punched into the motor carrier (50) the nut (49) has a left-hand thread (Fig. -
Page 44: Cleaning And Inspection
Nitronic AG Mattenstrasse 11 CH – 2555 Bruegg Tel. +41 32 373 7070 Switzerland +41 32 373 70 Cleaning and Inspection The cleaning intervals primarily depend on the material to be processed and the quantity of strip- ping slugs produced. The cleaning and inspection activities listed below should be performed daily or as needed. -
Page 45: Lubrication Schedule
Nitronic AG Mattenstrasse 11 CH – 2555 Bruegg Tel. +41 32 373 7070 Switzerland +41 32 373 70 Lubrication Schedule In the interest of a smooth and reliable functioning of the ST730 over longer period of time, it is of the essence that the lubrication intervals are being observed. -
Page 46: Diagnostic, Troubleshooting
+41 32 373 70 Diagnostic, Troubleshooting General Experience has shown that malfunctions are rarely encountered with the ST730T provided it is properly operated and maintained. Making use of the information furnished in this chapter malfunctions may be identified and reme- died more easily. -
Page 47: Troubleshooting Checklist
Nitronic AG Mattenstrasse 11 CH – 2555 Bruegg Tel. +41 32 373 7070 Switzerland +41 32 373 70 Troubleshooting checklist Fault Diagnosis Remedy Please check..... Wire moves out of the Change direction of rotation if the programmed rotating direction rotating axis matches the installed centralizers. -
Page 48: Fault Diagnosis
Nitronic AG Mattenstrasse 11 CH – 2555 Bruegg Tel. +41 32 373 7070 Switzerland +41 32 373 70 conductors pressed the symmetrical arrangement of the Use eccentric to adjust the position of into the dielectric of centralizers and stripping blades. - Page 49 Nitronic AG Mattenstrasse 11 CH – 2555 Bruegg Tel. +41 32 373 7070 Switzerland +41 32 373 70 Fault Diagnosis Remedy Please check..... The grippers do not Center the grippers again (page 37). if the grippers have been properly open.
- Page 50 Nitronic AG Mattenstrasse 11 CH – 2555 Bruegg Tel. +41 32 373 7070 Switzerland +41 32 373 70 Fault Diagnosis Remedy Action Please check..... The stripping head Check soldering points and wiring. if the electrical wiring in the me- moves to the strip- chanical portion is broken.
-
Page 51: Technical Data
Nitronic AG Mattenstrasse 11 CH – 2555 Bruegg Tel. +41 32 373 7070 Switzerland +41 32 373 70 Technical data Stripping length up to max. 30mm Stripping diameter up to max. 7mm Stripping capacity appr. 300 to 520 pcs/h (3-steps) -
Page 52: Basic Equipment, Spares, Options
Nitronic AG Mattenstrasse 11 CH – 2555 Bruegg Tel. +41 32 373 7070 Switzerland +41 32 373 70 Basic equipment, spares, options Basic equipment Qty. Description Part number Pos. Coax cable Stripping machine 010124 ST730T Tube of grease GBJ 131... -
Page 53: Block Diagram
Nitronic AG Mattenstrasse 11 CH – 2555 Bruegg Tel. +41 32 373 7070 Switzerland +41 32 373 70 Block diagram www.nitronic.ch 53 -... -
Page 54: Index
Nitronic AG Mattenstrasse 11 CH – 2555 Bruegg Tel. +41 32 373 7070 Switzerland +41 32 373 70 Index Adjusting the Clamping Force ......45 Open Blades Prior to Strip Pull ..... 20 Adjusting the Release Contact ...... 42 Operation ............13 Ausschneidezeit ..........