
Related Manuals for Pioneer A-40AE


Summary of Contents for Pioneer A-40AE
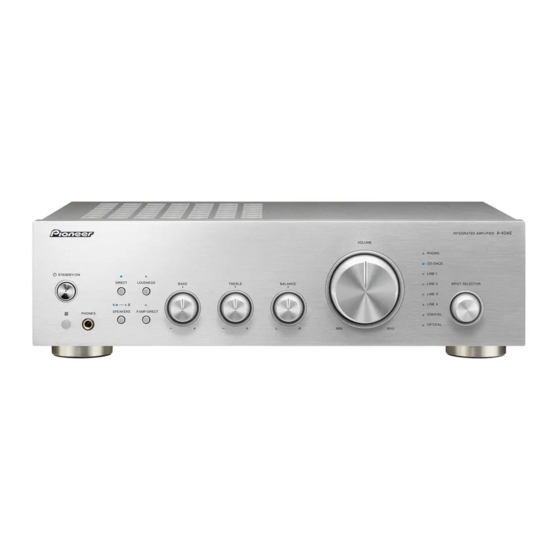
- Page 1 Instruction Manual A-40AE INTEGRATED AMPLIFIER Before use Preparations Basic Operations Others...
-
Page 2: Table Of Contents
Before use Before use Table of Contents What’s in the box Before use What’s in the box ..........2 Safety Information..........3 Part Names ............5 Front Panel ............5 Rear Panel ............6 Remote Controller ..........7 Preparations Setup and connection .......... -
Page 3: Safety Information
Before use Safety Information Operating Environment WARNING AVIS Operating environment temperature and humidity: +5 °C to RISK OF ELECTRIC SHOCK RISQUE DE CHOC ELECTRIQUE +35 °C (+41 °F to +95 °F); less than 85 %RH (cooling DO NOT OPEN NE PAS OUVRIR vents not blocked) The lightning flash with arrowhead symbol, within Do not install this unit in a poorly ventilated area, or in... -
Page 4: Before Use
Before use For European models Information for users on collection and disposal of old equipment and used batteries Symbol for Symbol examples equipment for batteries These symbols on the products, packaging, and/or accompanying documents mean that used electrical and electronic products and batteries should not be mixed with general household waste. -
Page 5: Part Names
Before use Part Names Front Panel 1. Í STANDBY/ON button amplifier is on. (p18) 0 P.AMP is an abbreviation of POWER AMP. 2. DIRECT button/indicator: Switch the DIRECT mode on and off. -
Page 6: Rear Panel
1. SIGNAL GND terminal: The ground wire of the turntable is connected. 2. CONTROL IN/OUT jacks: By connecting Pioneer brand audio devices, centralized control is possible, for example you can control other audio devices with this unit’s remote controller. -
Page 7: Remote Controller
to control a Pioneer brand CD/SACD player. 3. Buttons to control play on a network audio player: Enable you to control a Pioneer brand network audio player. 4. VOLUME buttons 5. MUTE button: Temporarily mutes audio. Press again to cancel muting. -
Page 8: Preparations
Preparations Setup and connection Connecting 1 speaker system a Speaker Cable 3/8” (10 mm) Right Left (Note) Speaker Impedance Connect speakers with an impedance of 4 ≠ to 16 ≠. 0 Setup: You have to change the setting on this unit if any of the connected speakers have 4 ≠... -
Page 9: Connecting 2 Speaker Systems
Preparations Connecting 2 speaker systems a Speaker Cable 3/8” (10 mm) Right Left Right Left Speakers A Speakers B Connect the Speaker Cables You can connect another speaker system set to the SPEAKERS B jacks. Make correct connection between the unit’s jacks and 0 You can output the same audio as Speaker A System by speaker’s jacks (+ side to + side, and - side to - side) for switching with A/B/A+B. -
Page 10: Bi-Wiring Connections
Preparations Bi-wiring connections a Speaker Cable 3/8” (10 mm) Right Left You can connect speakers that support bi-wiring to this unit. connecting. If the exposed wires touch the rear panel, or the Connect the treble and bass correctly. + side and - side wires touch each other, the protection 0 When connecting, be sure to remove the jumper bar that circuit will be activated. -
Page 11: Connecting Players (Digital In Connection)
Preparations Connecting players (DIGITAL IN Connecting players (LINE IN connection) connection) a Digital Optical Cable, b Digital Coaxial Cable a Analog Audio Cable Network Audio Player Network Audio Player Connect a playback device with a digital optical cable or digital coaxial cable. 0 Only PCM audio is supported for input through the Connect a playback device with an analog audio cable. -
Page 12: Connecting Players (Turntable Connection)
CONTROL Audio device Turntable If you have multiple Pioneer brand devices, and if they have Use an analog audio cable to connect a turntable that uses CONTROL IN/OUT jacks, you can centrally control them an MM-type cartridge to the PHONO jack. -
Page 13: Using This Unit As A Power Amplifier
Preparations Using this unit as a power amplifier Power Cord Hookup a Analog Audio Cable a Power Cord This model includes a removable power cord. The power Pre-amplifier cord must be connected only after all other connections are completed. Make sure you first connect the power cord to AC IN terminal of the unit and then connect to the outlet. -
Page 14: Before Play
Preparations Before play Turn on the power of the unit Remote controller preparations Match the polarity when inserting the batteries. STANDBY/ON Press Í STANDBY/ON on this unit or Í STANDBY/ON on the remote controller. -
Page 15: Speaker Impedance Settings
Preparations Depending on the speakers you connect and how you Speaker impedance settings connect them, you may need to change the speaker impedance setting on this unit. Refer to the page describing speaker connection (p8, 9, 10) and do the following procedures if the change is required. -
Page 16: Basic Operations
Basic Operations Playback Switching input and adjusting the VOLUME volume Input selector Perform the following procedure when the unit is on. 1. Press the input selector on the remote controller with the same name as the jack to which the player is connected to switch the input. -
Page 17: Switching Speaker Output
Basic Operations Switching speaker output Using the Direct Function DIRECT When connecting two speaker systems (p9), or when using bi-wiring connection (p10), switch the speakers to output from by switching to Speakers A or Speakers B, or to When you turn the DIRECT feature on (default value), the both. -
Page 18: Adjusting The Sound Quality And Balance
Basic Operations the treble. Adjusting the sound quality and BALANCE (main unit only) balance 1. Turn the BALANCE L/R controller on the main unit to adjust the balance of the sounds output from the left and right speakers. Switching the unit to power amplifier mode 3"... -
Page 19: Basic Operations
Basic Operations “Speaker impedance settings” (p15)/ “Switching input and adjusting the volume” (p16) / “Adjusting the sound quality and balance” (p18) / “Setting auto standby” (p20) 0 When switched to power amplifier mode, if the volume of the connected pre-amplifier is low, auto standby (p20) may function and the power may automatically switch to standby. -
Page 20: Others
Others Useful functions When automatic standby is on (default value), the unit Setting auto standby automatically switches to standby mode after 20 minutes of no audio input without any operations. 1. Press and hold Í STANDBY/ON on the main unit until the "DIRECT"... -
Page 21: Troubleshooting
Others Troubleshooting speaker wires are not touching each other or the back Before starting the procedure panel of the unit, then turn the unit on again. If this unit does not turn on, immediately unplug the power cord from the wall outlet and contact your dealer. Problems may be solved by simply turning the power on/off 0 The protective circuit function may have been activated or disconnecting/connecting the power cord, which is easier... - Page 22 Others 0 Make sure that the speaker cables have not shorted. 0 Make sure the speakers are connected correctly. (p8, 9, ∫ Noise can be heard 0 Using cable ties to bundle analog audio cables, power cords, speaker cables, etc. may degrade the audio performance, Do not bundle cords.
-
Page 23: Specifications
Others Specifications Speaker Outputs Amplifier (Audio) section SPEAKERS A: L/R SPEAKERS B: L/R Phones Rated Output Power (IEC) PHONES (Ø6.3 mm) 2 ch k 76 W at 4 ohms, 1 kHz, 2 ch driven of 0.9% THD 2 ch k 52 W at 8 ohms, 1 kHz, 2 ch driven of 0.9% THD Input Sensitivity and Impedance Others 200 mV/47 k≠...
Need help?
Do you have a question about the A-40AE and is the answer not in the manual?
Questions and answers
Unable to read 'impedance settings' on brand-new Pioneer A40AE
To read or adjust the impedance settings on a Pioneer A-40AE:
1. Ensure the speakers connected have an impedance between 4 Ω and 16 Ω.
2. If any connected speakers have an impedance between 4 Ω and less than 8 Ω, you must change the impedance setting on the amplifier to 4 Ω.
3. Refer to the device's settings menu to locate the impedance adjustment option and follow the instructions provided in the manual for making the change.
This answer is automatically generated