Table of Contents
Advertisement
PELLET FIRE
OWNERS MANUAL
SC.VER Version 1.3 10/5/19
Contents of manual may be updated without notice.
For the latest version of this manual please refer to our website: www.scandiastoves.com.au
SERIES 1
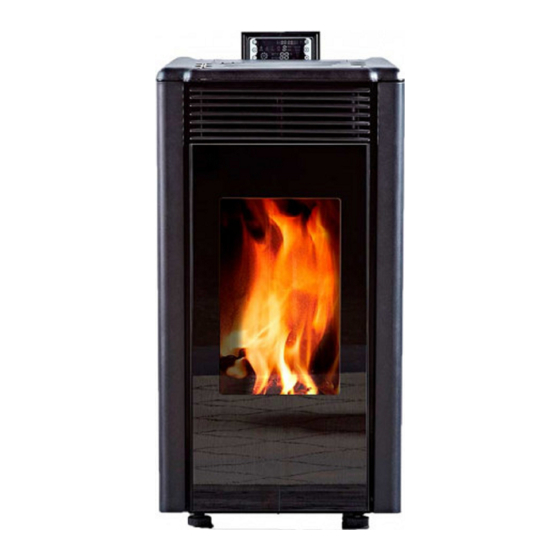
Pellet Fire - Verdant LE
Scandia Group Pty Ltd
Head Office
58 Access Way
Carrum Downs VIC 3201
Australia
AUS 1300 HEATER (432 837)
NZ +61 3 8579 5900
info@scandiastoves.com.au
www.scandiastoves.com.au
Advertisement
Table of Contents

Summary of Contents for scandia Verdant LE
- Page 1 PELLET FIRE OWNERS MANUAL SERIES 1 Pellet Fire - Verdant LE Scandia Group Pty Ltd Head Office 58 Access Way Carrum Downs VIC 3201 Australia AUS 1300 HEATER (432 837) NZ +61 3 8579 5900 SC.VER Version 1.3 10/5/19 info@scandiastoves.com.au Contents of manual may be updated without notice.
-
Page 3: Table Of Contents
Warranty INTRODUCTION Congratulations on purchasing a genuine Scandia pellet fire. When cared for properly, this high quality, finely crafted pellet fire will offer many years of reliable performance. This instruction manual has been developed to ensure optimum performance from your Scandia pellet fire. It is very important that you thoroughly read and understand all instructions before using your new stove. -
Page 4: Safety Precautions
SAFETY PRECAUTIONS When properly maintained and operated your pellet fire should give you many years of service, however there are important safety aspects of these products that you need to be aware of when operating a pellet fire. Installation and repair should only be performed by a professional service technician. -
Page 5: Product Dimensions
PRODUCT DIMENSIONS (MM) TIME ON TIME OFF HEAT DEVICE WORKING SHORT LONG SETTING MODE TIMING TIMING TIMER R T °C SET TEMP FIRE WARNING Ma vellique ipsum quaspe sit occabo. Optum imus adi dunt odit ate eveliquo milis exerum a desciis rescia voluptas coreces maios essi nonsequi nobis cus atqui omniendus eatatectum fugiatur rendi rerum exerchit min non non cupta dolenimincte perro minus sum aut harunti verum harum fugia nullorrorum conse cuptini scilian ditempo repuditae con cus rest harchitia... -
Page 6: Fuel Requirements
Due to different densities and sizes of pellets, the feed rate varies. This may require an adjustment to combustion fan for burning speed and feeding time. Scandia cannot control the quality of pellets you use, therefore will not be held responsible for problems caused by bad quality wood pellets. -
Page 7: Seismic Restraint Of The Pellet Fire
SEISMIC RESTRAINT OF THE PELLET FIRE NEW ZEALAND REQUIREMENT In order to comply with standard AS/NZS2918:2001, it is required that the wood fire and floor protector be secured to prevent shifting in the event of an earthquake. Anchor the appliance to the floor through the holes in the base (foot) of the appliance. STEP ONE Fasten the floor bracket to the bottom rear of the pellet fire using the bolts provided. -
Page 8: Installation Guide
INSTALLATION GUIDE Set the stove in a place that complies with the heating range. If installing this unit on a combustible floor (eg. linoleum or hardwood floor), a non-combustible hearth pad with a minimum 730 mm deep x 635 mm wide x 9 mm thick floor protector should be used under and in front of the appliance. - Page 9 STANDARD FLUE KIT Cowl 200mm 80mm Stainless Steel Active Flue 915mm Long 150mm Galvanised Plain Casing 915mm Long Scandia roof flashing (Usually supplied by installer) 150mm Galvanised Crimped Casing 915mm Long 50 x 50 Angles 915mm Long Ceiling Ring 80mm Painted Stainless...
-
Page 10: Masonry Chimney
STANDARD FLUE KIT Cowl 80mm Stainless Steel 200mm Active Flue 915mm Long 150mm Galvanised Plain Casing 915mm Long Scandia roof flashing (Usually supplied by installer) 150mm Galvanised Crimped Casing 915mm Long 50 x 50 Angles 915mm Long Ceiling Ring 80mm Painted Stainless... -
Page 11: Operating Instructions
OPERATING INSTRUCTIONS 1. INSTALLATION OF DISPLAY Unpack control panel and fix with screws at the top rear of stove. 2. BEFORE OPERATION Before igniting please check burn pot, pellet grate and ash box are aligned in proper position. 3. OPERATING THE HEATER WARNING Only operate this appliance if it has been installed by a licensed installer. - Page 12 MANUAL START-UP and SHUT-DOWN TIME ON TIME OFF ON: To ignite the heater, press the power button HEAT DEVICE WORKING SHORT LONG SETTING MODE TIMING TIMING TIMER The pellets will slowly be fed from the hopper into the burn pot. You should hear the gentle tingle of pellets as they fall.
- Page 13 SHORT TIMING 4. 7-Day program TIME ON TIME ON TIME OFF SHORT TIME OFF TIMING HEAT Before setting up the 7-day program, confirm that the heater displays DEVICE WORKING SHORT LONG TIMER SETTING MODE TIMING TIMING the correct time and date. If the time and date need to be adjusted, TIME ON R T °C please refer to the instructions of this manual in Section 5 - Other...
- Page 14 SHORT TIMING SHORT 5. OTHER SETTINGS TIMING TIME ON TIME ON TIME OFF ADJUSTING THE TEMPERATURE TIME OFF R T °C LONG TIMING Press the Settings Button until the ‘Set Temp’ icon SET TEMP TIME ON SHORT is highlighted. This can be done either in Standby Mode or while TIMING TIME OFF the heater is running.
- Page 15 SET TEMP REMOTE CONTROL POWER ON/OFF The wireless remote control provided with your LONG TIMING DEVICE SETTING Scandia pellet fire is the primary controller for SET TEMPERATURE LONG stove temperature and fan speed. WORKING TIMING R T °C MODE SET TEMP...
-
Page 16: Maintenance
HEATER MAINTENANCE Unplug and let the stove cool before any maintenance or cleaning. Some brands of pellets produce more ash and clinkers, therefore stove cleaning frequency greatly depends on the quality of the pellets. Not maintaining a regular cleaning schedule will cause the stove to have a low burning efficiency and void the warranty. CLEANING There will be some ash and small amounts of tar in exhaust pipe. -
Page 17: Ash Drawer Removal And Cleaning
HEATER MAINTENANCE ..continued ASH DRAWER REMOVAL AND CLEANING Do not remove the ash drawer when the stove is hot. Ash disposal should be in a metal container with a tight fitting lid. The closed container should be on a non-combustible floor, or the ground, away from all combustible materials, then to final disposal. -
Page 18: Glass Cleaning
There may be times when you need to clean the glass. To do this, use a soft cloth and a non-abrasive glass cleaner. Only ever clean the glass when the pellet fire is cold. For best results select from Scandia’s range of glass cleaning products. -
Page 19: Trouble Shooting
LONG TIMING TROUBLE SHOOTING R T °C Before seeking after-sale services, please check the list below: R T °C SET TEMP SET TEMP R T °C SET TEMP DEVICE TROUBLESHOOTING – ERROR CODES SETTING DEVICE SETTING WORKING MODE WORKING When the power is on and display shows E1 error message, MODE DEVICE TIME ON... - Page 20 TROUBLE SHOOTING ..continued 4. Not feeding properly Too many pellets have been added and cannot be burned within the required time. POSSIBLE CAUSE REMEDY The feeding time is too long. Adjust setting temperature (higher than room temperature by 3 - 6°C), let stove enter into MAX FIRE and let burn down. If still too much, adjust feeding setting to LEVEL 2 or 1 according to pellet quantity.
-
Page 21: Wiring Diagram
WIRING DIAGRAM... -
Page 22: Exploded Diagram
PELLET HEATER EXPLODED DIAGRAM... -
Page 23: Parts Listing
PELLET HEATER SPARE PARTS LIST LEGEND PART SCANDIA PART NO. Main Door Assembly SG031000018 Room Fan Vent SG031000019 Firebox Door Assembly SG031000020 Front Inspection Plate SG031000021 Ash Tray SG031000022 Burner Pot SG031000023 Firebox Liner SG031000024 Main Body Not Available for Purchase... -
Page 24: Warranty
WARRANTY This limited warranty (Warranty) is given by Scandia Heating (Aust) Pty Ltd (ACN 005 868 093) (Scandia or we) to the original retail purchaser (You) of the pellet fire to which this Warranty applies. Our goods come with guarantees that cannot be excluded under the Australian/New Zealand Consumer Law. You are entitled to a replacement or refund for a major failure and for compensation for any other reasonably foreseeable loss or damage. - Page 25 Alternatively, please complete the attached warranty www.scandiastoves.com.au/warranty card within 30 days of installation and return to: Your data will be used by Scandia to provide you with Scandia Group Pty Ltd. information about your purchase upon request. 58 Access Way, Carrum Downs Victoria, Australia, 3201.
- Page 28 www.scandiastoves.com.au 1300 HEATER (432 837)
Need help?
Do you have a question about the Verdant LE and is the answer not in the manual?
Questions and answers