Table of Contents
Advertisement
Quick Links
Advertisement
Table of Contents

Related Manuals for NAPCO iBridge Z-Wave

Summary of Contents for NAPCO iBridge Z-Wave
- Page 1 © NAPCO 2019 OI409ALF 12/19...
- Page 2 Most of the screen images were created using the Android operating system; most of the corresponding iOS screens are similar. Changes to the app may occur over time, so keep in mind that Napco reserves the right to change or modify any information or specifications without notice or obligation.
-
Page 3: Table Of Contents
GROUPS: SELECT DEVICES ............................30 GROUPS: VIEW DEVICES ..............................31 USING YOUR SYSTEM: CLIMATE CONTROL ......................... 32 USING YOUR SYSTEM: AUTOMATION ........................... 33 USING YOUR SYSTEM: SCENES CONTROL ........................34 USING THE ONSCREEN KEYBOARD .......................... 35-37 NAPCO LIMITED WARRANTY ............................40... -
Page 4: Getting Started
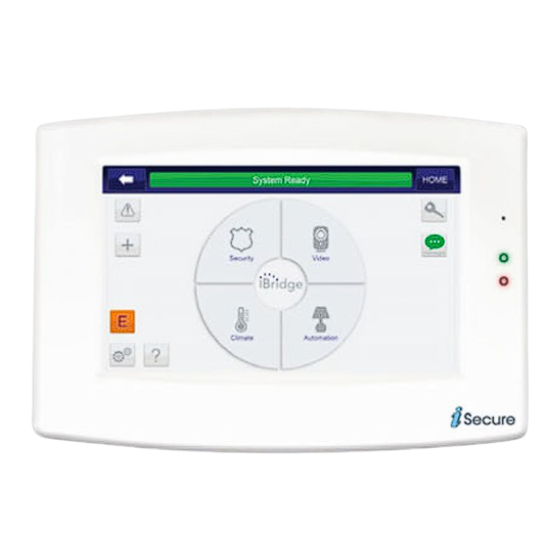
G E T T I N G S T A R T E D Security: Tap to display the status of your alarm system. Allows the control of all system operations, just like a standard wired keypad. Video: (optional) Tap to discover and view the camera transmissions in your system. -
Page 5: Using The Touch Screen
U S I N G T H E T O U C H S C R E E N Navigation through the App You can navigate through various sub-menus by simply using your finger to touch through the icons and menus as needed. The app responds differently depending on how the screen is touched: ... -
Page 6: Automation Overview (With Glossary Of Terms)
A U T O M A T I O N O V E R V I E W Overview: Home Control Network A home control (or "home automation") network is a system used for remotely controlling light switches, light dimmers, drapes/blinds, appliances, air conditioning, heating, security systems, door locks and other devices within a home or office. - Page 7 A U T O M A T I O N O V E R V I E W ( C O N T ' D ) "display" to provide visual output from the StarLink Connect Z-Wave controller. For the purposes of this manual, all references to the app will refer to both the app itself or the StarLink Connect Z-Wave controller module (see WI1980 for more information).
- Page 8 SECURITY WARNING: If you create a Scene or Event that involves arming the alarm control panel and the sys- tem is configured to use the Napco "Classic" keypad style, then ensure the User Code entered into the Scene or Event configuration screens is an "ARM ONLY"...
-
Page 9: Home Screen Icons
H O M E S C R E E N I C O N S The "Home Screen" may contain other touchable icons, including: SECURITY: This icon is your are unable to clear the trouble to WI2117 for more information. gateway to your alarm system. -
Page 10: Automation Management Screen
A U T O M A T I O N M A N A G E M E N T S C R E E N Tap the User Settings button, then tap Automation Management to open. Tap to add, remove, Tap for mode-specific and configure your Z- assistance... -
Page 11: Add Z-Wave Devices
Depending on the app firmware version, the device list may include an entry with the Description "Napco Controller" (also includes the NodeType "Napco P" ; see image below). This entry is the StarLink Connect module, with its integral Z-Wave primary controller. -
Page 12: Remove Z-Wave Devices
Automation Management screen. IMPORTANT: The addition and removal of thermo- stats from the system may cause uncontrolled and un- desired thermostat settings to be in effect. Napco is not responsible for property damage due to improper thermostat settings. Removal Started - Press Abort to Cancel... -
Page 13: Edit Device Names
E D I T D E V I C E N A M E S When a Z-Wave device is enrolled (see page 11), its NodeType, Description and Status that ap- pears in the table shown below is automatically obtained from data added by the device manufacturer. To edit the Description text: Tap in the # column to highlight the device you wish to edit (in the image below, the device with the Description text "Dim 4"... -
Page 14: Erase All Z-Wave Devices
Tap the "back" arrow (at the top left) to return to the Au- tomation Management screen. IMPORTANT: The addition and removal of thermo- stats from the system may cause uncontrolled and un- desired thermostat settings to be in effect. Napco is not responsible for property damage due to improper ther- mostat settings. -
Page 15: Advanced Settings: Replace Failed Devices
A D V A N C E D S E T T I N G S : R E P L A C E F A I L E D D E V I C E S You can easily replace an existing failed, un-plugged or missing device with a new device using the Re- place Failed Devices button. -
Page 16: Advanced Settings: Remove Failed Devices
A D V A N C E D S E T T I N G S : R E M O V E F A I L E D D E V I C E S You can easily remove an existing failed, un-plugged or missing device using the Remove Failed Devices button. -
Page 17: Advanced Settings: Add New Controller As Primary
Ethernet router or bridge. Contact your alarm installer for a list of ap- proved controllers that can be designated as Primary. Note: If the Napco StarLink Connect is the Primary Controller and a new controller is later added as the Primary, the StarLink Connect automati- cally becomes a Secondary Controller (unable to add and delete devices). - Page 18 . The new Primary Controller will appear in the device list with a NodeType that will vary with the manufacturer (will likely indicate "Controller" or "Controller P"). The former Napco StarLink Connect Primary and current Napco StarLink Connect Secondary Controller will appear with a NodeType of "Napco S".
-
Page 19: Advanced Settings: Learn
Secondary Controller or to another network as a Primary Controller. In either case, the StarLink Connect Controller receives "protocol replication data" from the Primary Controller of the other net- work. The other network, in this scenario, is a Z-Wave network separate from the iBridge Z-Wave network described so far in this User Guide. -
Page 20: Advanced Settings: Rebuild Mesh
A D V A N C E D S E T T I N G S : R E B U I L D M E S H Rebuilding the mesh is a request to redesign the internal Z-Wave database routing table to increase communication efficiency and to accelerate device response times. -
Page 21: Advanced Settings: Device Association Start
A D V A N C E D S E T T I N G S : D E V I C E A S S O C I A T I O N S T A R T Associations allow Z-Wave transmitter source ("secondary") devices (such as certain model motion detectors, wall switches and dimmers) to send commands directly to other target ("master") Z-Wave devices (such as lamp modules and appliance modules wired to the electrical load). -
Page 22: Add Scenes
A D D S C E N E S The Scene Management screen is used to control single or multiple Z-Wave devices and security sys- tem components according to predetermined settings. These settings all work together to create a par- ticular atmosphere, effect, or other desired task. - Page 23 A D D S C E N E S ( C O N T ' D ) (shown below right). Here a scrollable list of controllable items appears, allowing you to create your customized Scene. Tap in the # column to highlight one or multiple items to add (to scroll through the list, press and hold an item in the Type or Name column, then drag your finger up or down).
- Page 24 SECURITY WARNING: If you create a Scene or Event that involves arming the alarm control panel and the system is configured to use the Napco "Classic" keypad style, then en- sure the User Code entered into the Scene or Event configuration screens is an "ARM ONLY"...
-
Page 25: Add Events
A D D E V E N T S An Event is composed of up to three elements. To summarize, an event ("Trigger") occurs and a select- ed response ("Action") will occur, provided certain conditions ("Restrictions") are met. Examples include: ... - Page 26 A D D E V E N T S ( C O N T ' D ) number, tap the field that appears to add the data as necessary. For example, selecting PAN- EL DISARM will require a User Code to be entered in the " User ID" field that appears. DATE: Program a yearly recurrence pattern.
- Page 27 If you create a Scene or Event that involves arming the alarm control panel and the system is configured to use the Napco "Classic" key- pad style, then ensure the User Code entered into the Scene or Event configuration screens is an "ARM ON- LY"...
-
Page 28: Add Groups
A D D G R O U P S Groups help to organize Z-Wave devices in large installations, making them easy to locate. For ex- ample, add a Group named "Dining Room" for all Z-Wave lights and switches located in that room. Devices can be added to two or more Groups. - Page 29 A D D G R O U P S ( C O N T ' D ) In the Device Selection screen that automatically appears (shown below left), scroll through the list and tap in the # column to highlight the devices you wish to add. When finished, tap Save.
-
Page 30: Groups: Select Devices
G R O U P S : S E L E C T D E V I C E S To add or remove the devices within an existing Group: In the Group Management screen (shown below left), tap in the # column to select the Group Name you wish to view. -
Page 31: Groups: View Devices
G R O U P S : V I E W D E V I C E S To view the devices within an existing Group: In the Group Management table (shown below left), tap in the # column to select the Group Name you wish to view. -
Page 32: Using Your System: Climate Control
Note: The "SET TO" option is not available when the thermostat is set to Off. Tap the "back" arrow (at the top left) to return to the Napco Security Application Home Screen. Note: To update the screen and display the latest information, tap the "Refresh" button, at right. -
Page 33: Using Your System: Automation
Scenes Control: Tap to open the Scenes Control screen that displays a button for each created Scene in the system. next page for details. "back" arrow (at the top left) to return to the Napco Secu- rity Application Home Screen. -
Page 34: Using Your System: Scenes Control
To ac- cess all of the Scenes in your system: In the Napco Security Application Home Screen, tap Automation. Tap the Scenes Control button. In the Scenes screen (shown below), each existing Scene in the system appears as a but- ton. -
Page 35: Using The Onscreen Keyboard
U S I N G T H E O N S C R E E N K E Y B O A R D Standard Keyboard The "Standard" onscreen keyboard allows you to type text, numbers and other characters. With some applications, the onscreen keyboard opens automatically;... - Page 36 U S I N G T H E O N S C R E E N K E Y B O A R D ( C O N T ' D ) Numbers and Symbols On the "Standard" keyboard shown on the previous page, tap the "?123" key and switch to the "Numbers and Symbols"...
- Page 37 U S I N G T H E O N S C R E E N K E Y B O A R D ( C O N T ' D ) Additional Symbols On the "Numbers and Symbols" keyboard shown on the previous page, tap the "~[<" key and switch to the "Additional Symbols"...
- Page 38 N O T E S...
- Page 39 N O T E S...
-
Page 40: Napco Limited Warranty
NAPCO SECURITY SYSTEMS, INC. (NAPCO) warrants its products to be free from In no event shall NAPCO be liable for an amount in excess of NAPCO's original selling price manufacturing defects in materials and workmanship for thirty-six months following the date of of the product, for any loss or damage, whether direct, indirect, incidental, consequential, or manufacture.
Need help?
Do you have a question about the iBridge Z-Wave and is the answer not in the manual?
Questions and answers