Advertisement
*24203424*
24203424
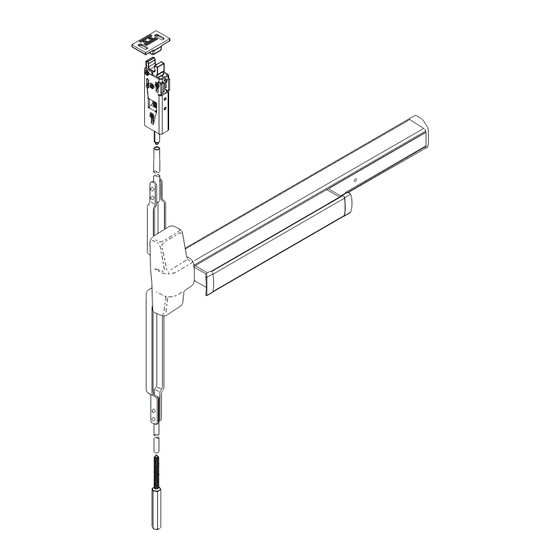
Concealed Vertical Rod Exit Device for Metal Door Applications
Please give these instructions to building owner after device is installed
HH (KAW) 98/9947
Devices covered by these instructions:
HH 98/9947 Concealed Vertical Rod Exit Device
HH CD98/9947 (Cylinder Dogging) Concealed Vertical Rod Exit Device
HH EL98/9948 (Electric Latch Retraction) Concealed Vertical Rod Exit Device
Special tools needed:
5/64" hex wrench
#10-24 tap
Drill bits: #25, 1/8", 1/4",
5/16", 13/32"
Index:
Screw chart ............................. 2
Door preparation chart............ 3
Device installation ................ 4-5
Frame preparation .................. 5
Adjust rods .............................. 6
Optional equipment ............. 7-8
Cut device .............................. 8
Installation Instructions
Advertisement
Table of Contents

Summary of Contents for Von Duprin HH KAW 9847
-
Page 1: Table Of Contents
*24203424* HH (KAW) 98/9947 24203424 Concealed Vertical Rod Exit Device for Metal Door Applications Installation Instructions Devices covered by these instructions: HH 98/9947 Concealed Vertical Rod Exit Device HH CD98/9947 (Cylinder Dogging) Concealed Vertical Rod Exit Device HH EL98/9948 (Electric Latch Retraction) Concealed Vertical Rod Exit Device Index: Screw chart ...... -
Page 2: Screw Chart
SCREW CHART Surface mount or #10-24 x 1” Sex bolts (1-3/4” door) Sex bolts (2-1/4” door) #10-24 x 1-1/2” - Packaged with trim - 990 trims (1-3/4” door) #10-24 x 1-3/8” 990 trims (2-1/4” door) #10-24 x 1-7/8” Surface mount or #10-24 x 3/4”... -
Page 3: Door Preparation Chart
DOOR PREPARATION CHART Go to instructions on next page before using preparation chart Center case - 4 holes Surface mount Sex bolts or 990 trims 1/4” Drill (device side) #25 Drill #10-24 tap 13/32” Drill (trim side) Door Cut-outs Outside cylinder applications: Mark with template and cut-out: *End cap bracket - 2 holes Metal door (cut device side) -
Page 4: Device Installation
If Using an Outside Cylinder, Check NL Drive Screw Draw Horizontal Device Center Line ( C L ) and Install Tailpiece Guide NL drive screw Factory installed on back of center case RHR shown (LHR opposite) With NL drive screw removed, key locks and unlocks lever, knob, or thumb piece. -
Page 5: Frame Preparation
Install Rods and Latches as Shown Prepare and Install Top Strike Bottom rod Top rod of top latch & bolt & latch 2x #16 drill & tap 12-24 use strike as template once final strike location is set 3/4" Blade stop 2x #16 drill 3/4"... -
Page 6: Adjust Rods
ADJUST RODS Open door and verify top latch bolt Release pushbar. is fully extended (Figure 1). Depress pushbar and ensure latchbolt falls. Shown fully Top latch bolt Latch bolt retracted extended (flush with latch case) Figure 1 Figure 3 Loosen bottom locking screw (Figure 2). -
Page 7: Optional Equipment
OPTIONAL EQUIPMENT CD (CYLINDER DOGGING) Std. mortise 1. Remove mortise cylinder cam and reinstall in reverse (Figure 6). cylinder 2. Insert key and rotate cam to install the cylinder to the cover plate (Figure 7). 3. Remove key to slide cover plate in position in the mechanism case. Offset toward pushbar Std. -
Page 8: Cut Device
CUT DEVICE Measure amount to cut off device. Cut device square. Cut device square NOTE: Device must and remove all be cut square for burrs proper end cap fit 2” Minimum clearance (with endcap removed) Slide anti-rattle clip into device. Note If 5/8”...

Need help?
Do you have a question about the HH KAW 9847 and is the answer not in the manual?
Questions and answers
How much can you reduce the Length of the Panic Device?
The minimum length reduction for the Von Duprin HH KAW 9847 panic device is 2 inches.
This answer is automatically generated