Table of Contents

Summary of Contents for EcoSpring HP300
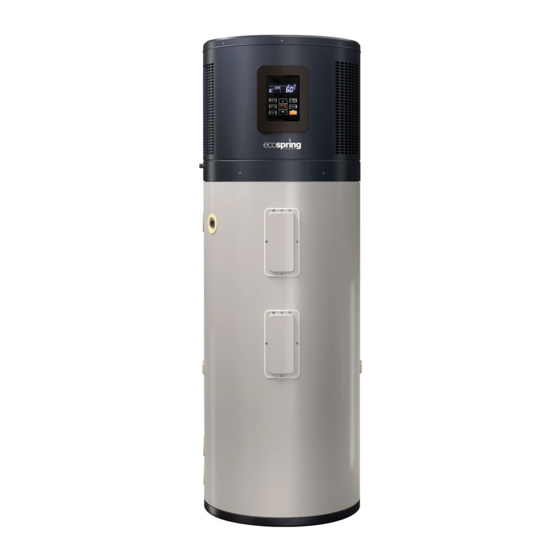
- Page 1 Installation & Owner’s Manual ALL IN ONE Type Air-source Heat Pump Water Heater EcoSpring HP300 Thank you very much for purchasing our product, Before using your unit, please read this manual carefully and keep it for future reference.
- Page 2 The supply to the heat pump water heater can be operated directly from the switchboard or via a remotely mounted switch or time clock as requested by the customer. The heater must be provided with a suitable means for disconnecting the power supply. HP300 Installation & Owner’s Manual...
- Page 3 All the picture in this manual are for explanation purpose only. They may be slightly different from the heat pump water heater you purchased (depanding on model). Please refer to the real product instead of the picture of this manual. Water-proof Shield to be purchased by the client, not along with the product accessories. HP300 Installation & Owner’s Manual...
-
Page 4: Table Of Contents
12.28 given supervision or instruction concerning use of the appliance by a person responsible for their safety. Children should be supervised to ensure that they do not play with the appliance. Installation & Owner's Manual HP300 Installation & Owner’s Manual... -
Page 5: Before Installation
Hydrogen gas is extremely flammable, and may build up if no water is drawn of for several weeks. To reduce the risk of The ambient air temperature must also be considered when Installation & Owner's Manual HP300 Installation & Owner’s Manual... - Page 6 In places where there are strong wind like seaside, fix the unit in a location protected from the wind. 2.3 Maintenance space requirements (unit: mm) ≥600 ≥600 Barrier Display Φ650 Fig.2-1 Fig.2-3 HP300 Installation & Owner’s Manual Installation & Owner's Manual...
-
Page 7: Installation
WARNING 50mm larger than ● Do not dismantle the PTR valve, the dia. of unit Fig.3-2 ● Do not block off the drainage pipe, it will cause explosion and injury. EXPLOSION Installation & Owner's Manual HP300 Installation & Owner’s Manual... -
Page 8: Electric Connection
Blue Without disinfect Power frequency-60Hz White To ST1 Without electric heater 300L model Blue With disinfect Power frequency-50Hz Without electric heater 300L model WATER TANK Without disinfect Power frequency-60Hz COMP Fig.3-3 HP300 Installation & Owner’s Manual Installation & Owner's Manual... -
Page 9: Installation Checklist
Frequently inspection of magnesium anode is recommended.This anode Can Power Cable be fitted by midea or an authorized person. This Warranty does not apply if the TDS exceeds 2500 mg/litre. Fig.3-5 HP300 Installation & Owner’s Manual Installation & Owner's Manual... -
Page 10: Trial-Running
Immediate action is required. water outlet valve and open drainpipe. To maintain optimal operation check, remove and clean the air filter. Open Close Hot water outlet Open Cool water inlet Drainpipe shut-off valve HP300 Installation & Owner’s Manual Installation & Owner's Manual... - Page 11 E-heater running ambient temperature range: -20~53ºC. included), it is normal that outlet water is unclean. Turn the tap on Heat pump running ambient temperature range: -7~43ºC. and the water will be flushed clean. Water temperature limits: Installation & Owner's Manual HP300 Installation & Owner’s Manual...
- Page 12 NOTE Previous 2nd t error or protection code While the ambient temperature below than -7℃, heat pump will stop running, the unit will automatically shift to E-heater running. Software number HP300 Installation & Owner’s Manual Installation & Owner's Manual...
-
Page 13: Operation
TEMP-UNIT: will be displayed if displays temperature, E-HEATER: otherwise will be extinguished. will be displayed if e-heater is activated, ③ otherwise will be extinguished. Installation & Owner's Manual HP300 Installation & Owner’s Manual... - Page 14 ● When Setting clock/timer, press more In the unlocked state, press the button for 3 than 1s, Clock/timer value will be increased second and the Timer-TIME ON function will be continuously; canceled. Installation & Owner's Manual HP300 Installation & Owner’s Manual...
- Page 15 Press the two buttons at than 3 seconds and the Timer-TIME ON & TIME OFF the same time for 1sec to Disinfect function will be canceled. go into disinfect. HP300 Installation & Owner’s Manual Installation & Owner's Manual...
-
Page 16: Trouble Shooting
HP300 Installation & Owner’s Manual Installation & Owner's Manual... - Page 17 System blocked, air or water or more refrigerant in system(after repair), water temperature System high pressure protection sensor malfunction, ect. ≥ 3.0MPa active ;≤ 2.4MPa inactive Contact a qualified person to service the unit. HP300 Installation & Owner’s Manual Installation & Owner's Manual...
-
Page 18: Maintenance
Turn off the power, and turn off the water inlet valve. hander, replace PTR valve with a new one Open hot water tap, and decrease the pressure of the inner container. Installation & Owner's Manual HP300 Installation & Owner’s Manual... -
Page 19: Specifications
Outlet/inlet vertically, water-proof installation available Dimension Φ650×1935mm Water tank cap. 280L Net weight 153.5kg T30A 250VAC Fusible link type The test conditions: Ambient temperature 15/12°C(DB/WB), Water temperature from 15°C up to 45°C. HP300 Installation & Owner’s Manual Installation & Owner’s Manual... - Page 20 4) If a cold water expansion valve, check valve and strainer is not major failure. fitted in areas where mains pressure is likely to exceed 0.65MPa; Contact Phone: 1300 367 565. HP300 Installation & Owner’s Manual Installation & Owner's Manual...


Need help?
Do you have a question about the HP300 and is the answer not in the manual?
Questions and answers