
Related Manuals for Adventure Kings AKGA-GAZHUB_01

Summary of Contents for Adventure Kings AKGA-GAZHUB_01
- Page 1 GAZEBO HUB USER MANUAL AKGA-GAZHUB_01 V1.2 PLEASE READ AND UNDERSTAND THIS MANUAL COMPLETELY BEFORE USING THIS PRODUCT.
- Page 2 CONTENTS 1. INTRODUCTION 2. SAFETY INFORMATION 3. SETUP INSTRUCTIONS 4. WARRANTY CARD...
- Page 3 This manual covers the safety information, general information and setup & pack up instructions for the Adventure Kings Gazebo Hub. The AK Gazebo Hub is designed to be used as an additional attachment to the Adventure Kings 6x3m gazebo or 3x3m gazebo. For any questions or warranty claims please call 1800 883 964.
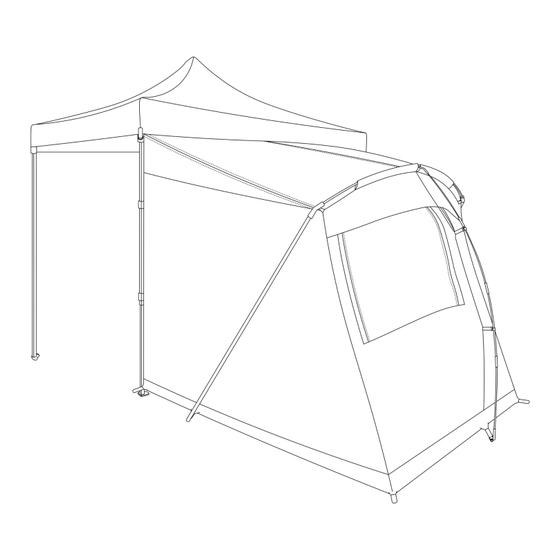
- Page 4 3. SETUP INSTRUCTIONS The following is a step by step procedure on how to setup the AK Gazebo Hub. For information regarding setting up an AK 3x3m or 6x3m gazebo, please see the specific user manual which can be found on the 4WD Supacentre website. See Setup diagram below. STEP 1: Ensure that a 3x3m or 6x3m gazebo is setup and pegged down before starting the AK Gazebo Hub setup.
- Page 5 STEP 3: Roll the AK Gazebo Hub out flat and position next to any 3m side of the gazebo. Ensure the front door of the AK Gazebo Hub is facing the gazebo. Note: The AK Gazebo Hub is only designed to fit the 3m side of a gazebo. STEP 4: Lift the front wall of the Gazebo Hub and clip it onto the gazebo cross bars using the small plastic hooks, you will now see the Gazebo Hub begin to take shape.
- Page 6 STEP 5: Using the Velcro straps (#1 setup diagram) secure the sides of the Gazebo hub to the vertical corner poles of the gazebo. STEP 6: Grab the centre spreader pole and slide it into the sleeve (#2 setup diagram). Once through the sleeve, ensure both ends of the centre spreader poles are located in the plastic joiners (#3 setup diagram).
- Page 7 12 MONTH LIMITED WARRANTY WARRANTY PERIOD: Full 12 month warranty from date of purchase against all manufacturing defects. WHAT DOES THE WARRANTY COVER? Under normal usage conditions, this warranty covers: a. Any defect in design or manufacture which results in the product failing to perform substantially as described in authorised advertising or literature.
Need help?
Do you have a question about the AKGA-GAZHUB_01 and is the answer not in the manual?
Questions and answers