Advertisement
Advertisement
Table of Contents

Summary of Contents for Move Shoot Move SiFo
- Page 1 SiFo Star Tracker Bluetooth version V1.0 User Manual Android MoveShootMove.com...
-
Page 2: Table Of Contents
Index Specification ................3 Installation Gesture A Horizontal Rotation ..............4 B Tilt Rotation................4 C Vertical Rotation................4 D Star Tracking Mode.................4 E Slider Multi-axis Mode..............5 III. Working Instruction 1 Time-lapse..............5 1.1 Camera control Rotator...............5 1.2 Rotator control camera............8 2 Video................9 3 Panorama stitching................10 3.1 Custom stitching..............10... -
Page 3: Specification
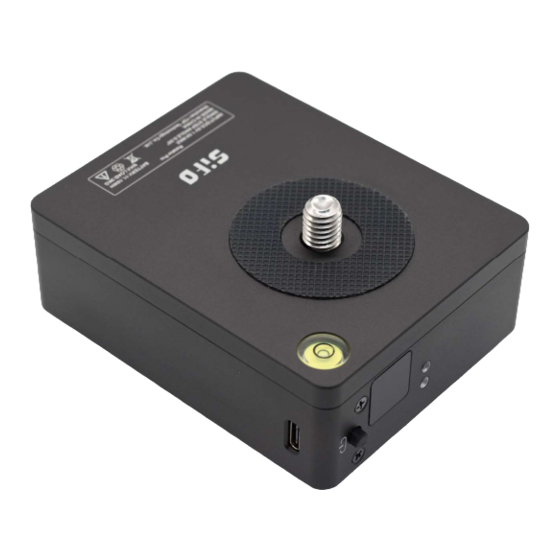
Specification Size: 55*100*80(mm) Weight: 445g Material: Main body - Aluminum alloy Worm gear - Copper Surface treatment - Anodizing Max load: 3 Kg Total Photos/Charge: 9600 Min Angle: 0.05° /step Max angle: No Limit Max rotation speed: 4°/sec Min rotation speed: 1.2°/sec Bluetooth maximum connection distance: 2m Star tracking speed: 24 Hour/360°... -
Page 4: A Horizontal Rotation
2. Installation mode A horizontal rotation B pitch rotation... -
Page 5: C Vertical Rotation
C Vertical rotation D Star tracking mode E slide rail multi-axis... - Page 6 3. Instructions Apart from some specified mode, we take the horizontal rotation as an example in the below section Section 1: Star Tracker Mode 1. Install the pan/tilt head on to the tripod, install the Rotator on to the Pan/Tilt head. 2.
- Page 7 Attention, Please do not keep the laser pointer continuous running more than 1 min, this may shorten the life of the laser pointer. If you shoot in the southern hemisphere, please check this link to do a polar alignment. https://www.moveshootmove.com/pages/polar-alignment-tutorial-for-southern-hemisphere-with- msm-sifo-star-tracker 6. Turn on your phone’s Bluetooth, connect the app with your Rotator.
- Page 8 7. Selection mode: Starry Sky 8. Path setting, fine-tuning your camera’s position.
-
Page 9: Time-Lapse
9. Enter“PARAM” to choose the hemisphere of your shooting location. Then choose the speed you needed. ● Full-speed is the standard star speed. If you want to take Milky way photos with foreground, you need to take 2 photos, one power on the rotator for the star, one power off the rotator for the foreground. - Page 10 If you use the built-in time-lapse app of your camera, then there is no need for external shutter release. 6. Turn on your phone’s “Bluetooth”. 7. Open the app “SiFo assistant”. Click “Rotater” to enter the “BLE Settings” interface, select the device from the device list., and confirm.
- Page 11 8. Select mode: Time-lapse to set up your timelapse parameters. ● LEFT, RIGHT arrow, set the Rotator to rotate left and right. ● UP, DOWN, these 2 movements can only be activated when you have 2 rotates work together. Check 4.3 720 degrees stitching for detail. ●...
- Page 12 ● The ‘Camera controls’ mode, the interval time will be determined by the camera, and the rotator passively follows the camera instruction. ● Photo number, Total photos you want the camera to shoot from the start position to the ending position. ●...
-
Page 13: Video
● Turn off the autofocus ● Turn off the reflector pre-up. 5. Turn on your phone’s Bluetooth, connect rotator with SiFo app, Mode, Param setup. 6. Set the parameters ● Choose ‘Rotator Control’ ● Set "number of shots", "shutter time", "interval time", "slide tracking", the system automatically calculates the angle of each rotation 7. -
Page 14: Panorama Stitching
7. The path setting is the same as “Time Lapse”. 8. Set parameters: set the shooting related parameters "shooting time" "slide track", the system automatically calculates the speed of rotation. 9. Click "Start" to work. Section 4 Panorama stitching 4.1 Custom stitching 1. -
Page 15: 360 Degrees Stitching
5. Click “Start” to enter the shooting. (Same as "Time Lapse".) 4.2 360-degree stitching 1. Same as custom stitching installation and setting. (The difference is that the rotator automatically rotates 360 degrees without setting the path.) -
Page 16: 720 Degrees Stitching
4.3 720 degrees stitching 1. Please refer to the illustration for installation. 2. APP must be connected to the horizontally placed rotator, and the 2 rotates should be connected By cross communication cable (cross-communication cable should be purchased separately). 3. Be careful to avoid the lens hitting onto the rotator. 4. -
Page 17: Troubleshooting
APPENDIX.1 Troubleshooting 1. Red light flashes - battery is too low. 2. The indicator light flashes and the Rotator does not run - the internal failure of the rotator. 3. The rotating base is loose - the rotating base is not fixed on the main body, if loose, it can be tightened. - Page 18 APPENDIX.2. Frequently Asked Questions Q: Which tripods can the rotator be connected to? A: As long as the tripod with 1/4 or 3/8 screws, most of them are supported on the market. Q: Which brands of cameras does the rotator support? A: Supports all cameras on the market with hot shoe or shutter release port.
- Page 19 long as it is working. Q: Will there be any gaps between the gear? A: No. Because the gimbal uses an innovative elastic worm gear structure, the worm will always bite the worm gear tightly. Then there will not be any shake when shooting.
Need help?
Do you have a question about the SiFo and is the answer not in the manual?
Questions and answers