Advertisement
Table of Contents
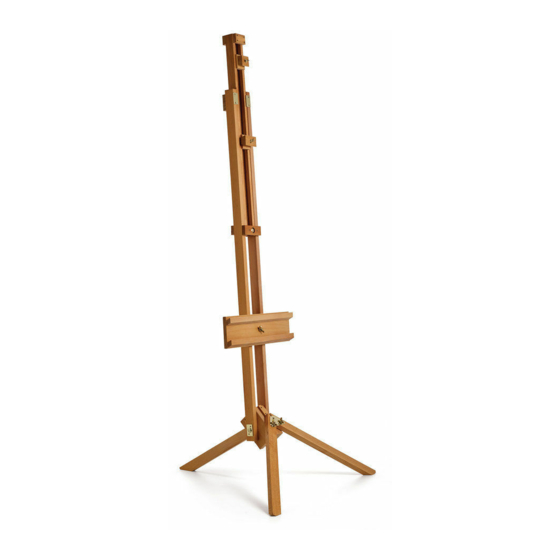
WINSOR & NEWTON THAMES RADIAL EASEL INSTRUCTIONS
Now you have got over the excitement of
receiving all of your wonderful Cass Art
goodies, it's now time to assemble your
Winsor & Newton Thames Radial Easel.
We would like to offer some helpful
alternative instructions to those provided
with your easel.
Once you have all your pieces laid out,
take piece A and unscrew the large wing
nut on the side. Then pull each of the
three legs of the easel apart. The further
outwards these are, the lower the overall
height of the easel will be.
Take piece B and separate the two
pieces (1B and 2B) by unscrewing the
small wing nut. Slot piece 2B through
the hole in the middle of the back of
piece A. The large screw should poke
through the front of the easel. Slot piece
1B onto the front of the easel, onto the
long screw. Then screw on the wing nut
to keep this in place.
Page 01 / 02
A
C
B
2B
2B
2B
1B
1B
1B
Advertisement
Table of Contents

Subscribe to Our Youtube Channel
Summary of Contents for WINSOR & NEWTON Thames Radial Easel
- Page 1 WINSOR & NEWTON THAMES RADIAL EASEL INSTRUCTIONS Now you have got over the excitement of receiving all of your wonderful Cass Art goodies, it’s now time to assemble your Winsor & Newton Thames Radial Easel. We would like to offer some helpful alternative instructions to those provided with your easel.
- Page 2 Your easel is now complete! The wing nuts on the two small blocks can be loosened and moved up and down to accommodate one or two boards/ canvasses of various heights. So your easel is all set up and ready to hold your canvas/board but what is this mysterious T-Bar piece (piece C) for? You can actually use your easel perfectly...
Need help?
Do you have a question about the Thames Radial Easel and is the answer not in the manual?
Questions and answers