
Summary of Contents for AVG Automation EZTouch I/O Flex Series
- Page 1 EZTouch I/O Flex Copyright © 2015 by AVG Automation. All Rights Reserved.
-
Page 2: Table Of Contents
EZTouch I/O Flex Table of contents Warnings ........................3 Product Overview ......................4 Specifications ......................... 5 Quickstarting the Device ....................7 Installation Considerations ..................... 8 Safety Considerations ....................8 Installation Considerations ..................9 Electrical Considerations ................... 10 Shielding from RFI ....................11 Mounting Information .................... -
Page 3: Warnings
All Rights Reserved No part of this document shall be copied, reproduced, or transmitted in any way without the prior written consent of AVG Automation. AVG Automation retains the exclusive rights to all information included in this document. Designed, Built and Marketed by AVG 4140 Utica Ridge Rd. -
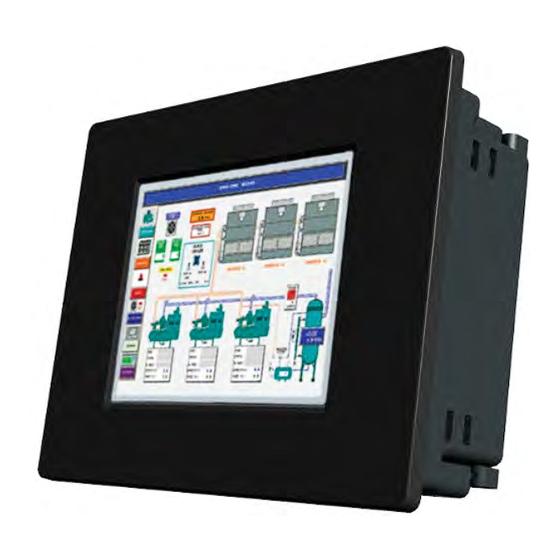
Page 4: Product Overview
EZTouch HMI with PLC capabilities. As the latest in a long line of high preforming and easy programming HMIs, the EZTouch I/O Flex Series is both convenient and fast to use. In addition, the EZTouch I/O Flex provides several enhancements over its predecessors including additional communication ports, higher resolution, a standard MicroSD slot, and built in remote monitoring and control features. -
Page 5: Specifications
EZTouch I/O Flex Specifications EZTouch I/O Model Specifications 6” EZTouch I/O 6” EZTouch I/O 6” EZTouch I/O 6” EZTouch I/O 6” EZTouch I/O 8” EZTouch I/O 10” EZTouch I/O Mode l Micro Micro Flex Flex Flex Nano Micro EZ3-T6C-E-24-8- EZ3-T6C-E-24-8- Part Number EZ3-T6C-E-16- EZ3-T6C-E-24-8-... - Page 6 EZTouch I/O Flex 8.048” x 6.146” x 4.325” 10.894” x 8.748” x 13.584”x10.594” x External Dimensions (204.41 x 156.11 x 109.87mm) 4.363” 4.299” (276.71 x 222.20 x (345 x 269.1 x 109.20mm) 110.82mm) Weight 2 lbs 3.5 lbs 4.5 lbs 6 / 64...
-
Page 7: Quickstarting The Device
EZTouch I/O Flex Quickstarting the Device This section outlines the steps needed to setup the EZTouch I/O Flex and get it started. This is not intended to explain specific details needed to start your system. Rather, it provides a quick guide to give a broad picture of what is needed to power-up EZTouch I/O Flex system. -
Page 8: Safety Considerations
EZTouch I/O Flex Safety Considerations Please follow all applicable local and national codes to ensure maximum safety of the equipment and personnel. The installation and operational environment must be maintained per the latest revision of these codes. You are responsible to determine the codes to be followed and to verify the compliance of equipment, installation, and operation with the latest revision of these codes. -
Page 9: Installation Considerations
EZTouch I/O Flex Installation Considerations Our products have been designed and tested for operation in the most demanding industrial environments. Modern solid-state industrial controls are complex electronic equipment that operate at low levels of voltage and current, co-existing with components that operate at much higher levels of power. The difference in operating power characteristics between the high and low power control devices creates the possibility of unwanted signals being generated, thus causing interference. -
Page 10: Electrical Considerations
EZTouch I/O Flex and electromechanical controls. If possible, the electromechanical controls (motors, starters, solenoids, etc.) should be housed separately or at the farthest point when enclosed within the cabinet. We recommend that the unit has a minimum clear space of 2" on all sides for adequate ventilation as shown in the image on the right. -
Page 11: Shielding From Rfi
EZTouch I/O Flex Shielding from RFI Shielded Cables Power cables, I/O cables or wiring, and communication cables should all be separate so that they do not couple the conducted RFI on any of these wires/ cables. Another path for RFI into the PLC is through its RS232 port. Hence, the cables to this port must be shielded properly. - Page 12 EZTouch I/O Flex Cabinet Wiring The wiring of the EZTouch I/O Flex unit to the “feld” outside the cabinet must be by design. The wiring cannot be random in order to get the various points of the cabinet and the “feld” electrically connected. Below are some general rules that apply in most situations: o Provide a separate power source to electronic controls and keep this power bus away from any I/O power.
-
Page 13: Mounting Information
EZTouch I/O Flex Mounting Information Units: inches [millimeters] EZTouch I/O Panel Dimensions Unit Type 8.05" [204.42mm] 6.15" [156.11mm] 6" 4.37" [110.93mm] 8" 10.89" [276.71mm] 8.75" [222.20mm] 4.53" [115.06mm] 10" 13.58" [345.03mm] 10.59" [269.09mm] 4.56" [115.82mm] EZTouch I/O Micro 8.05" [204.42mm] 6.15"... - Page 14 EZTouch I/O Flex Mounting Instructions (6 Inch Model) The 6-inch models (6" EZTouch I/O Flex, EZTouch I/O Micro and EZTouch I/O Nano) must be mounted using DIN Clips. DIN Clips are metal brackets (P/N EZ- BRK-1, package of 2 brackets and 4 screws) that attach to the panel and secure the front panel to a mounting surface with 4 screws.
- Page 15 EZTouch I/O Flex Mounting Instructions (8 and 10 Inch Model) The 8" and 10" EZTouch I/O Flex units are stud mounted. All the necessary mounting hardware is provided with the unit. Use the 8 studs and 8 nuts with captive washers to secure the unit to the mounting surface. Note: Nuts are to be tightened with no more than 1 inch-pound of torque.
-
Page 16: Communication And Ports
EZTouch I/O Flex Communication and Ports Powering the Unit Connect the power input wires into the HMI's power terminals. Supply 24VDC nominal (20-30VDC) power to the system. Ensure the indicator LED located on the PLC base is ON (green LED). If not, remove power from the system and check all the wiring. -
Page 17: Com1 Port
EZTouch I/O Flex COM1 Port The EZTouch I/O has a built-in serial port (COM1 PORT) located on the 9-pin D- Sub connector. COM1 PORT is an RS-232 port which requires an appropriate RS-232C cable (P/N: EZ-PGMCBL) for programming the unit through a PC. It serves as the default programming port on the EZTouch I/O Flex. -
Page 18: Ethernet Port
EZTouch I/O Flex Ethernet Port There is an Ethernet port available on the EZTouch I/O Flex This port enables users to add/ update programming through Ethernet connection. It allows for both PC and PLC simultaneous communications. It can also be used for Internet access and email alerts. -
Page 19: Usb Ports
EZTouch I/O Flex USB Ports Dual USB Ports I / O F l e x EZTouch come equipped with two USB ports. Prog port for program upload through programming cable. Note: If a powercycle occurs while the programming cable is connected, the cable will need unplugged and then replugged in to reestablish a connection. -
Page 20: Wiring I/O Connections
EZTouch I/O Flex Wiring I/O Connections EZTouch I/O Flex comes with Easy to Wire Phoenix Terminals. As shown in the picture, simply insert the wire and screw to tighten. You can wire up to ONE 14 AWG wire, TWO 18 AWG wires, or FOUR 22 AWG wires in every terminal. -
Page 21: Touch I/O With Micro
EZTouch I/O Flex Touch I/O with Micro Terminal Layout 21 / 64... -
Page 22: Terminal Pinouts
EZTouch I/O Flex Terminal Pinouts 22 / 64... - Page 23 EZTouch I/O Flex 23 / 64...
-
Page 24: Digital I/O Specifications
EZTouch I/O Flex Digital I/O Specifications Discrete Input Specifications Number of Inputs Input Voltage Range 10-28 VDC 1.92 mA @12 VDC Input Current 4.0 mA @ 24VDC Maximum Input Current 4.3 mA @ 26 VDC Input Impedance 11.5k @ 12-26 VDC ON Voltage Level >12 VDC OFF Voltage Level... - Page 25 EZTouch I/O Flex Relay Output Specifications Number of Outputs Max Switching Voltage 277 VAC or 30 VDC Max Switching Power 2770 VA or 300 W Rated Switching Current Contact Resistance 100mΩ (at 1A 6VDC) Insulation Resistance 100MΩ Min. at 500VDC 5000VAC at 50/60Hz for one minute between Coil &...
-
Page 26: Analog I/O Specifications
EZTouch I/O Flex Analog I/O Specifications 26 / 64... - Page 27 EZTouch I/O Flex 27 / 64...
-
Page 28: Touch I/O With Nano
EZTouch I/O Flex Touch I/O with Nano Terminal Layout 28 / 64... -
Page 29: Terminal Pinouts
EZTouch I/O Flex Terminal Pinouts 29 / 64... -
Page 30: I/O Specifications
EZTouch I/O Flex I/O Specifications Digital Input Specifications Number of Inputs Input Voltage Range 12-26 VDC 1.92 mA @12 VDC Input Current 4.0 mA @ 24VDC Maximum Input Current 4.3 mA @ 26 VDC Input Impedance 11.5k @ 12-26 VDC ON Voltage Level >12 VDC OFF Voltage Level... - Page 31 EZTouch I/O Flex Relay Output Specifications Number of Outputs Max Switching Voltage 277 VAC or 30 VDC Max Switching Power 2770 VA or 300 W Rated Switching Current Contact Resistance 100mΩ (at 1A 6VDC) Insulation Resistance 100MΩ Min. at 500VDC 1500VAC between Coil &...
-
Page 32: Programming The Touch I/O
EZTouch I/O Flex Programming the Touch I/O PLC Operation Sequence EZTouch I/O Flex CPU operating sequence A good understanding of the will help you achieve the proper control for your equipment or process. The flow chart on the left shows how the CPU controls all aspects of system operation. - Page 33 EZTouch I/O Flex Output instructions do not wait for the CPU to complete the ladder scan. Immediate outputs are directly written to the image table and Outputs are updated accordingly. Subroutines The CPU executes subroutines when called for in the ladder program.
-
Page 34: Create A Project
EZTouch I/O Flex Create a Project This section outlines the basics of creating a project using the EZSeries Editor software. Further programming information for the EZTouch I/O Flex is located in the Software Manual. Launch your Programming Software and select how you would like the program to connect to the EZTouch I/O Flex. - Page 35 EZTouch I/O Flex 4. Click OK to launch the editing software program. The Main Project Window will then appear. The steps below outline how to create a sample panel program or PLC project. Create PLC Program: On the left side, click on "Main Logic" under the Project Tree to start creating a sample PLC Ladder Logic program as outlined below.
- Page 36 EZTouch I/O Flex Once again, a dialog box will appear. Enter "O1" as the address string. Click Click on Instructions > Line to wire “NO Contact” and “NO Coil.” Your screen should look like this when finished: Create a Panel Program: Click on “Panel” and "Scr 1" to create the Panel display screen as explained in the sample below.
- Page 37 EZTouch I/O Flex Click anywhere on the screen to place the Button object. Double click the icon to open its object dialog box if you need to adjust the object's appearance or attributes. Clicking "Simulates Press" will allow you to toggle between On and Off states.
-
Page 38: Transfer A Project
EZTouch I/O Flex Transfer a Project After a project is complete, the next step is to transfer the project to the EZTouch I/O FlexC unit. When editing projects online, programming information is automatically sent to the unit once the project is saved. When editing in an off-line mode, the project information will need to be transferred. -
Page 39: Cpu Memory
EZTouch I/O Flex CPU Memory Memory Types A PLC system handles many numbers representing different types of information regarding processes/machine parameters. These processes/machine parameters may be anything from status of the input or output devices, timers/counters, or other data values. Before you start programming the EZTouch I/O Flex, it would be helpful if you took a moment to familiarize yourself with how the system represents and stores the various types of data. -
Page 40: Mapping Conventions
EZTouch I/O Flex Please Note: Since the PLC Editor is a common programming platform for all the models offered by the AVG PLC family, it may allow you to include 128 Inputs (I), 128 Output (O), 64 input Registers (IR) and 64 Output Registers (OR) in the main logic. - Page 41 EZTouch I/O Flex Word data types (registers). The maximum number of Input Registers available is 1 through 64. The EZTouch I/O with Micro only requires registers IR1-IR4. You can only Read from an IR register. Note: All the EZ Analog Inputs (if available) are mapped to Input Registers. Output Register (Word) Output Registers are denoted using an “OR”...
- Page 42 EZTouch I/O Flex Index and Value Registers (Word) The Index Register data type is represented by an “XR” prefix (e.g. XR1, XR2 etc.). There are 4 XR memory locations available in EZTouch I/O Flex. “XR” is a Read- Write data type and it is mainly used to point to the correct address of “R” registers. The pointed-to “R”...
-
Page 43: Additional Features
EZTouch I/O Flex Additional Features Data Logging Overview The EZTouch I/O Flex offers a flexible Data Acquisition capability. You can acquire and save the data for one or more tags defined in the panel. The acquired data along with a time stamp is saved in CSV file format in the USB stick or the MicroSD card, depending on how the schedule is set. - Page 44 EZTouch I/O Flex Click on Add/Edit buton to display the ““dd D“A Schedule Details.” The "Add DAQ Schedule Details" box will appears allowing you create a new schedule for the panel. Schedule names can be either be Tag based or a Constant (user defined name).
- Page 45 EZTouch I/O Flex Types of Schedules Time based – at regular Intervals Allows you to store the tag value at regular time intervals, anywhere from every 1 second to every 1000 hours. Time based – at Specifc Times Allows you to store the value of a group of tags up to 10 specific times. You may always edit / delete a specified time.
- Page 46 EZTouch I/O Flex Numeric Type event: Event Based - at Regular Intervals: Allows you to create an event and store the values of a group of tags on the occurrence of the same during a set time period. Based on the data type of the event tag, schedule can be either Discrete Event Type or Numeric Event Type.
- Page 47 EZTouch I/O Flex Pausing Data Acquisition and Ejecting Card Pause / Resume Data Collection Tag: This is a discrete tag that can be controlled by user (e.g. through a Push Button) or by PLC to enable or disable data acquisition. When the tag's value is 0, data collection is enabled;...
- Page 48 EZTouch I/O Flex Changing logging between USB and Micro SD There are two options to change how the data logging information is saved. Option #1 Using the Programming Software Open your project file for the EZTouch I/O Flex using the EZTouch Editor Software.
-
Page 49: Create Oem Packager
EZTouch I/O Flex Create OEM Packager The EZPackager utility allows an OEM to distribute updates to EZTouch I/O or EZPLC projects easily and quickly. Using the utility, OEMs can package current project and/or firmware into a zip file for distribution to the end user via email or the web. If you click on File >... - Page 50 EZTouch I/O Flex Opening a Pack File A Pack File contains the following: 1. Updater application (comprising of the .exe and required dlls) 2. Project files (which would show up inside the Project folder when unzipped) 3. Firmware files (which would show up inside the Firmware folder when unzipped The end user can take the pack file, unzip it, and then run the EZTouch I/O Updater application to update his/her panel with the selected project(s) and/or firmware.
- Page 51 EZTouch I/O Flex Once you click on OK, EZUpdater window appears on the screen with an option to select the communication port. You may also test the connection, before a final click to Update button. Click on the Update button to update the Project and/or the Firmware on your EZSeries TouchPLC.
-
Page 52: Create Usb Loader
EZTouch I/O Flex Create USB Loader Through the EZTouch Editor Software (version 5.5 and higher) users can program EZTouch I/O through a USB Flash drive. This process especially benefits System Integrators and OEMs with upgrading the Panels on-site without having to actually connect to a computer. - Page 53 EZTouch I/O Flex Copy file(s) on USB Drive Copy file(s) created by the editor on the root directory of a USB flash disk. (Please note files copied in a location other than root directory would not be read by the panel.) All files are saved automatically with .hmi extension. Files without this extension will not be read.
-
Page 54: Remote Monitoring & Control
EZTouch I/O Flex Remote Monitoring & Control With the introduction of new Remote-Access Card and Remote Monitor & Control (RMC) Software EZTouch I/O offer a unique set of remote capabilities. A user can remotely log on to a unit and monitor any of the panel screens with live data including the currently displayed screen. - Page 55 EZTouch I/O Flex Set Remote Users Here you may add up to 8 remote users by clicking on Add/Edit button. The Log-in name and the password are case sensitive and both must be between 8 to 16 characters in length. Password also must contain at least one letter and one number.
- Page 56 EZTouch I/O Flex Run RMC Software To access the panel over Ethernet, you need to install and run the EZ-RMC software on your PC. Once you run the software, you will see the following EZ-RMC dialog. Select Parameters Select the communication port, IP Address if Ethernet is selected, and Polling Time.
-
Page 57: Maintenance And Troubleshooting
EZTouch I/O Flex Maintenance and Troubleshooting Hardware Maintenance Routine maintenance checks should be performed on the unit to avoid any risk of hardware problems. The EZTouch I/O Flex is designed to be a very rugged controller so that just a few checks periodically will help keep it up and running. The key points to be checked include: ·... -
Page 58: Changing The Battery
EZTouch I/O Flex Changing the Battery The unit comes with a built in Lithium battery with a 5 year life expectancy. The steps below outline the process to change the battery inside the unit. Since only the information saved to the registers/discretes available on a power cycle will remain intact, please save pertinent information before attempting to change the battery. -
Page 59: Update Firmware
EZTouch I/O Flex Update Firmware There are several methods to update the firmware for an EZTouch I/O Flex unit. Previously, it was explained how to update firmware through an OEM Packager file. Alternatively, the user can follow the steps below to update firmware through the EZ Series Software and a COM port on the EZTouch I/O Flex unit. - Page 60 EZTouch I/O Flex 6. Use Browse to locate the appropriate firmware version. 7. Verify Serial (COM1) is selected under the PC to Panel Connection, then click 60 / 64...
-
Page 61: Setup Ip Address
EZTouch I/O Flex Setup IP Address The EZTouch I/O Flex will arrive with a factory-programmed IP Address that may need edited to be compatible with your LAN network. Once the IP Address has been adjusted to the LAN, the EZTouch I/O Flex can receive programming instructions through either the serial port (COM1) connection or via the Ethernet. - Page 62 EZTouch I/O Flex 8. Once the dialog box appears, select 'Configure Ethernet Attributes.' Type in the necessary changes and click 'Set Ethernet Parameters.' Click OK. 9. Next, save the project. 62 / 64...
-
Page 63: Troubleshooting
EZTouch I/O Flex Troubleshooting If you encounter difficulties while using the EZTouch I/O Flex device, please consult the list below which outlines common troubleshooting issues and their solutions. Additional assistance is also available within the EZTouch I/O Software Help. Alternatively, you may also find answers to your questions in the operator interface section of our website @ www.ezautomation.net. - Page 64 EZTouch I/O Flex Power cycle the panel and ping the IP address assigned to the panel by going to your command prompt. If it is pinging, disconnect the cable from the panel end and ping again, if it pings again, then there is another device with the same IP address in the network.
Need help?
Do you have a question about the EZTouch I/O Flex Series and is the answer not in the manual?
Questions and answers