
Summary of Contents for HardSID 4U Series
- Page 1 HardSID 4U user’s guide HardSID 4U Studio Edition HardSID 4U Standard Edition HardSID 4U user’s guide © 2008 Hard Software, Hungary...
-
Page 2: Table Of Contents
MSG LED ..............................7 The Power Supply ............................. 7 Installing SID chips ............................ 8 How to prepare the HardSID 4U for installing SID chips ............... 8 Socket numbering ..........................8 Supported versions, number of SIDs ....................9 The right direction..........................9 Setting the voltage .......................... - Page 3 Installing the device driver .......................... 11 Installing the HardSID 4U 32bit or 64bit device driver on Windows XP ..........11 Installing the HardSID 4U 32bit or 64bit device driver on Windows Vista ..........13 Prerequisites for Windows Vista x64 Edition ..................13 Installing SID Chips video tutorial .......................
-
Page 4: Safety Information
Always unplug the power supply from the AC connector when not using the unit for a long time. • (for more than a few hours) If the device is broken, do not try to fix it yourself. • HardSID 4U user’s guide © 2008 Hard Software, Hungary... -
Page 5: Introduction
Read this manual carefully to learn about configuring your HardSID 4U • Learn about installing SIDs into the HardSID 4U at appendix “Installing SID chips video tutorial” • To notify applications about the removed PCI/ISA HardSID, you need to remove this registry key: •... -
Page 6: About Hardware
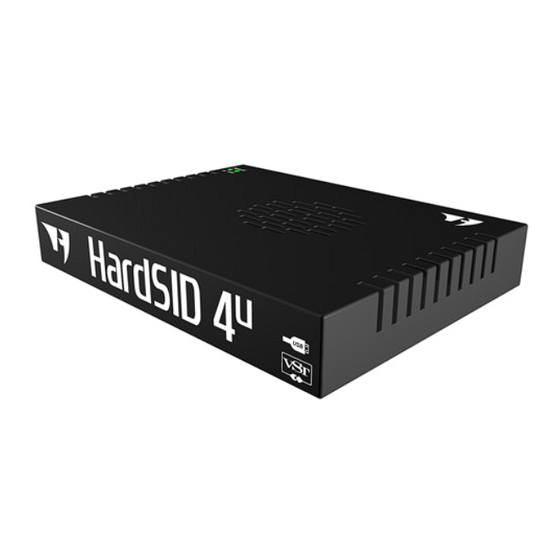
Mixed output (black) The mixed output is the easiest way of connecting the HardSID 4U to an amplifier, soundcard, etc... It combines the sound of all installed SIDs into one mono output (the same signal on both channels of the stereo jack). -
Page 7: Inputs (Blue)
The SID has the ability of routing the incoming mono audio signal through its filter. This functions can be activated in a VST host application using the HardSID 4U VSTi. There are two (blue) input jacks on the HardSID 4U. Both jacks are stereo. The mono inputs of SID 1&2 are on the same stereo jack (1=right, 2=left). -
Page 8: Installing Sid Chips
Check out the “Installing SID chips video tutorial” in the Appendix! • How to prepare the HardSID 4U for installing SID chips After you’ve checked out the “Installing SID chips video tutorial” in the Appendix, start with the following: Switch off the unit... -
Page 9: Supported Versions, Number Of Sids
Supported versions, number of SIDs The HardSID 4U works with any number of SIDs up to four. (1, 2, 3 or 4) All SID versions are supported in any combination. (6581, 8580, 6582) The right direction Always check the direction of the SID before installing it! Installing the SID in the wrong direction may cause damage to your HardSID 4U. - Page 10 There are two-pin-wide and three-pin-wide ones. You have to install them aligned to the right. If you install wide capacitors, you can install them into pins 1-3 and 4-6, but if you have two-pin-wide ones you can simply install them into pins 2-3 and 5-6. HardSID 4U user’s guide © 2008 Hard Software, Hungary...
-
Page 11: Installing The Device Driver
Download the device driver for your OS from http://www.hardsid.com/drivers_apps_docs.php extract to a folder before connection/turning on your HardSID 4U. Remember the folder (path) where you extracted the driver files. Your OS will ask for the device drivers after connecting and turning on your HardSID 4U. - Page 12 Answer: Click the Have Disk button. A new dialog pops up. Locate the folder where you extracted the driver files and press Ok. Now the list contains the HardSID 4U driver. Click on the driver’s name and click Next. HardSID 4U user’s guide © 2008 Hard Software, Hungary...
-
Page 13: Installing The Hardsid 4U 32Bit Or 64Bit Device Driver On Windows Vista
Vista 64-bit Edition” is checked/enabled. Click the Apply Settings button Reboot into Vista x64 Now your Vista x64 will let you to install the HardSID 4U x64 drivers. HardSID 4U user’s guide © 2008 Hard Software, Hungary... - Page 14 Answer: Don’t search online The next dialog will ask you if you have a driver disc. Answer: I don’t have a disc. Show me other options. HardSID 4U user’s guide © 2008 Hard Software, Hungary...
- Page 15 The next dialog will warn you that Windows can’t verify the publisher of this driver: Answer: Install this driver software anyway The last dialog will tell you that your HardSID 4U is ready to use. HardSID 4U user’s guide © 2008 Hard Software, Hungary...
-
Page 16: Installing Sid Chips Video Tutorial
About the tutorial: The initial state of the HardSID 4U unit shown in the tutorial is the same as the initial configuration of your own unit (you’ve received it with the factory default configuration). Factory default for HardSID 4U units without SID: Sockets 1/3 are configured for 6581 and sockets 2/4 are configured to 8580. -
Page 17: How To Remove Sids Carefully
Step 2: Insert the tip of the screwdriver between the SID chip and the SID socket as shown on the picture. Don’t push it further under the SID yet. Insert just the edge of the screwdriver’s tip. HardSID 4U user’s guide © 2008 Hard Software, Hungary... - Page 18 Now that you have some place under the SID, you can push the screwdriver until almost the other end of the SID. The SID lifts a bit more so its pins are released from the socket at your end. The screwdriver’s position is still horizontal. HardSID 4U user’s guide © 2008 Hard Software, Hungary...
- Page 19 Step 5: Start pushing down the handle of the screwdriver carefully to lift the other end of the SID. Lift it until the SID gets horizontal. Now all pins of the SID are released from the socket. Step 6: You can now take out the SID. HardSID 4U user’s guide © 2008 Hard Software, Hungary...
Need help?
Do you have a question about the 4U Series and is the answer not in the manual?
Questions and answers