Table of Contents
Advertisement
Advertisement
Table of Contents

Summary of Contents for Beastx Nanobeast
- Page 1 Version 5.1 INSTRUCTION MANUAL...
-
Page 3: Safety Notes
The pilots are fully responsible for their actions and for damage caused by the operation of their model aircraft and injury. • Read the following instructions thoroughly before using NANOBEAST the first time and carefully adjust the system according to the given instructions. Take enough time and check every step for correctness. - Page 4 • The NANOBEAST PROEDITION comes with the AttitudeControl function (optionally available horizontal stabilization) which serves as a flight aid for beginners by restricting the freedom of movement of the helicopter. However, this does not ensure that the helicopter can be always flown safely! Due to incorrect control inputs the helicopter may crash anyway, even when using AttitudeControl.
- Page 5 STUDIOX.BEASTX.COM BEASTX.COM WIKI.BEASTX.COM 0719...
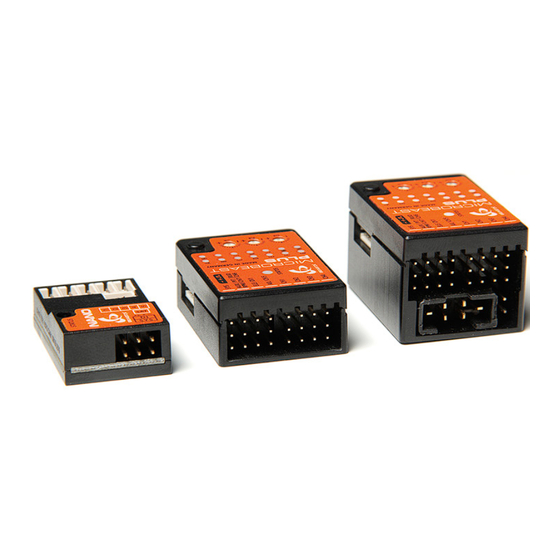
- Page 6 Dear customer, We congratulate you on your purchase! NANOBEAST is a control unit for small and very small RC model helicopters without mechanical fly bar. The integrated gyro elements stabilize the helicopter as much as possible, so that it’ll only follow the control commands of the pilot. The steering feel can be tuned easily from tame to extremly agile.
-
Page 7: Box Contents
With the NANO Servo Connection Kit, you can connect With the separately available NANO Light Programmer servos with normal sized servo plugs to NANOBEAST. you can adjust some settings quickly on the airfield. Please note that the tiny white plugs and the thin... -
Page 8: Installation
1. INSTALLATION NANOBEAST can be installed either flat or upright. The white connector strip must point either to the front or to the back of the heli. The sensor axes (edges of the device housing) must be aligned absolutely parallel to the three rotation axes. Anyhow, the device can be mounted laterally offset, it does not have to be exactly on the axes of rotation. -
Page 9: Receiver Connection
Receivers with serial signal output transmit all control commands / channels by one wire. Connect the signal output from the receiver with the signal input DI on the NANOBEAST (using the enclosed patch cable). If you use a SPEKTRUM® or JR®... -
Page 10: Preparing The Transmitter
3. PREPARING THE TRANSMITTER Create a new model memory in your remote-control transmitter. It should provide multiple flight modes in order to control engine, collective and gyro in different flight situations. No mixing functions must be active on the channel outputs. In particular, disable the mixing of the swashplate servos in the radio. - Page 11 4. STUDIOX NANOBEAST has a serial interface marked with the letter [SYS]. Use a standard servo cable to connect this port with your USB or Bluetooth interface (sold separately). Watch out for correct polarity! Note that the interface NANOBEAST does not supply the with power.
-
Page 12: Radio Setup
5. RADIO SETUP As first setup step we have to teach the receiver type / remote control system and the assignment of the control functions to the system. To do so, select CONTROL SIGNAL on the StudioX overview page. - Page 13 Automatic detection of the remote-control system In order to recognize the connected receiver type, the remote-control transmitter must be switched on and bound to the receiver. Also make sure that the default setup of the transmitter was performed as described in chapter 3. Press SCAN to start the search.
- Page 14 In case the preset does not match to your radio system or you have another switch assignment wishes, you can train the functions in sequence. Choose TEACH and then move the sticks / switches according to the display in the app. Note that you NANOBEAST must always only move one channel at once. Otherwise, can‘t recognize which channel you want to use for...
-
Page 15: Basic Setting
If you do not know the optimum or maximum drive frequency of the servos, never exceed 50Hz! The higher the driving frequency, the better the flight performance of NANOBEAST. However, it must be ensured that the servos are allowed to be operated with an increased drive frequency. Otherwise the servos could be damaged! At WIKI.BEASTX.COM we have a list of data on the most popular servo types. - Page 16 Rudder servo and tail rotor 1. Connect the rudder servo to the output [2] of NANOBEAST and mount the rudder horn/servo cross as good as possible at a 90 ° angle to the tail linkage rod. Adjust the linkage so that the tail slider is positioned correctly. Ideally, in the 90 °...
- Page 17 Move rudder to the right Be sure to follow the given order! Always set the correct servo and stick direction first, then check the control NANOBEAST . The internal control direction does not change the servo direction! This only direction of serves to ensure that the gyro is moving the rudder to to correct direction.
-
Page 18: Swashplate Mixing
Disable any kind of mixing of the swashplate servos in the transmitter. Choose a mechanical mixer (often referred to as „normal“, „H1“ or „1 servo“) if applicable. Each stick of the transmitter must drive exactly one control output. Only NANOBEAST is responsible for the swashplate mixing! Then connect the servos to the outputs [3] to [5] as shown below. - Page 19 Alignment of the swashplate servos In the next step we trim the servo centre positions so that the servo arms form a perfect 90 degrees angle with the linkage rods. This is necessary because usually the servo drive trains are not accurate enough, so the servo arms fit as good as possible from the beginning.
- Page 20 Note: You can’t reverse the individual servo directions with the reverse function of the transmitter! The transmitter only gives control commands to NANOBEAST , but does not directly control the servos! When a control channel in the transmitter is reversed, the function as a whole will be reversed, not the direction of one single servo (except when using a mechanical swash plate mixture).
- Page 21 Collective pitch adjustment 1. Move collective pitch up and down and verify the control direction on the rotor head. Reverse the pitch channel using the servo reverse function of your transmitter, in case the direction is incorrect. Move thrust up and down 2.
- Page 22 (=control direction) for the aileron or elevator channel. 2. Now set the internal control direction of NANOBEAST : If you move elevator forward, the Status LED lights in blue colour while the bar for elevator moves to the right in the app. If you pull elevator back, the Status LED must light in red and the bar in the app should move to the left.
- Page 23 Make sure to check the LED display before the first flight, whether the gain changes in the flight phases accordingly. Follow the display of the NANOBEAST and do...
-
Page 24: Other Parameters
At this point, we only want to mention the most important parameters which you should know and which you may possibly adjust before or after the first flight. Control style NANOBEAST The stick movements of aileron, elevator and rudder are transferred by into a specific rate of rotation. When the sticks are in middle position (i.e. -
Page 25: Firmware Update
(Chapter 7). 10. PROEDITION FIRMWARE NANOBEAST can be upgraded to the paid PROEDITION firmware. With this you get additional functions from your device like flight assistance for beginners and advanced adjustability for experienced pilots. The exchange of the firmware runs like a normal firmware update from the StudioX software/app. - Page 26 ATTITUDECONTROL (Rescue function) AttitudeControl is a position stabilization that brings the helicopter into the hover position at the push of a button. There are various ways in which this affects in detail: Quad Mode - In this mode, the helicopter flies similar to a multicopter. The pitch can be controlled „normally“, but if you move aileron or elevator, then the helicopter is tilted by a specific angle (but will not roll at a given speed).
- Page 27 Switching channel for the AttitudeControl Usually a free switching channel is used on the remote control transmitter to activate the AttitudeControl function in flight. If this switching channel is moved / switched in one direction, then the function is off, switching in the other direction activates position stabilization.
- Page 28 Normal mode instead of the tail gyro setting.) This Mode can be activated via the menu CONTROL SIGNALS by performing a manual function assignment, and skipped the assignment of a separate control channel for the AttitudeControl. You can WIKI.BEASTX.COM find more information in the online manual under...
- Page 29 BANK SWITCHING Bank switching allows you to switch between three sets of parameters in flight instead of always to fly with one and the same settings. So you can connect the system to different flight situations and / or Adjust rotor speeds, i.e. for hovering, sightseeing flight, speed flight, for landing, etc.
- Page 30 We therefore are not liable for damages in respect to the use of this content. We are grateful to all senders for suggestions. Just send us an e-mail to info@beastx.com. The contents of this publication are protected by copyright. All rights reserved.
- Page 32 WWW.BEASTX.COM ©2019...
Need help?
Do you have a question about the Nanobeast and is the answer not in the manual?
Questions and answers