Table of Contents
Advertisement
Advertisement
Table of Contents

Summary of Contents for Iconic VF1
- Page 1 Iconic Vacuum Forming Machine Instruction Manual...
-
Page 2: Table Of Contents
CONTENTS Page 1 - INTRODUCTION 2 - TECHNICAL SPECIFICATIONS 3 - PACKAGING CONTENTS 4 - INSTALLATION INSTRUCTIONS 5 - INSTRUCTIONS FOR USE 6 - SAFETY AND FUNCTIONALITY PRECAUTIONS 7 - MAINTENANCE AND CLEANING 8 - SPECIAL STORAGE CONDITIONS 9 - TROUBLESHOOTING 10 - WARRANTY TERMS &... -
Page 3: Introduction
1 - INTRODUCTION Thank you for purchasing the Iconic VF1 vacuum forming machine. Please read the contents of this manual to ensure safe and trouble free operation whilst achieving the highest quality results. The vacuum forming procedure involves heating vacuum forming material for a set length of time or to achieve a specific amount of sag in the blank before vacuum forming the material. -
Page 4: Installation Instructions
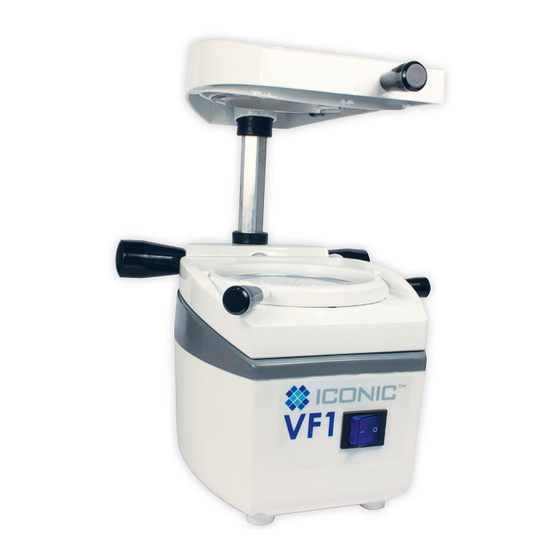
4 - INSTALLATION INSTRUCTIONS • Before the installation of the machine, mount the handles packed separately inside the packaging. These must be mounted in the plasticizer before its installation, as shown in the illustrative drawing below; • There are two (2) identical shorter M6 thread handles, one for the heating unit and one for the rotary ring and two (2) longer vacuum driving M10 thread handles. -
Page 5: Instructions For Use
5 - INSTRUCTIONS FOR USE Iconic VF1 provides two (2) processes of vacuum forming: Conventional and Rotary. For the operational process follow the instructions below guiding from the numbers in Figures 1 and 2. Figure 01 Figure 02 FIGURE 02... -
Page 6: Covering The Retentive Surface To The Desired Limit. Then Introduce The Assembly In The Vacuum Chamber (Photos
Photo 01 Photo 02 5.1.3 - With the help of handle (01), rotate the heating unit (02), 180º to the left to facilitate the manipulation job with the models and model holders and to install the blanks (photos 03 and 04). Photo 03 Photo 04 5.1.4 - Put the model(s) in the model holders (06) and then insert the model(s) in the vacuum chamber (07). - Page 7 5.1.4.2 - Flat position: Allows making a copy of the whole extension of the model. For better results, cut the model eliminating its retentions and obtaining a flat base. Do not use a very high model in this process, because there will be a higher distortion of the blank.
- Page 8 5.1.6 - Insert the blank for moulding from the front side of the fixing unit observing a small access slope and introducing it under the two side pins ( photo 11) (photo 12). 5.1.7 - Insert the smaller ring into the fixing unit on the blank observing the two side pin guides (11) and turn it to the left clockwise direction using the handle (09) locking the blank (photo 13).
- Page 9 5.1.9 - Upon reaching the ideal plastic forming point, turn the vacuum activation handle right side (03), half turn counter- clockwise direction to release the blank fixation unit (04), lower the whole of the fixation unit set of the blanks with both hands (one at each handle), causing the fixation unit frame of the blank to close to the vacuum chamber (photo 16).
- Page 10 Photo 19 Attention: We recommend always keeping the system locked while the machine is used the conventional way, by slightly tightening the lock screw (10). When using the rotary system with heating on both faces of the blank, place the model after the whole heating process of the blank is completed on both faces, since the rotation of the rotary ring may hit the model, damaging it.
-
Page 11: Safety And Functionality Precautions
5.2.3 - Repeat item 5.2.2, now rotate the larger ring clockwise to the return the fixing system (04) to the normal position and the plate to the initial position. Leave heating for a few more seconds the same side of the plate that initiated the process. -
Page 12: Maintenance And Cleaning
7 - MAINTENANCE AND CLEANING Always keep the Iconic VF1 clean and protected from moisture, specially the resistance in the heating unit. To clean the cabinet, use only water, wet cloth and use neutral detergent. The heating element is a component that requires some attention, it should not receive moisture while heated and should not be touched by tools or metallic objects. -
Page 13: Troubleshooting
9 - TROUBLESHOOTING Problem Likely cause Solution The equipment won’t start, general Machine is powerless. switch is off. General switch starts but heating does Heating element is burnt. (22). Replace the heating element, call the not work. Authorized Service. Heating is normal but motor does not End-of-course pin (32) with some Replace or adjust the end-of•course pin start. -
Page 14: Warranty Terms & Servicing
10 - WARRANTY TERMS AND SERVICING DB Orthodontics Limited gives one (1) year warranty (from date of purchase) to Iconic VF1. This warranty comprises any and all manufacturing defect, provided by repairing the product and limited to the following requirements: a) That the product was correctly used, according to the instructions supplied. - Page 15 ISS 3: 150416 DB Orthodontics Limited Ryefield Way Silsden West Yorkshire BD20 0EF United Kingdom T: +44 [0] 1535 656999 F: +44 [0] 1535 656969 W: www.dbortho.com...
Need help?
Do you have a question about the VF1 and is the answer not in the manual?
Questions and answers