Table of Contents
Advertisement
Advertisement
Table of Contents

Related Manuals for Next Technology idMEDIA 8

Summary of Contents for Next Technology idMEDIA 8
- Page 1 Android Car Radio User Manual Model: www.next-technology-ltd.com...
- Page 2 www.next-technology-ltd.com...
-
Page 3: Table Of Contents
Content 1. BASIC COMMON SENSE OF CAR RADIO ..........................1 1.1 Power on and off ..............................1 1.2 Screen function key..............................1 1.3 Home and Application interface ..........................1 1.4 Drop-down menu and status bar ..........................1 2. MAIN FUNCTIONS OF YOUR CAR RADIO DEVICE ......................... 2 2.1 Navigation function.............................. -
Page 4: Basic Common Sense Of Car Radio
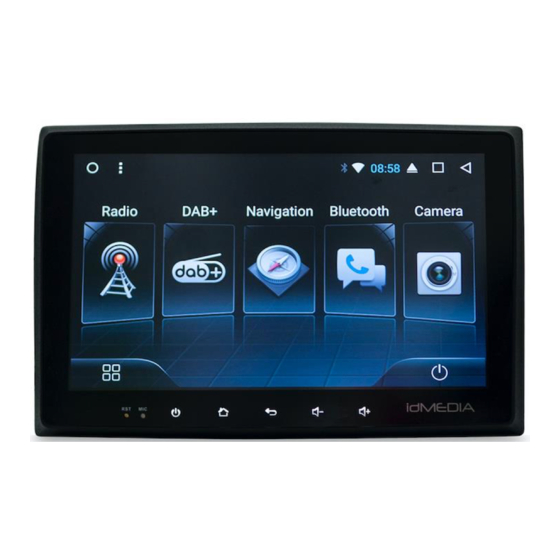
1. BASIC COMMON SENSE OF CAR RADIO Warning: Before using this device, please make sure you read this manual. 1.1 Power on and off Power on: When you plug in the car keys, the car’s ACC power is switched on. The device will automatically power on, displaying the boot animation LOGO idMEDIA. -
Page 5: Main Functions Of Your Car Radio Device
Note: The device software is under upgrading, the status indicator may be different in your device; please refer to the actual device software. 2. MAIN FUNCTIONS OF YOUR CAR RADIO DEVICE 2.1 Navigation function 2.1.1 Use of maps Click on the Navigation icon in the main interface or in the application interface to enter the map interface. 2.2 Radio function 2.2.1 Radio interface In the main interface or in the application interface, click the Radio icon to enter the audio interface. -
Page 6: Bluetooth Function
2.3 Bluetooth function The Bluetooth interface can be entered by the main interface or the application interface by clicking on the Bluetooth icon. 2.3.1 Pairing equipment 1) When the machine has not yet paired the equipment, it can only enter the setting and search interface, and the other interface cannot be entered. -
Page 7: Dial And Call
Find contacts: in the mobile address book interface, click the phone book icon or in the SIM card address book interface, click the SIM card phone book icon . The contact interface will pop up the search box. Enter the name and phone to find the contact. -
Page 8: Call Record
Note: when you click on the icon, the call is answered. When you click on the icon, the call ends. When the call ends, the small window will disappear automatically. 2.3.4.2 Call record 1) In the Bluetooth interface, click to enter into Bluetooth call history interface. The history records incoming / dialed and missed calls. -
Page 9: Interface
2.6 EQ 2.6.1 Interface There are two ways to enter the EQ interface: 1) In the main interface or application interface, click on the equalizer application function to enter the equalizer settings interface 2) Or click EQ in some of the functions, such as audio and music, to enter the equalizer settings interface 2.6.2 Equalizer setting interface Equalizer and sound field setting 1) The equalizer settings interface provides 8 kinds of audio playback modes that you can choose. -
Page 10: Dab
2.8 DAB+ Click the DAB+ icon to enter into the following page: 1. Slideshow 2. Channel list 3. Channel LOG 6. Frequency tracking: if you click , the icon turns yellow. The Frequency tracking is activated. If you click the icon again, it turns white and this function is off. -
Page 11: Andriod Auto Connection
2.9.1.1 Andriod Auto connection 1) The Android auto app should be downloaded and installed in the mobile phone. You need to open it as shown below: 2) Click in the car radio to open it and then connect the mobile phone by USB cable. Note: please only use the original USB cable for your phone. - Page 12 2) Navigation Click to enter the navigation interface Click to search Settings, set mute/road condition/road image Click to return to current location Zoom in the map Zoom out the map 3) Dial and Call Click to enter into Dial and Call interface Slide up Slide down Dial pad...
-
Page 13: Car Play
Return to car radio page Click to return to the car radio system page. Once you are back to the car radio page, android auto is running in the background, so you don’t need to connect it again if the mobile phone is still connected to the car radio. 2.9.2.2 Car play You can choose to display the interface menu on the left or on the right. -
Page 14: Cautions
Navigation Click to enter the map. Search the location you need in the top left corner. Move up/down/left/right Voice input Settings Current location Dial and call Click to enter into dial and call Siri Long press to enter into Siri page (voice recognition page), so the carplay can be operated by voice commands. 2.9.3 Cautions Checking the activated Zlink mode and version. -
Page 15: Set Up Common Sense
3. SET UP COMMON SENSE 3.1 WiFi Setting There are two ways to open and close WiFi: 1) The drop-down interface has a WLAN function. Click it to set it. 2) Settings →WLAN or Wi-Fi. Click to set. 3.2 Sound Setting Voice settings includes four common functions: Reverse mute, Navi audio channel, Navi volume, and Device ringtone: 3.2.1 Reverse mute By default, radio sound is on when in reverse mode. -
Page 16: Setting Date & Time
Device ringtone is the sound of the phone when call is received through the idMAEDIA device. After setting, the sound of the ring sounds when you receive a call. 3.3 Setting Date & time The device automatically calibrates the current time function, but requires your GPS to be activated. You can also manually set the date, time, time zone, and format. - Page 17 iGO NAVIGATION PROCEDURE INSTALLATION iGO NAVIGATION sur Radio idM EDIA INSTALLATION PROCEDURE iGO NAVIGATION on Radio idM EDIA Allumez votre radio Turn on your radio Dans le menu Général Cliquez sur Paramètres In the General menu Click Settings Sélectionnez A propos de Tablette Select About Tablet Sélectionnez IMEI Select IMEI...
Need help?
Do you have a question about the idMEDIA 8 and is the answer not in the manual?
Questions and answers
Do I need a simcard to use the GPS?