Table of Contents
Advertisement
Quick Links
Advertisement
Table of Contents

Subscribe to Our Youtube Channel
Related Manuals for Seametrics T1

Summary of Contents for Seametrics T1
- Page 1 T1/T1r Submerible Temperature Smart Sensor PROUDLY MADE IN THE 9001:2008...
-
Page 2: Table Of Contents
Connecting via RS232 Serial Port ....................28 Connecting with a USB/Serial Adapter..................28 Trouble Shooting ....................30 Seametrics Limited Warranty................31 ©1997 - 2016 Seametrics. All rights reserved. Registered trademarks and trademarks belong to their respective owners. Seametrics • 253.872.0284 Page 2... -
Page 3: Introduction
The T1 and T1R temperature sensors are designed to provide trouble-free submersible operation when properly installed. The T1 (non-recording version) operates on an external (9 to 16 VDC) power supply and is ideal for use with many data loggers and SCADA systems. -
Page 4: Wiring Diagram
T1/T1R INSTRUCTIONS Sensor: There are no user-serviceable parts. If problems develop with sensor stability or accuracy, contact Seametrics. If the sensor has been exposed to hazardous materials, do not return it without notification and authorization. Cable: Cable can be damaged by abrasion, sharp objects, twisting, crimping or crushing and pulling. -
Page 5: Installation
INSTALLATION AND OPERATION T1/T1R INSTRUCTIONS Installation Lower the sensor to the desired depth. Fasten the cable to the well head using tie wraps or a weather proof strain-relief system. If your sensor comes with a connector, be sure the supplied cap is securely placed on the weather-resistant connector at the top of the cable when not connected to a computer or logger. -
Page 6: T1 Technical Specifications
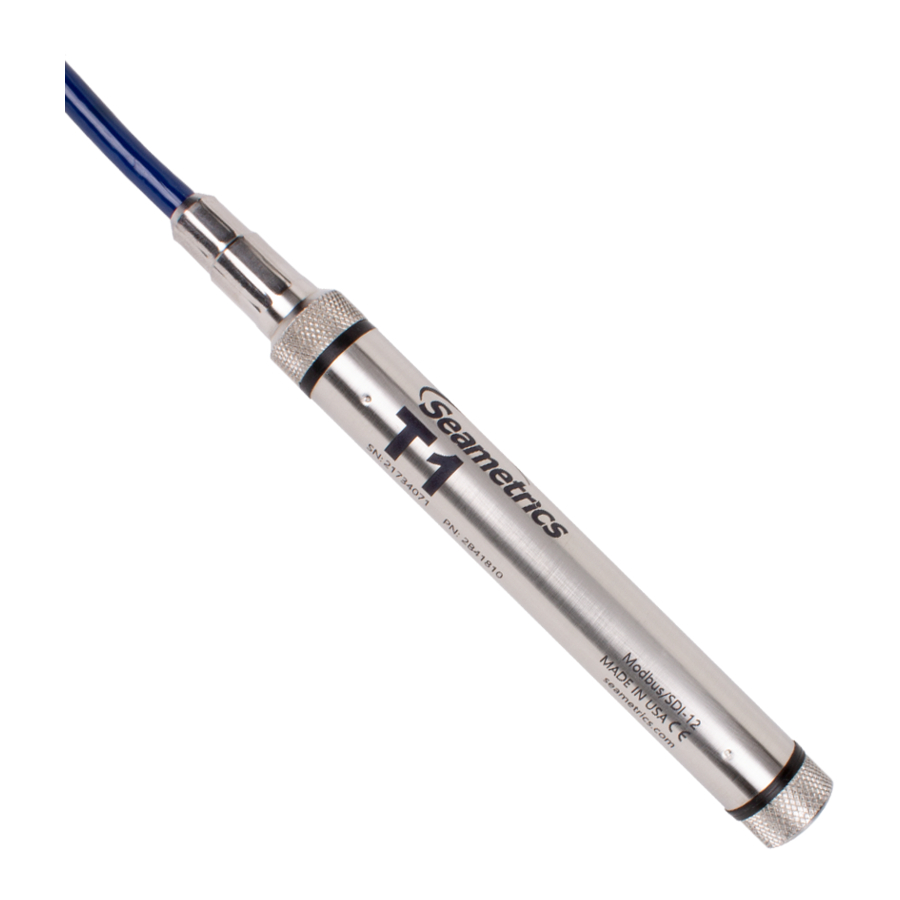
TECHNICAL SPECIFICATIONS - T1 T1/T1R INSTRUCTIONS Dimensions and Specifications GENERAL Length 6.85” (17.4 cm) Diameter 0.75” (1.9 cm) Weight 0.8 lb (0.4 kg) Body Material 316 stainless steel or titanium Wire Seal Material Fluoropolymer and PTFE Submersible Cable Polyurethane, polyethylene,... -
Page 7: T1 (Non-Recording Sensor) Operations
OPERATIONS - T1 NON - RECORDING T1/T1R INSTRUCTIONS Reading via Modbus RTU Register Definitions Modbus Functions ® Read the values in the registers using function 03-Read Holding Registers. Parameter Data 32-bit ieee floating point values, read-only These registers must be read as pairs... - Page 8 OPERATIONS - T1 NON - RECORDING T1/T1R INSTRUCTIONS Sensor Configuration/Control 40301=n Set averaging: This enables sensor for n seconds (Read/Write). Each second, the statistical data registers will be update to contain new averages, max and min. At the completion of n seconds, the final statistical values will be left in the registers, and the sensor will be put to sleep.
-
Page 9: Reading Via Sd-12
OPERATIONS - T1 NON - RECORDING T1/T1R INSTRUCTIONS Readings and the Auto-Enable Setting When a reading is requested, four things happen: 1. The sensor wakes up. 2. The current value in the register is returned. 3. The sensor turns on the analog portion, begins sampling, and begins putting the new values in the registers. - Page 10 OPERATIONS - T1 NON - RECORDING T1/T1R INSTRUCTIONS SDI-12 Commands Sensor Identification <a>I! <a>13 INWUSA PT12 Note: will change to reflect current 20.7ssssssssss<cr><lf> firmware version. ssssssssss = device serial number Acknowledge Active, Address Query a! a<cr><lf> ?! a<cr><lf> Change Address aAb! b<cr><lf>...
- Page 11 OPERATIONS - T1 NON - RECORDING T1/T1R INSTRUCTIONS aMC4! a0ttt4<cr><lf> Request averaged data. depends on programmed average duration. aD0! a+0+0+0+25.0000{crc}<cr><lf> Read null, null, null, average temperature Concurrent Measurement with CRC aCC! a00203<cr><lf> Request temperature/voltage measurement aD0! a+0+25.0000+12.0512{crc} Read null, temperature (°C), voltage (V) <cr><lf>...
-
Page 12: Calibration Register Definitions
OPERATIONS - T1 NON - RECORDING T1/T1R INSTRUCTIONS Calibration Register Definitions All calibration registers contain floating point values. SDI-12 Default REG ID Mnemonic Description Value Field temperature cal-slope 1.000000E+00 Field temperature cal-offset 0.000000E+00 T_Alpha Factory Temperature Cal-Alpha 0.000000E+00 T_Offset Factory Temperature Cal-Offset 0.000000E+00... -
Page 13: T1R Technical Specifications
TECHNICAL SPECIFICATIONS - T1R T1/T1R INSTRUCTIONS Dimensions and Specifications GENERAL Length 10.725” (27.24 cm) cabled 10.475” (26.61 cm) cableless Diameter 0.75” (1.9 cm) Weight 0.8 lb. (0.4 kg) Body Material Acetal & 316 stainless steel or titanium Wire Seal Material... -
Page 14: T1R (Recording Sensor) Operations
If auxiliary power is desired, you can use a 12 - 16 VDC supply that can provide 15 mA. Connect to Vaux++ (pin 1 - white) and Ground (pin 5 - blue) or contact Seametrics for auxiliary power supplies. -
Page 15: Installing Aqua4Plus Software
• Display readings from a T1R on a panel meter. If you want to use one of these methods, please see Direct Read Section or contact Seametrics for more details. Collecting Data Following is a brief overview on using Aqua4Plus to collect data. Please refer to the Aqua4Plus Instruction Manual for further details on configuring and using Aqua4Plus. - Page 16 OPERATIONS - T1R RECORDING T1/T1R INSTRUCTIONS The Real Time Monitor gives a snapshot of the current readings on the sensor. Setting up a Data Recording Session Click the tool button. A Session Profile Window will open. Refer to the Aqua4Plus Instruction Manual for details in describing your session profile.
- Page 17 OPERATIONS - T1R RECORDING T1/T1R INSTRUCTIONS • Click Start. Select the data session you are ready to upload. Viewing Data • Click the tool button to view data as a table. • Click the tool button to view data as a graph.
- Page 18 OPERATIONS - T1R RECORDING T1/T1R INSTRUCTIONS The Graph Window displays your data on an X Y coordinate graph. Exporting Data to .csv or .xls Files • Using the File Display window, open the file you want to export. • Click on the tool button.
-
Page 19: T1R (Recording Sensor) Calibration
CALIBRATION - T1R RECORDING T1/T1R INSTRUCTIONS Field Calibration Calibration can only be done when there are no sessions stored on the sensor. If there are any sessions stored on the sensor, upload any data you want and then erase the session before continuing. - Page 20 CALIBRATION - T1R RECORDING T1/T1R INSTRUCTIONS -- Second Calibration Point -- • Place sensor in water at second temperature. Allow time for sensor to reach thermal equilibrium. • Using an accurate alternate measuring device, measure the temperature of the water.
-
Page 21: Reading The T1R
READING THE T1R T1/T1R INSTRUCTIONS Direct Read While the T1R comes with our easy to use Aqua4Plus software, you can also use standard Modbus RTU or SDI-12 equipment to easily take readings, so as to tie into your existing ®... -
Page 22: Reading Via Modbus® Rtu
READING THE T1R T1/T1R INSTRUCTIONS Reading Via Modbus® RTU Setting Baud Rate Your T1R comes configured to communicate at 38,400 baud, with 8 data bits, one stop bit, and no parity. The sensor can also be set to 19,200 or 9600 baud, if needed for your application. -
Page 23: Reading Via Sdi-12
READING THE T1R T1/T1R INSTRUCTIONS Measurement Timing When you request a reading via Modbus, the sensor wakes up, returns the current values in the registers, and then starts taking new readings and updating the registers. After approximately 10 seconds, if no more readings have been requested, the sensor goes back to sleep. - Page 24 READING THE T1R T1/T1R INSTRUCTIONS SDI-12 Commands Sensor Identification <a>I! <a>13 INWUSA Note: will change to reflect current T1R2.1ssssssssss<cr><lf> firmware version. ssssssssss = device serial number Acknowledge Active, Address Query <a>!<a><cr><lf> ?! <a><cr><lf> Change Address <a>A<b>!<b><cr><lf> Change address to b Request Measurement <a>M1! <a>0021<cr><lf>...
-
Page 25: Maintanence
MAINTANENCE T1/T1R INSTRUCTIONS Changing Batteries Battery Type: Two standard AA Alkaline batteries. Because changing the batteries involves opening the water-tight seal, this must be done in a clean, dry environment to avoid contamination or moisture damage to the circuitry. Tips •... -
Page 26: Securing The Sensor
MAINTANENCE T1/T1R INSTRUCTIONS Securing the sensor In order to compress the black square ring, the sensor must be secured so that you can apply downward pressure to compress the ring. This can be done by holding in your hand, using a vise, or using pliers, as detailed below. - Page 27 MAINTANENCE T1/T1R INSTRUCTIONS Replacing Batteries and Resealing Sensor 1. Gently pull wiring to one side in order to allow batteries to fall out. Shake gently if needed. 2. Replace batteries with button (+) facing open end. 3. Reinstall wiring connector — it only goes in one way, so make sure not to force it.
-
Page 28: Alternative Connection Options
USB-to-Serial cables are readily available from many electronics and computer stores, as well as numerous sites on the Internet. Seametrics has tested and recommends the Keyspan USA-19HS. It is available from Seametrics as well as from many sites on the Internet. Install as follows: •... - Page 29 READING THE T1R T1/T1R INSTRUCTIONS A list of active COM ports will be displayed. Note the COM number assigned to the adapter you just installed. For example: Close Manager. • Connect to the sensor. • On the Aqua4Plus software, select the COM port noted above. (If you do not see your new COM port in the dropdown box, open the Communications dialog box from the Options menu.
-
Page 30: Trouble Shooting
The single most important step in minimizing a ground loop is to tie all equipment (sensors, dataloggers, external power sources and any other associated equipment) to a single common grounding point. Seametrics recommends the following: (1) the sensor cable shield (the wrapped shield inside the cable) be attached to the power ground on the datalogger and (2) the grounding lug be connected via a 12 AWG or larger wire, to a grounding rod driven into the earth. -
Page 31: Seametrics Limited Warranty
LIMITED WARRANTY/DISCLAIMER T1/T1R INSTRUCTIONS AquiStar T1 & T1R SUBMERSIBLE PRESSURE /TEMPERATURE SENSOR ® A. Seller warrants that products manufactured by Seller when properly installed, used, and maintained, shall be free from defects in material and workmanship. Seller’s obligation under this warranty shall be limited to replacing or repairing the part or parts or, at Seller’s option, the products which prove defective in material or workmanship... - Page 32 Seametrics • 19026 72nd Avenue South • Kent, Washington 98032 • USA (P) 253.872.0284 • (F) 253.872.0285 • 1.800.975.8153 • seametrics.com LT-14417r7 20180306 3/6/2018...
Need help?
Do you have a question about the T1 and is the answer not in the manual?
Questions and answers