
Summary of Contents for Amprobe DMII PRO
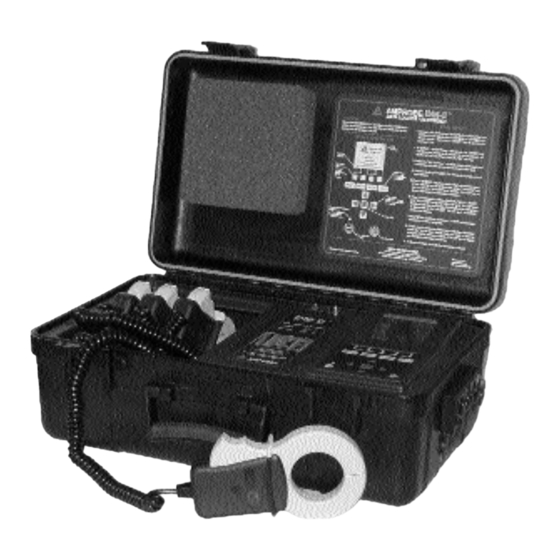
- Page 1 Part No. 995758 Rev.A | AMPROBE ® DMII ™ Data Logger Recorder User’s Manual Amprobe thanks you for purchasing the DMII PRO. For your safety, please read this instruction manual in its entirety.
- Page 2 SAFETY PRECAUTIONS & WARNINGS 1. Read this manual in its entirety before proceeding. 2. This equipment should only be used by trained professionals who are familiar with electrical hazards. 3. In many instances you will be working with dangerous levels of voltage and/or current, therefore, it is important that you avoid direct contact with any uninsulated current-carrying surfaces.
-
Page 3: Table Of Contents
R Table of Contents Introduction ..............4 Phase Set-up . -
Page 4: Introduction
R Introduction Congratulations! You have just purchased Amprobe’s DM-II (PRO) Data Logger Recorder. This instrument was designed to assist you in your work. We have written this manual in a user friendly, easy-to-follow format. Follow the steps and you will find it to be simple to use. -
Page 5: Phase Set-Up
R Phase Set-up In order to prepare your DM-II PRO for operation, follow the various steps indicated in the dia- grams that follow: STEP 1 - Press SET-UP button (phase should be highlighted). STEP 2 - Press ENTER STEP 3 - Scroll through the 4 Phase screens. Before you press OK, check Drawings A through D (on pages 6 - 7) for instructions for connecting test leads. - Page 6 R Phase Set-up (cont’d.) DRAWING A 3-Phase 4-Wire (phase to neutral measurement) NOTE: Use 3-Phase 3-Wire set-up (below) for phase voltage measurement on 3-phase 4-wire system. DRAWING B 3-Phase 3-Wire (phase to phase measurement) NOTE: V2 and I4 inputs are NOT used. Page 6...
- Page 7 R Phase Set-up (cont’d.) DRAWING C 1-Phase 2-Wire DRAWING D 1-Phase 3-Wire Page 7...
-
Page 8: Ct Set-Up
R CT Set-up Check if the type of CT’s you are using matches the set-up on the DM-II PRO. PROPER SET-UP TYPE OF CURRENT TRANSDUCERS RANGE OF THE DM-II DM-CT or Standard CTs 0-1000 amps DM-CT DM-CT CE shipped with every DM-II PRO ACF-3000DM Optional flexible CTs set-up 30-300 amps... -
Page 9: Clock Set-Up
R Clock Set-up Step 1 - Under SET-UP screen, using arrows on the keypad, select clock, then press ENTER. Step 2 - If clock needs to be changed, using arrow keys, change time and date. Step 3 - Once correct information has been obtained, press OK to return to SET-UP screen. R Language Set-up If you are satisfied with the choice of language on your screen, skip this section. -
Page 10: Communication Mode
R Communication Set-up You may skip this section. No set-up is required at this stage. The Communication Mode is used only when downloading data to a computer. Disregard the baud rate indicated on your screen, it will be selected before you download to your PC. Please refer to the software section of your manual on how to use this feature. -
Page 11: Meter Mode
• P (Real Power) on each of the phases should be positive. If it is negative, reverse the direction of the CT to make the color dot and Amprobe logo face the opposite way. • Check if voltage and amperage (current) ranges on each of the phases are within expected values. - Page 12 R Meter Mode - 3Ø 4 Wire Press the corresponding button labeled: either ØA, ØB, or ØC to view respectively phase A, B or C; press RN to view current in the neutral wire, press TOTAL to view power and power factor. Go to Phase B Go to Phase C Go to Neutral Wire...
- Page 13 R Meter Mode - 3Ø 3 Wire Using the TOTAL (corresponding black key), you can display the total 3-Phase power measurements from all three phases. Use LINE V & button to go back to volt and amp. NOTE: Indicated readings should be of an actual condition. Page 13...
- Page 14 R Meter Mode - 1Ø 2 Wire NOTE: Indicated readings should be of an actual condition. Page 14...
- Page 15 R Meter Mode 1Ø 3 Wire Press V2 2 to view Phase 2 Press V1 1 to view Phase 1 NOTE: Indicated readings should be of an actual condition. Page 15...
-
Page 16: Record Mode
R Record Mode Step 1 - Press the RECORD button . Step 2 - Select parameters for recording. • SELECT ALL button will select all of the parameters for recording. All grid boxes will become black. The DMII™ is going to record everything. •... - Page 17 R Record Mode (cont’d.) Threshold Set-up and Features The threshold feature is available for RMS voltage or current only (the first upper row). The DMII™ is going to record only those values, that are between threshold parameters. Any values beyond threshold will be recorded as zero. Threshold feature is not going to give any additional time for recording.
- Page 18 R Record Mode (cont’d.) • Changing number of parameters selected for recording - The more parameters selected, the shorter the total time of recording. If you are recording events like max, min, average, peak or energy only, there is no time limit for recording.
- Page 19 R Record Mode (cont’d.) Step 4 - Start, Stop Recording - Press the START button. This will take you to the confirmation screen. • If you press the START button again you will start a recording session. WARNING: All previously stored data in the memory will be erased. If you want to cancel and return to the RECORD selection screen, press NO (middle right black button).
-
Page 20: Viewing Data
R Viewing Data It is not necessary for you to download to a PC in order to view your recorded data. You have the option of viewing the data directly on the DMII LCD screen. Note that while the data is being recorded, the scroll feature of the charts is not available. - Page 21 R Viewing Data (cont’d.) NON DEMAND RECORDING (interval was set up to NONE) Note: If you recorded on-demand (interval was set up to 15 or 30 min.) skip this section and go to the next one. To view desired parameter, move blinking cursor to the parameter. If you selected parameter other than POWER, press ENTER.
- Page 22 R Viewing Data If you selected power, push corresponding black button to view: P - Real Power Q - Reactive Power S - Apparent Power PF - Power Factor Press VIEW button to return to the selection screen. Here is an example for single phase system: Notice that if you are viewing data while recording, you can’t scroll through the data.
- Page 23 R Viewing Data (cont’d.) ON DEMAND RECORDING (INTERVAL was set-up to either 15 or 20 minutes during recording). To view desired parameter, move blinking cursor to the parameter. - If you selected RMS, the chart on Page 21 will be shown. - If you selected POWER, the parameters are going to be displayed the same way as on Page 22.
- Page 24 R Viewing Data (cont’d.) If you selected DEMAND (available for three phase set-up only), the peak and interval selection is available (explained in the next section). Page 24...
- Page 25 R Viewing Data (cont’d.) Total will show the event value for entire recording session (this value is NOT GOING to be overwritten if the DM-II is looping TOTAL (EVENT) Interval - Points on the graph represent event values for each of the time intervals (these values ARE going to be overwritten if the DM-II starts looping).
- Page 26 R Viewing Data (cont’d.) DEMAND - will show the Peak Demand for entire recording session (this value is not going to be overwritten if the DM-II starts looping). For Peak Demand definition, refer to Page 18 “What is Energy on Demand?” Page 26...
-
Page 27: Symbols & Definitions
R Symbols & Definitions of Terms Used on the DM-II SYMBOLS AND DEFINITIONS OF TERMS USED ON THE DM-II - Voltage RMS - Current RMS (VA) - Apparent Power (W or kW) - Working Power (VAR) - Reactive Power - Power Factor Root mean square value, which is the effective value of an alternating current or voltage. - Page 28 DM-II™ Fuse Replacement/Voltage Selection Procedure True RMS Voltage and Current (volts and amps): True RMS is calculated by using Parseval’s theorem: √Σ √Σ Vrms = Irms = Real Power P (watts): The real power that performs the work of creating heat, light, motion, machine output, etc.
-
Page 29: Total Power Quantities
True Power Factor PF: The ratio of working power or Real Power, P, to Apparent Power, S. It meas- ures how effectively electrical power is being used by the system. The Displacement Power Factor has traditionally been calculated by examining the phase angle between the fundamental voltage and current and is equal to cos (θ). -
Page 30: Battery Replacement
R Battery Replacement Step 1 - Remove the battery cover by turning the two cover screws 3/4 turn counter clockwise. COVER SCREWS Step 2 - Remove batteries from battery compartment. Step 3 - Install new batteries. Use six “D” size alkaline batteries. Always replace all six batteries at the same time. - Page 31 To set voltage selection switch: 1. Disconnect the power cord from the power entry module. 2. Use a small screwdriver to open the fuse compartment door. Remove the drawer by pulling it out of the power entry module. 3. Rotate the fuse holder so that the desired voltage setting is aligned with the window. Slide the fuse holder back into the compartment until it snaps into place.
-
Page 32: Specifications
DM-II™ ODEL Data Logger/Recorder Specifications Inputs: Voltage: Three voltage channels with common (V1, V2, V3, and COM). The test leads are flexi- straight sheathed banana plugs on each end, rated for 1000Vrms and a length of 6 Ft. (set of four supplied). The alligator clips have a 1 in. jaw opening and are rated at 10A max. (set of four supplied). - Page 33 DM-II™ PRO Data Logger/Recorder (cont’d) ODEL Memory: Total of 600K RAM memory. The recording session length depends on the recording rate, the number of parameters selected for recording, recording mode, and recording interval. The memory has a lithium backup battery to preserve its contents in event of the absence of AC power and batteries.
-
Page 34: User Interface
User Interface Graphic Display: User adjustable contrast, LED backlight, 160 x 160 pixel, STN Switch Keypad: 15 key membrane switch keypad, shielding protection, embedded dual color red/green LED indicating power from line voltage or from batteries. System Requirements for DM-II View™ PRO Windows™... -
Page 35: Notes
NOTES... - Page 36 Telephone: 305-757-8811 Fax: 305-757-2153 www.amprobe.com...
- Page 37 Mouser Electronics Authorized Distributor Click to View Pricing, Inventory, Delivery & Lifecycle Information: AMPROBE DM-II PRO...
Need help?
Do you have a question about the DMII PRO and is the answer not in the manual?
Questions and answers