Advertisement
Quick Links
Thank you for purchasing this product.
THIS INSTRUCTION BOOKLET
CONTAINS IMPORTANT SAFETY
INFORMATION. PLEASE READ
AND KEEP FOR FUTURE
REFERENCE.
Lot Number:
____________________
Date Purchased: __________________
Homestar North America
607 Meacham Road, Statesville, NC 28677
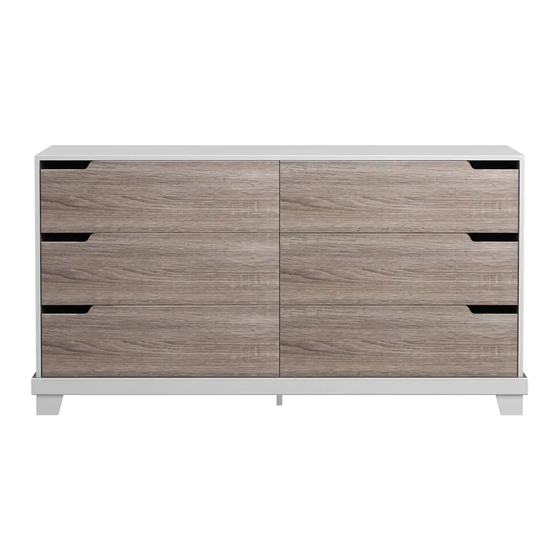
ASSEMBLY INSTRUCTIONS
Stockholm 6 Drawer
Model #108630
DO NOT RETURN YOUR UNIT
TO THE STORE
CONTACT US FIRST
For FAST, FRIENDLY and EFFICIENT service call:
Toll Free: 1-800-668-0490
(8:00am-5pm Monday-Friday EST)
United States and Canada (except holidays)
Or email: customer@homestarna.com
Most replacement parts ship from our facility in two
to three business days.
1
Dresser
Made In USA
Advertisement

Related Manuals for Homestar Stockholm


Summary of Contents for Homestar Stockholm
- Page 1 ASSEMBLY INSTRUCTIONS Stockholm 6 Drawer Dresser Model #108630 Made In USA Thank you for purchasing this product. THIS INSTRUCTION BOOKLET DO NOT RETURN YOUR UNIT TO THE STORE CONTAINS IMPORTANT SAFETY INFORMATION. PLEASE READ CONTACT US FIRST AND KEEP FOR FUTURE For FAST, FRIENDLY and EFFICIENT service call: REFERENCE.
- Page 2 O por correo electrónico: customer@homestarna.com Número de lote: ____________________ La mayoría de las piezas de repuesto se envían Fecha de compra: __________________ desde nuestra planta en dos a tres días hábiles. Homestar North America 607 Meacham Road, Statesville, NC 28677...
- Page 3 INSTRUCTIONS D'ASSEMBLAGE Commode Stockholm 6 tiroirs MODÈLE N° 108630 FABRIQUÉ AUX ÉTATS-UNIS Merci d'avoir acheté ce produit. CE LIVRET D'INSTRUCTIONS NE PAS RETOURNER VOTRE UNITÉ CONTIENT D'IMPORTANTES AU MAGASIN CONSIGNES DE SÉCURITÉ. VEUILLEZ D'ABORD NOUS CONTACTER VEUILLEZ LE LIRE ET LE...
- Page 4 NOTE! It is recommended that two people assemble this item. Assembly should be done in a dry location on a flat, level surface. Note the arrow direction on each panel when assembling the case. Our easy-to-assemble furniture is easy to put together. Just follow these step-by-step instructions carefully, and you will have furniture that is both attractive and functional.
- Page 5 ¡AVISO! Se recomienda que dos personas ensamblen este artículo. El ensamblaje debe hacerse en un lugar seco sobre una superficie plana y nivelada. Tenga en cuenta la dirección de la flecha en cada panel al ensamblar la caja. Nuestros muebles de fácil montaje son fáciles de armar.
- Page 6 REMARQUE ! • Il est recommandé que deux personnes assemblent cet article. • L'assemblage devrait être effectué dans un endroit sec, sur une surface plane. • Prenez note du sens de la flèche sur chaque panneau lors de l'assemblage de la boîte. Notre meuble facile à...
- Page 7 PARTS LIST / LISTA DE PARTES / LISTE DES PIÈCES Panels / Paneles / Panneaux 2 x part # 14 1 x part # 1 2 x parte # 14 1 x parte # 1 2 x pièce N° 14 1 x pièce N°...
- Page 8 PARTS LIST / LISTA DE PARTES / LISTE DES PIÈCES Hardware Kit / Juego de Herrajes / Kit matériel 48 x screws / tornillos / vis (H1) 4 x screws / tornillos /vis (H2) 26 x confirmat screws / tornillos confirmat / vis confirmat (H3) 14 x metal dowels / pasadores metálicos / chevilles métalliques (H4) 14 x cams locks / cerraduras de leva / serrures (H5) 24 x metal dowels / pasadores metálicos / chevilles métalliques (H6)
- Page 9 Assemble 1 glide only Step 1: Align the back of H17 with front H16 Step 2: Keep the glides aligned and slide H17 into H16 Step 3: Push H17 all the way into H16 until they lock Disassemble the assembled glide before assembling the unit Step 1: Pull out H17 as far as it can Step 2: Push down on the plastic glide arm and at the same time pull out H17 from H16 If you understand this process it will make the assembly much easier.
- Page 10 Lay out both part #4’s on the floor Both are the exact same panel. See the placement below both having the finished edges facing outward. One panel will become the left case side and one will become the right. Coloque las dos piezas #4 en el suelo Ambas son el mismo panel exacto.
- Page 11 Tools Required (not included) : Herramientas necesarias (No incluido) : Outils nécessaires (Non inclus) : Phillips screwdriver Hammer 2 x (H5) Desarmador en cruz Martillo Tournevis Philips Marteau 3 x (H16) 6 x (H1) 2 x (H4) H16 Front H16 Frente H16 Frente Finished Edge Borde Terminado...
- Page 12 6 x (H1) 3 x (H16) 2 x (H5) 2 x (H4) H16 Front H16 Frente H16 Frente Finished Edge Borde Terminado Bord Fini 5/8” (16mm) Screw placement / Ubicación de los tornillos / Vissage...
- Page 13 8 x (H5)
- Page 14 6 x (H4)
- Page 15 2 x (H13) 2 x (H8) 4 x (H9)
- Page 16 2 x (H13) 2 x (H8) 4 x (H9)
- Page 17 4 x (H4)
- Page 18 6 x (H1) 2 x (H5) 3 x (H16) H16 Front H16 Frente H16 Frente Finished Edge Borde Terminado Bord Fini 0” (0mm) Flip panel 5 over for step 11 Voltee el panel 5 para el paso 11 Faites basculer le panneau 5 pour l'étape 11 Screw placement / Ubicación de los tornillos / Vissage...
- Page 19 3 x (H16) 6 x (H1) H16 Front H16 Frente H16 Frente Finished Edge Borde Terminado Bord Fini 0” (0mm) Screw placement / Ubicación de los tornillos / Vissage...
- Page 20 Part #11 is a common part and there are 12 pieces. When completed with the following steps 12 and 13 you should have 6 left drawer sides and 6 right. Please pay attention as this can be confusing. La parte #11 es una parte común y hay 12 piezas. Cuando haya completado los siguientes pasos 12 y 13 usted debe tener 6 lados del cajón izquierdo y 6 del derecho.
- Page 21 Complete this step 6 times Complete este paso 6 veces Effectuez cette étape 6 fois 1 x (H17) 2 x (H1) H17 Front H17 Frente H17 Frente 2 x (H7) Insert 2x H7 on the other side of the board Inserte 2x H7 en el otro lado de la tabla Insérez deux H7 de l'autre côté...
- Page 22 Complete this step 6 times Complete este paso 6 veces Effectuez cette étape 6 fois 2 x (H1) 1 x (H17) H17 Front H17 Frente H17 Frente 2 x (H7) Insert 2x H7 on the other side of the board Inserte 2x H7 en el otro lado de la tabla Insérez deux H7 de l'autre côté...
- Page 23 Complete this step 3 times Complete este paso 3 veces Effectuez cette étape 3 fois 4 x (H6) 4 x (H6) Complete this step 3 times Complete este paso 3 veces Effectuez cette étape 3 fois...
- Page 24 Complete this step 6 times Complete este paso 6 veces Effectuez cette étape 6 fois Lock metal cams before going to the next step. Fije las levas de metal antes de ir al siguiente paso. Veuillez verrouiller les cames métalliques avant de passer à l'étape suivante.
- Page 25 Complete this step 6 times Complete este paso 6 veces Effectuez cette étape 6 fois...
- Page 26 4 x (H3) Complete this step 6 times Complete este paso 6 veces Effectuez cette étape 6 fois...
- Page 27 Finished Edge Borde Terminado Bord Fini Lock metal cams before going to the next step. Fije las levas de metal antes de ir al siguiente paso. Veuillez verrouiller les cames métalliques avant de passer à l'étape suivante.
- Page 28 Finished Edge Borde Terminado Bord Fini Support the left side of Part #3 & #12 in order to complete next step. Apoye el lado izquierdo de la Parte #3 & #12 con el fin de completar el siguiente paso. Soutenez le côté gauche de la pièce no 3 & no 12 pour compléter l'étape suivante.
- Page 29 Finished Edge Borde Terminado Bord Fini Lock metal cams before going to the next step. Fije las levas de metal antes de ir al siguiente paso. Veuillez verrouiller les cames métalliques avant de passer à l'étape suivante.
- Page 30 Finished Edge Borde Terminado Bord Fini 2 x (H3)
- Page 31 Finished Edge Borde Terminado Bord Fini Lock metal cams before going to the next step. Fije las levas de metal antes de ir al siguiente paso. Veuillez verrouiller les cames métalliques avant de passer à l'étape suivante.
- Page 32 Lock metal cams before going to the next step. Fije las levas de metal antes de ir al siguiente paso. Veuillez verrouiller les cames métalliques avant de passer à l'étape suivante.
- Page 33 2 x (H2) 2 x (H2)
- Page 34 Make sure the back panel is nailed on squarely to the case starting with 6 nails. Make sure the case sides, top and bottom are all parallel with the edges of the back panel. Asegúrese de que el panel trasero esté clavado en ángulo recto al cajón comenzando con 6 clavos. Asegúrese de que las partes laterales junto con las partes superior e inferior del cajón estén todas paralelas con los bordes del panel posterior.
- Page 35 Before the back panel is completely attached make sure the back panel is square to the case. Otherwise you will create drawer alignment issues. Antes de que el panel trasero esté completamente colocado asegúrese de que esté cuadrado con el cajón. De lo contrario, usted creará problemas de alineación del cajón. Avant de fixer complètement le panneau arrière, assurez-vous qu'il est perpendiculaire au boîtier.
- Page 36 To insert the drawers Step 1: At the same time align the drawer box glides with the glides on the case sides Step 2: Keep the glides aligned and slide the drawer box glides into the case side glides Step 3: Push the drawer all the way in so the drawer is closed, this will assure the 2 glides connect and lock You may have to push hard to get the drawers in the first time Para insertar los cajones Paso 1: Alinee al mismo tiempo las correderas de la gaveta con las correderas de las partes laterales del cajón...
- Page 37 To remove the drawers Step 1: pull the drawer out as far as possible Step 2: Press up on the left glide plastic arm and push down on the right glide plastic arm Step 3: While still pressing down and up on the plastic arms grab the drawer box and pull out the drawer box This may take a little force please don’t be afraid of pulling a little harder on the drawer Para quitar los cajones Paso 1: tire del cajón hacia afuera lo más lejos posible...
- Page 38 4 x (H11) 1 x (H12) 1 x (H15) 2 x (H14) WARNING Serious or fatal crushing injuries can occur from furniture tip-over. To prevent this furniture from tipping over it must be permanently fixed to the wall. Fixing devices for the wall are not included since different wall materials require different types of fixing devices.
- Page 39 Trouble Shooting Problems Drawers appear to be slightly crooked in the case Make sure the back is nailed on squarely Make sure that all tack glides are nailed in Make sure the center foot part #12 is straight up and down Make sure your floor is level Drawer glide issues Make sure all screws attaching the glides are screwed down tight to the drawer boxes and case sides...
- Page 40 ASSEMBLY INSTRUCTIONS INSTRUCCIONES DE ENSAMBLAJE INSTRUCTIONS D'ASSEMBLAGE Stockholm 6 Drawer Dresser Model #108630 Made In USA Aparador Estocolmo Commode Stockholm 6 tiroirs de 6 cajones MODÈLE N° 108630 Modelo #108630 FABRIQUÉ AUX ÉTATS-UNIS Fabricado en EE.UU IF YOU NEED ASSISTANCE WITH ASSEMBLY OR TO ORDER PARTS, PLEASE CALL 1-800-668-0490 AND REFERENCE THE MODEL #.
Need help?
Do you have a question about the Stockholm and is the answer not in the manual?
Questions and answers