Advertisement
Quick Links
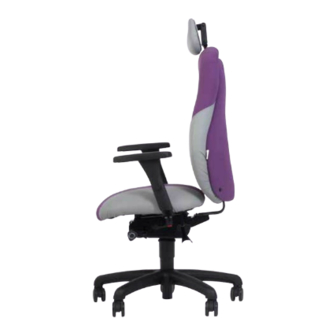
Congratulations on
the purchase of your new
®
Zenki Chair.
All Zenki products are designed to help
users achieve stress free working postures
but even the best ergonomic chair in the world
can't do everything for you.
Spending just a few minutes getting to know your
new chair and thinking about the way you sit
will make a huge difference to how much
you will enjoy this product.
That's why we've written this
short guide to help you achieve
the very best experience.
®
Zenki
User Guide
Good ergonomics at work
Advertisement

Related Manuals for HWS Zenki Series


Summary of Contents for HWS Zenki Series
- Page 1 Congratulations on the purchase of your new ® Zenki Chair. All Zenki products are designed to help users achieve stress free working postures but even the best ergonomic chair in the world can’t do everything for you. Spending just a few minutes getting to know your new chair and thinking about the way you sit will make a huge difference to how much you will enjoy this product.
- Page 2 Setting your chair up … In order to achieve the very best performance from your Zenki Chair please follow the Set Up instructions in the order published. 1. Seat Height 2. Seat Depth 3. Back Angle 4. Back Height 5. Seat Pivot / Free-Float 6.
- Page 3 1. Seat Height Ideally your hips should be slightly higher than your knees in order to promote good posture. When your shoulders are relaxed and elbows are at right angles, your forearms should be just above the surface of the desktop, parallel to the floor.
- Page 4 2. Seat Depth Your bottom should be at the back of the seat with roughly three fingers’ gap between the front of the seat and the back of your knees. This will ensure adequate thigh support without obstructing leg movement or lower leg circulation.
- Page 5 3. Backrest Angle Adjustment To fix the back rest angle, rotate the knob by one click to unlock then move the backrest to your desired angle. You can lock the back position by rotating the knob one more click. If you require the chair to operate in Free-Float mode leave the back rest unlocked (in the first position).
- Page 6 4. Back Height Lock the back rest in a vertical position. When seated, grasp the sides of the backrest and raise one click at a time until comfortable. PULL UP The Zenki Chair features a 7- position ratchet system. To reposition the back, lift fully to the top, lower to the bottom to re-engage ratchet and raise again to the desired height.
- Page 7 Seat only unlocked Seat & back rest unlocked together 5. Seat Pivot (& Free Float) The seat is locked/unlocked by rotating the knob as with the back rest (step 3) Having both the seat and back rest unlocked together will provide the full Free-Float experience.
- Page 8 6. Body Weight Tension In the Free-Float mode the resistance of the mechanism is set automatically by the weight of the user. This resistance can be increased to give a more controlled feel if desired. The tension adjustment handle is located at the front right side of the seat.
- Page 9 7. Reactive Lumbar Support You can adjust the level of support for the sacral, lumbar and lower thoracic areas of the spine by pumping the inflator bulb located on the outer back rest. The triple air cell automatically balances out to mirror your natural spinal curve.
- Page 10 8. Multiway Armrests (Optional) Height Adjustable Arms The armrests should touch the Width Adjustable Arms underside of your forearms when your shoulders are relaxed and Depth Adjustable Pad elbows are at right angles. Width Adjustable Pad This will avoid stress in the neck, Twist Top Pad shoulders and upper limbs.
- Page 11 9. Neck Support (Optional) ROTATE Alter the height by grasping the pad and raising or lowering to desired height. Next, move the articulated bracket so that the pad is in contact with the back of the head. Finally, rotate the angle of the pad so that the bottom of the pad nestles into the nape of the neck and the desired level of...
- Page 12 ® Zenki Good ergonomics at work 01639 844500 sales@healthyworkstations.com www.healthyworkstations.co.uk...
Need help?
Do you have a question about the Zenki Series and is the answer not in the manual?
Questions and answers