
Subscribe to Our Youtube Channel
Summary of Contents for Robin PROLINE
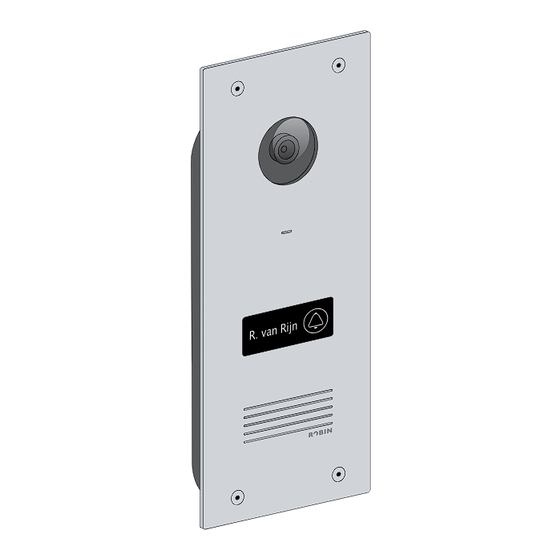
- Page 1 ROBIN PROLINE DOORBELL Manual Handleiding Bedienungsanleitung R i j n Mode d’emploi R . v a n Instrucciones de uso...
- Page 2 Additional copies are available on the Robin • power consumption: 5 W website or via the Robin support service. The latest manual for • ambient temperature: -30 - 60°C this product is available at any time on the Robin website.
-
Page 3: Warranty Conditions
If no invoice is available, the production date applies. The consumer is obliged to inform Robin Telecom Development B.V. in writing of any non-conformity within two months from reporting a defect. - Page 4 • stroomverbruik: 5 W nieuwe eigenaren. Extra exemplaren zijn beschikbaar op de • omgevingstemperatuur: -30 – 60°C Robin-website of via de Robin-support service. De nieuwste • CE en FCC markering handleiding voor dit product is op elk moment beschikbaar op de Robin-website.
- Page 5 Als er geen factuur is, is de productiedatum van toepassing. De consument is verplicht Robin Telecom Development B.V. binnen twee maanden na het melden van het gebrek schriftelijk op de hoogte te stellen van de non-conformiteit.
-
Page 6: Technische Daten
Sie muss in den Bestand für elektrische Installationen • Montage: standardmäßig Unterputzmontage aufgenommen und an neue Besitzer weitergegeben • Versorgungsspannung: 48 VDC ± 10% werden. Zusätzliche Exemplare sind auf der Robin-Website • Leistungsaufnahme: 5 W oder über den Robin-Support erhältlich. Die aktuelle • Umgebungstemperatur: -30 - 60°C Bedienungsanleitung zu diesem Produkt ist jederzeit auf der •... - Page 7 Im Falle einer Nichtkonformität hat der Konsument ausschließlich Anspruch auf kostenlose Produktreparatur oder -ersatz, was jeweils von Robin Telecom Development B.V. entschieden wird. Robin Telecom Development B.V. haftet nicht für einen Defekt oder Folgeschäden. ROBIN SUPPORT Besuchen Sie unsere Support-Seite für Support, FAQs und RMA-Anforderungen: www.robin.nl/de/unterstutzung...
-
Page 8: Caractéristiques
Des exemplaires supplémentaires • Consommation d'énergie : 5 W sont disponibles sur le site Web de Robin ou via le service • Température ambiante : -30 à 60 °C d’assistance Robin. Le dernier manuel d'utilisation de ce •... -
Page 9: Conditions De Garantie
En cas de non-conformité, le consommateur n'a droit qu'à une réparation ou à un remplacement gratuit du produit, sur la décision de Robin Telecom Development BV. Robin Telecom Development BV ne peut être tenu responsable de tout défaut ou dommage résultant. SUPPORT ROBIN Consultez notre site de support technique, les questions fréquentes et les requêtes RMA :... -
Page 10: Especificaciones
Se pueden obtener ejemplares • consumo eléctrico: 5 W adicionales en el sitio web de Robin o a través del servicio de • temperatura ambiente: -30 – 60 °C asistencia de Robin. La última versión de las instrucciones de •... - Page 11 El consumidor tiene la obligación de informar por escrito a Robin Telecom Development B.V. de la no conformidad en el plazo de dos meses desde la notificación del defecto. En caso de no conformidad, el consumidor solo tiene derecho a una reparación o sustitución del producto, según el criterio de...
- Page 12 Package Contents / Inhoud verpakking / Lieferumfang / Contenu de l'emballage / Contenido del embalaje 68mm 2.7” drilling Ethernet IN To Robin DC Run PoE Run Power 48V 110mA 5W 0000 0000 Model : A00000 Content : Proline MAC : FF:FF:FF:FF:FF:FF drilling Serial : R0000-0000 Otterkoog 14J 1822BW Alkmaar (NL)
- Page 13 Mounting / Montage / Montage / Montage / Montaje EN The doorbell can be mounted in three different ways. In a hollow wall or column. In a stone wall: this requires the optional flush-mounting box. On a wall, this requires the optional surface-mounted box. NL De deurbel kan op drie verschillende manieren gemonteerd worden.
- Page 14 In hollow wall / In holle wand / In hohler Wand / Dans un mur creux / En un muro hueco EN Use the drilling template supplied. Use a hole saw (90mm / 3-1/2” ) or jigsaw to make a cutout. 6 8 m m 2 .
- Page 15 EN Place the interference filter (1) around the Ethernet cable. Mount the doorbell aft er connecting the cables (step 3). If necessary, use adapted screws suitable for the material on which it is being mounted. NL Plaats het ontstoringsfilter (1) om de Ethernetkabel. Monteer de deurbel na aansluiting van de kabels (stap 3).
- Page 16 With flush-mounted box / Met inbouwdoos / Mit Unterputzdose / Avec un boîtier encastré / Con caja de montaje empotrado 5 m m 9 0 - 9 4 ” - 3 - 3 / 3 - 1 / 2 M i n . 5 0 m m 2 ”...
- Page 17 EN For mounting in a stone wall, make a recess in the wall with the indicated dimensions (1). Drill a hole through the wall for the Ethernet cable and optional bell connector. Pass the cables through one of the four holes in the flush-mounting box. Make sure the flush-mounting box is level and flush with the wall.
- Page 18 With flush-mounted box / Met inbouwdoos / Mit Unterputzdose / Avec un boîtier encastré / Con caja de montaje empotrado...
- Page 19 EN Adjust the positioning of the internal adjustment plate if the flush-mounted box is not completely level (1). Connect the cables (see step 3 in the manual). Screw the doorbell to the flush-mounted box using the screws and Allen key (2) supplied. NL Stel de positionering van de interne stelplaat bij indien de inbouwdoos niet helemaal waterpas staat (1).
- Page 20 Surface Mounting Box / Opbouwdoos / Aufputzdose / Boîtier en applique / Caja de montaje exterior...
- Page 21 EN Keep the surface-mounting box in the right place on the wall and make sure it is level. Mark the four mounting holes on the wall with a pencil. Also mark the point where to make the hole for the doorbell cables. Drill the holes. Feed the Ethernet cable and optionally the bell cables through the drilled hole (1).
- Page 22 ProLine connection / Aansluiting ProLine / Anschluss ProLine / Connection ProLine / Conexión ProLine MA C FF : FF : FF : FF : FF : CAT5 Max 24V - 0,75 A 1 OR / W Max 24V - 0.75 A 2 OR Máx.
- Page 23 EN Strip the outer sheath and the individual cores of the Ethernet cable using the proper tool (1). Connect the cable. The colours for the individual cores must match the colour coding on the PCB. An additional cable (two-wire) is required for the chime connection (2). Attach the cable(s) to the housing as a tension relief using the supplied 'tie wrap' (3).
- Page 24 PoE connection / Aansluiting PoE / Anschluss PoE / Connexion PoE / Conexión de PoE Internet Ethernet IN To Robin DC Run PoE Run Power...
- Page 25 NL De deurbel moet worden aangesloten op de meegeleverde Power over Ethernet (PoE) injector. Sluit de kabel van de deurbel aan op de ‘To Robin’ aansluiting (1). Sluit de Ethernetkabel van de router aan op de ‘Ethernet IN’ aansluiting (2). Sluit als laatste de voeding aan op de ‘Power’...
- Page 26 Gravieren Sie im Spiegelbild und ausreichend tief (mindestens 0,3 mm) FR La gravure peut être eff ectuée via robin.nl ou via votre propre service de gravure. Gravez sur le dos de l'étiquette. Cela garantit que l'éclairage peut briller à travers la gravure.
- Page 27 NL Plaats het label (1 t/m 4). Let wel: een label dat eenmaal geplaatst is kan lastig verwijderd worden. Bij vragen en nieuwe labels bekijk www.robin.nl/nl/support. DE Platzieren Sie das Namensschild (1 bis 4). Hinweis: Ein einmal platziertes Namensschild ist schwer wieder zu entfernen.
- Page 28 HomeKit connection / HomeKit koppeling / HomeKit-Link / Connexion HomeKit / Conexión con HomeKit 9 41 48V 110mA 5W 0000 Model : A00000 Model : A00000 0000 Content : Proline Content : Proline MAC : FF:FF:FF:FF:FF:FF MAC : FF:FF:FF:FF:FF:FF Serial : R0000-0000 Otterkoog 14J 1822BW Alkmaar (NL)
- Page 29 EN Make sure that the iPhone or iPad is connected via Wi-Fi to the same network as the doorbell and that the doorbell is booted up according to step 4. Open the Apple Home app on the iPhone or iPad and click on the '+' symbol in the upper right corner to add the doorbell.
- Page 30 Robin IOS app / Robin IOS app / Robin IOS-App / Application Robin iOS / Aplicación iOS de Robin EN With the Robin app you can change the settings for your doorbell and update the firmware. Scan the QR code to download the app from the App Store.
- Page 31 Robin IOS app / Robin IOS app / Robin IOS-App / Application Robin iOS / Aplicación iOS de Robin EN To change the settings or firmware of a doorbell click on the icon next to the doorbell. To view the snapshot history, press the icon.
- Page 32 Daily use / Dagelijks gebruik / Täglicher Gebrauch / Utilisation quotidienne / Uso diario Done Robin Proline Settings 2019-03-15 12:47:25 LIVE R i j n R . v a n...
- Page 33 EN To ring the bell, press the bell symbol (1). This will display a message on the paired iOS device and your doorbell will ring (if an external bell is connected). Tap the notification to open the Home app and watch the live video. When the live video is shown, you can tab the icon (2) to activate the two-way audio with the person at the door.
- Page 34 Reset factory settings/ Reset fabrieksinstellingen / Werkseinstellungen zurücksetzen / Réinitialiser les paramètres d'usine / Restablecer los ajustes de fábrica Ethernet IN To Robin DC Run PoE Run Power 30 SEC. 5 SEC.
- Page 35 Apple Woning-app (stap 7). DE Um den Robin auf die Werkseinstellungen zu resetten, ist es erforderlich, das folgende Verfahren zu befolgen: Ziehen Sie den Netzstecker aus dem PoE-Adapter (1) und schließen Sie ihn nach 5 Sekunden Wartezeit erneut an. Warten Sie, bis die Türklingel hochgefahren wird.
- Page 36 Apple is not responsible for the operation of this device or its compliance with safety and regulatory standards. ©2019, Robin Telecom Development. Any illustrations and drawings only serve to provide an impression of the product; and do not constitute any legal obligation. All rights and technical modifications reserved.
Need help?
Do you have a question about the PROLINE and is the answer not in the manual?
Questions and answers