Table of Contents
Advertisement
Quick Links
Advertisement
Table of Contents

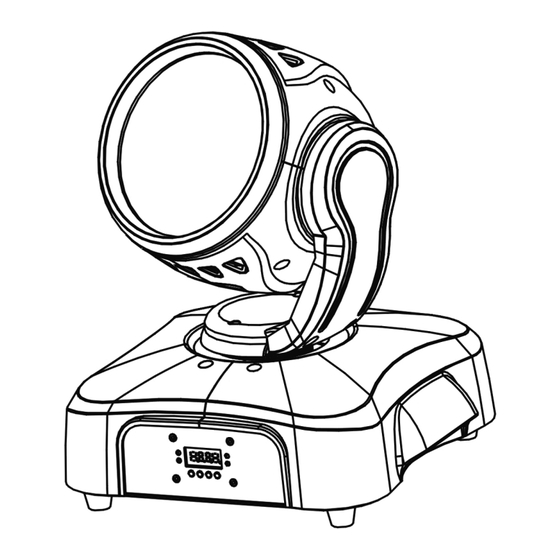
Summary of Contents for Professional Entertainment Technology StairVille MH-360
-
Page 2: Table Of Contents
Congratulations on your purchase of this Moving Head. To get the most from your equipment you must read all of this manual before using it first time. Table of Contents 1. Safety Instruction ................3 Warning ..................3 Caution ..................4 Installation ................... -
Page 3: Safety Instruction
1. Safety Instruction You have to carefully read the instruction, which includes important information about the installation, usage and maintenance. • Please keep this User Guide for future consultation. If you sell the unit to another user, be sure that they also receive this in- struction booklet. -
Page 4: Caution
• Do not open the unit within five minutes after switching off. • The housing, the lenses, or the ultraviolet filter must be replaced if they are visibly damaged. Caution There are no user serviceable parts inside the unit. Do not open the housing or attempt any repairs by yourself. -
Page 5: Change Beam Angle
2.1 Change Beam Angle In this CM series, if you want to change the beam angle of fixture, you can change lens of the fixture as below: angle art.-no. 15° 219955 25° 219957 (standard) 45° 219956 3. How To Set The Unit 3.1 Control Panel Display To show the various menus and the selected functions... -
Page 6: Main Function
Button MENU To select the programming functions DOWN To go backward in the selected functions To go forward in the selected functions ENTER To confirm the selected functions Mains input IEC socket and integrated fuse holder, connect to main power ca- ble. - Page 7 - 7 -...
- Page 8 DMX 512 Address Setting Press the MENU button up to when the is showing on the display. Pressing ENTER button and the display will blink. Use DOWN and UP button to change the DMX512 address. Once the address has been selected, press the ENTER button to setup or au- tomatically return to the main functions without any change after 8 seconds.
- Page 9 without any change press the MENU button again. Sound Mode Press the MENU button until the is showing on the display. Pressing ENTER button and the display will blink. Use DOWN and UP button to select the (sound on) or (sound off) mode.
- Page 10 Led Display Press the MENU button up to when the is showing on the display. Pressing ENTER button and the display will blink. Use DOWN and UP button to select the (Led on) or (Led off) mode. Once the mode has been selected, press the ENTER but- ton to setup or automatically return to the main functions without any change after 8 seconds.
-
Page 11: Home Position Adjust
Software version Press the MENU button up to when the is blinking on the display. Pressing ENTER button and the display will show the version of software of the unit. To go back to the functions press the MENU button again. Reset Press the MENU button up to when the is blinking on the display. -
Page 12: Pocket-Master I
4.1 Master/Slave Built In Preprogrammed Function By linking the units in master/slave connection, the first unit will control the other units to give an automatic, sound activated, synchronized light show. This function is good when you want an instant show. You have to set the first unit in master mode and select (show 1) or (show 2) or... -
Page 13: Dmx 512 Configuration
DOWN and UP button to change the DMX512 address. Once the address has been selected, press and keep ENTER button pressed up to when the display stops blinking or storing automatically 8 seconds later. To go back to the functions without any change press the MENU button again. -
Page 14: Dmx512 Connection
4.5 DMX512 Connection The DMX 512 is widely used in intelligent lighting control, with a maximum of 512 channels. 1. If you using a controller with 5 pins DMX output, you need to use a 5 to 3 pin adapter-cable. 2. -
Page 15: Troubleshooting
0-511 (usually 0 & 1 are equal to 1). 6. The end of the DMX 512 system should be terminated to re- duce signal errors. 7. 3 pin XLR connectors are more popular than 5 pin XLR. 3 pin XLR: Pin 1: GND, Pin 2: Negative signal (-), Pin 3: Positive signal (+) 5 pin XLR: Pin 1: GND, Pin 2: Negative signal (-), Pin 3: Positive signal (+) -
Page 16: Fixture Cleaning
E. One of the channels is not working well 1. The stepper motor might be damaged or the cable connected to the PCB is broken. Consult your dealer then. 2. The motor’s drive IC on the PCB might be out of condition. Consult your dealer then. F. If The pan belt is broken ..consult your dealer. 6. - Page 17 EC Declaration of Conformity We declare that our products (lighting equipments) comply with the following specification and bears CE mark in accordance with the provision of the Electromagnetic Compatibility (EMC) Directive 89/336/EEC. EN55014-2: 1997 A1:2001, EN61000-4-2: 1995; EN61000-4-3:2002; EN61000-4-4: 1995; EN61000-4-5: 1995, EN61000-4-6:1996, EN61000-4-11: 1994.
- Page 18 - 18 -...
- Page 19 - 19 -...
- Page 20 Contact: Musikhaus Thomann e.K. Treppendorf 30 96138 Burgebrach Germany www.thomann.de...
Need help?
Do you have a question about the StairVille MH-360 and is the answer not in the manual?
Questions and answers