Table of Contents
Advertisement
Advertisement
Table of Contents

Related Manuals for Excelltel MK-208

Summary of Contents for Excelltel MK-208
-
Page 2: Table Of Contents
Table of Contents Chap 1 Brief Introduction & Features..........1 1.1 System Overview ..............1 1.2 Features ................1 Chap 2 Installation & Connection............2 2.1 System Appearance............2 2.2 Technical Parameter ............3 2.3 Attention................3 2.4 Warning................4 2.5 Installation procedure ............4 2.5.1 Connecting C.O. lines & extensions to the unit: ..4 2.5.2 Zero-load power-on inspection: .......4 2.6 Direct Access when Power Failure ........5 Chap 3 System programming ............6... - Page 3 3.6.4 Setting Auto-attendant Mode (OGM) for All C.O. Lines ..................11 3.6.5 Setting Auto-attendant Mode (OGM) for Certain C.O. line..................11 3.6.6 Setting Auto-attendant Mode .........12 3.6.7 CRBT (Directly ringing while play OGM Process in Auto-attendant Mode) ............12 3.7 OGM setting (Outgoing Message)........13 3.7.1 Setting OGM paragraph mode.......13 3.7.2 OGM recordable time..........13 3.7.3 OGM Recording (multiple paragraphs mode)..13...
- Page 4 3.13.5 Clear Restriction Group of Item B......21 3.13.6 Clear All Restriction of Item B ......21 3.14 Assign Special Calling-out Number......21 3.14.1 Assign Special Calling-out Number for Class 0...21 3.14.2 Clear Permission of Certain Group......22 3.14.3 Clear All Permission..........22 3.15 Calling Time Restriction Setting / Clear .......22 3.15.1 Calling Time Restriction Setting......22 3.15.2 Clear Calling Time Restriction ......22 3.16 Exts.
- Page 5 4.1.2 Automatic Mode Setting.........28 4.2 Outward Call..............28 4.2.1 Outward Dialing 9 First (or Dialing Directly) ..28 4.2.2 Outward Call by Choosing a Certain Line .....29 4.2.3 CO line booking............29 4.2.4 Automatically Callback when Busy ......29 4.2.5 Outgoing Call Transfer (Secretary Function) ..30 4.2.6 Automatically Redial ..........30 4.3 Intercom Call ..............30 4.3.1 Intercom Call at Indirect-Dialing-Out Mode.
- Page 6 4.13.1 Reporting of Ext number for Caller ID phone ..39 4.13.2 Reporting of System time........39 4.13.3 Reporting of PBX System Version.......40 4.13.4 Reporting of PBX System Status......40 4.14 Priority Access and Monitoring........40 4.15 Setting Don’t Disturb / Clear..........40 4.15.1 Setting Don’t Disturb ..........40 4.15.2 Clear Don’t Disturb..........41 4.16 Clear Extension Function Setting .........41 4.17 Call All Extension............41...
- Page 7 5.2.1 Setting the connector port for Door-phone ....55 5.2.2 Doorphone ringing Extensions Assignment ..56 5.2.3 Door phone call auto transfer to CO line setting ...56 5.2.4 Setting Duration of switch Signal ......56 5.3 Operating Instruction ............56 5.3.1 Door phone call & Door opener (call internal extension) ................56 5.3.2 Door phone call &...
-
Page 8: Chap 1 Brief Introduction & Features
Chap 1 Brief Introduction & Features 1.1 System Overview With its design and manufacture according to G.712 and G.732 protocols of CCITT, the system integrates virtues of various KTSs with advanced functions of PABX, and has unique advantage in innovation. As a type of new generation with over 50 powerful functions for business and management, it has wide application in offices, enterprises, hotels……etc. -
Page 9: Chap 2 Installation & Connection
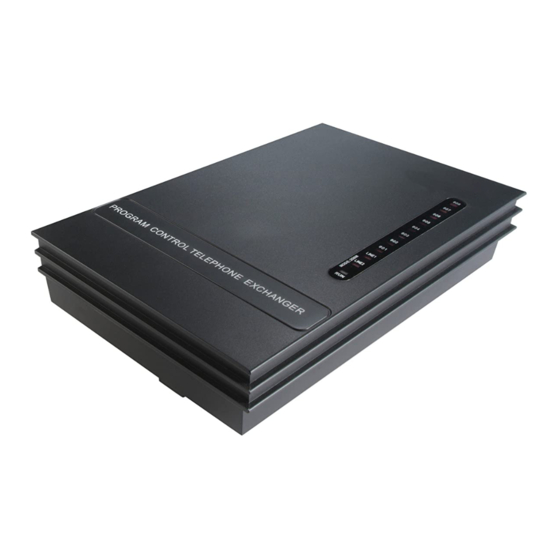
Chap 2 Installation & Connection Before Installation For easy and quick installation and connection, it is strongly recommended that the user read and follow the following instruction carefully so as not to damage the system accidentally by incorrect operation. 2.1 System Appearance NOTE: 1. -
Page 10: Technical Parameter
208/308 Front View: 208/308 Rear View : ① ② External Music interface Co line Port ③ ④ Extension Por Power Socket ⑤ ⑥ Lock interface 2 Lock interface 1 ⑦ keyphone interface 208/308 Connection Diagram: 2.2 Technical Parameter Power Supply Voltage ----------------AC 220V or AC 110V, 50-60Hz Power Dissipation ----------------------≤20VA Exchange Mechanism-----------------Analog spatial division Type of Telephone-----------------------Dual Tone Multi-Frequency... -
Page 11: Warning
The telephone exchange shall be installed in a stable indoor place ℃ with dry, ventilated environment. (Temperature Range: 0-45 , Humidity Range: 20%-80%.Avoid straight sun shine or in the environment of flammable or caustic gas.) Special telephone wire is preferable. A marginal space around the exchange should be remained for heat sink, inspection and maintenance of the system. -
Page 12: Direct Access When Power Failure
out the voltage of local power supply. A UPS backup is highly recommended. Plug in the power supply line, indicating normal power supply and working state of the machine. Pick up the handset of extension 601. A sharper internal dial tone indicates that the system is working normally. -
Page 13: Chap 3 System Programming
Chap 3 System programming 3.1 Before programming ● All the programming must be carried out on the extension 601, 602, 603, 604; all the programming must be into system programming status. ● All the extensions must be of dial tone multi-frequency phone with caller id function. -
Page 14: Change The Password
3.2.2 Change the Password Format: 09EFGH# Explanation: EFGH is the new system password. Description: to change the password of system programming. Example: Changing the system password from “0000” to “5678” 1. We suggest changing the password before using. 3.2.3 Flash Time Setting Format: 00F # Explanation: F means the flash time. -
Page 15: Enable/Disable C.o. Lines
3.3 Enable/Disable C.O. Lines You must use these commands according to the actual trunk lines before using this product!!! If you don’t enable any C.O. line, the system will consider there is no C.O. line and doesn’t auto detect C.O. line!!! 3.3.1 Enable All C.O. -
Page 16: Day/Night Change Mode Setting
Format: 02 HHTT# Setting Hour/Minute of system Explanation: HH: hour, 00-23, 24 hours mode TT: minutes, 00-59 Format: 020000W # Set week of system Explanation: W: Week, 1-7(7 = Sunday) Example: Set system to 2002/12/18 21:30 Sunday 3.4.2 Day/night change mode setting Format: 0 4 0# Set day/night mode in automatically changing mode 0 4 1#... -
Page 17: Setting Operator
3.5 Setting Operator. 3.5.1 Setting Operator Format: 15N # Explanation: N: the Ext. line No., N=1-8 Description: To assign any Ext as the operator. In the default setting, Ext.602 is the operator. Example: Setting Ext.602 as operator In operator mode, this programming doesn’t change the ringing extension assignment 3.5.2 Fast Dialing Operator Format: 1 5 2 0 #... -
Page 18: Ringing Mode When All The Ringing Extensions Is Busy
1. When the C.O. line is in operator mode, the Operator mode ringing extension (setting refer3.10.1&3.10.2) will be ringing when calling in, the caller can hear the ringing tone. 2. Operator mode or auto-attendant mode, certain C.O. line just can be in one status, but if set the certain C.O. -
Page 19: Setting Auto-Attendant Mode
1. If the caller doesn’t know the extension number, he can inquiry the operator by dialing “0”. 2. Outgoing Message must be record when setting this mode. 3.6.6 Setting Auto-attendant Mode Format: 0 4 4 0 # Enable auto-attendant (OGM) in day and night 0 4 4 1 # Enable auto-attendant in day (means in night is operator mode) -
Page 20: Ogm Setting (Outgoing Message)
3.7 OGM setting (Outgoing Message) This system has one OGM with 50 seconds (default) recordable time. 3.7.1 Setting OGM paragraph mode The system use up to four paragraph of OGM messages, and can be set in four modes, see below: Format: 0451# Set OGM to be one paragraph mode... -
Page 21: Ogm Playing (Multiple Paragraphs Mode)
extension and this extension is busy, if you want to transfer this calling to other extension, you may record “Sorry! This extension is busy. please dial other extension number or dial “0” for operator.” OGM 3 recording , this is the third OGM, usually it is for C.O. line dial extension and this extension no answer, you may record “Sorry! This extension do not answer, please dial other extension number or dial “0”... -
Page 22: Monitoring The Holding Music
Description: To setting the OGM volume and monitoring P=0-7, maximum is 0 Note: It doesn’t affect the OGM paragraph mode. 3.8 Monitoring the Holding Music Format: 14 # Description: Perform the music on holding melody or test the quality of telephone unit. -
Page 23: Auto-Attendant Mode No Dial Process
waiting(no extensions ringing),this is default setting. Format: 1 5 4 1# Description:When multiple external lines calling because auto-attendant just one or two lines, some one external line calling just can be waiting, the system can be set to ring the operator mode ringing extension(refer3.10.1&3.10.2) and will not lose any calling. -
Page 24: Called Extension No Answer Process
3.9.5 Called Extension No Answer Process Format: 166# Description: when the called extension is no answer, the C.O. line will be cut off; this is the default setting. Format: 1660# Description: when the called extension is no answer, the call transferred to operator. -
Page 25: Dialing-Out Mode Setting
In default setting only Ext601, 602 will ring. Format: 3 1 M N 1 # Description: Disable No. N Ext. ring when calling of No.M C.O. line come in while system in night mode. Format: 3 1 M # Description: Disable all Exts ring when calling of No.M C.O. line come in while system in night mode. -
Page 26: Set Direct-Dialing-Out Mode For Certain Ext
3.11.4 Set Direct-Dialing-Out Mode for Certain Ext. Format: 2N0# Explanation: N: the Ext. line No., N = 1 - 8 Description: set Direct-Dialing-Out mode for Ext.N. Example: Set Direct-Dialing-Out mode for Ext.607 1. In Direct-Dialing-Out mode, extension make intercom call should dial *first, then dial the extension number. -
Page 27: Setting Restriction Item (A/B)
Explanation: N: the Ext. line No., N = 1 - 8 L : class number, L= 0 - 6 Description: Assign dialing-out class L for certain Ext. N Example: Assign class 3 for Ext.606 3.13 Setting Restriction Item (A/B) 3.13.1 Setting Restriction Item A Format: 4 1 Q ABCD# Explanation: ABCD: the initial digits of the calling number to be locked, it can be from 1-digit to 4-digits, it should be ended with # if less than 4-digits. -
Page 28: Setting Restriction Item B
3.13.4 Setting Restriction Item B Format: 4 2 Q ABCD# Explanation: ABCD: the initial digits of the calling number to be locked, it can be from 1-digit to 4-digits, it should be ended with # if less than 4-digits. Q --- The group series from 01 to 16. Description: to restrict the call-out number starting with ABCD Example: Ext.606 is be assigned dialing-out class 5, now you want Ext.606 can’t dial the numbers with initial digits –... -
Page 29: Clear Permission Of Certain Group
3.14.2 Clear Permission of Certain Group Format: 43P # Explanation: P: The group series from 01 to 16. Description: to cancel the permission of certain calling-out numbers of group P 3.14.3 Clear All Permission Format: 4 3 # Description: to cancel all the permission of special calling-out numbers. 3.15 Calling Time Restriction Setting / Clear 3.15.1 Calling Time Restriction Setting Format: 6NTT#... -
Page 30: Assign Exts. Outgoing To Certain C.o.line / To Clear In Night Mode
70N2# Allow extension N use all C.O.lines in day mode. 70N3# to restrict EXT.N use all C.O.lines in day mode. 3.16.2 Assign Exts. Outgoing to Certain C.O.Line / to Clear in night mode Note: If you not use day/night function, you needn’t to set these settings. Format: 71MN0# Assign the extensions N outgoing to use the certain C.O. -
Page 31: Number)
numbers should be equal digits, and not in duplicate. For example, to set the extension’s number to 4-digit number (8001-8008),the user should dial 918001# first ,then dial 928002#,938003#…one by one, up to 988008. 3.17.2 Restoring Original Extension Numbers Format: 9000# Description: return to the Exts number of the default setting, that is: from 601 to 602 603…... -
Page 32: Transfer Operation Parameter
3.19 Transfer Operation Parameter 3.19.1 External Transfer Mode Format: 1530# Description: After 3 busy tone, can connect the C.O line in 5 seconds, this is the transfer mode 1. Format: 1531# Description: After 10 secs busy tone, waiting the transfer Ext. to pat the hook to reconnect the C.O.line again without off-hook, this is the transfer mode 2. -
Page 33: Ext. Groups Function Setting
can’t display CID correctly and you know the CID mode, you can use 1812# or 1813# to set CID mode compulsively. 3.21 Ext. groups function setting 3.21.1 Assign the Exts. groups number The extensions can be set to 2 groups, each group is from 01 to 08 and have a programmed number. -
Page 34: Setting The Exts. Groups Working Mode
3.21.3 Setting the Exts. Groups working mode Format: 1 6 8 # Description: to define the Exts. groups are in meeting mode. Explanation: when Extension groups are in meeting mode; If one extension call one extension group, the members in this group will ring at the same time, each extension can pick up the handset and talk with the caller, while the other extension keep ringing . -
Page 35: Chap 4 Operating Instruction
Chap 4 Operating Instruction 4.1 Day/Night Mode Setting 4.1.1 Manual Setting In manual mode, you can input the following command: Format: # 2 0 Switch the system to day mode. # 2 1 Switch the system to night mode. 1、The default mode is day mode. 2、The command can be inputted only by Programming Extensions ( Ext. -
Page 36: Outward Call By Choosing A Certain Line
C.O. line, you may dial the desired number after hearing the C.O. line dialing tone. Example: You call out with number 80129876 in Indirect-Dialing-Out mode 1. The user should dial 9 within 15 seconds after hearing the internal dialing tone. 2. -
Page 37: Outgoing Call Transfer (Secretary Function)
otherwise the call canceled. 2. If the Ext is at Direct-Dialing-Out mode, you should input: * # 0 then hang up. 4.2.5 Outgoing Call Transfer (Secretary Function) Format: Pat the hook (or press the FLASH button) then dial the Ext. number Description: This function let you make an outgoing call from one Ext then divert and connect other Ext. -
Page 38: Intercom Call At Direct-Dialing-Out Mode
set(refer 3.18.1) 4.3.2 Intercom Call at Direct-Dialing-Out Mode Format: * + Ext number Description: Make internal call from Ext. with Direct-Dialing-Out mode. Example: Call the Ext.608,then you should input * 608 when you in Direct-Dialing-Out mode. 4.3.3 Calling to Exts.group at Direct-Dialing-Out Mode Format: Exts. -
Page 39: Answering Call
4.4 Answering call 4.4.1 Answering Calls at Operator Mode The Ext (s) which is set to ring will ring when an incoming call is received, and pick up the handset you may answer the call directly. Under the default mode, Ext.601 and Ext.602 will ring. 4.4.2 Answering Calls at Auto-attendant Mode The system use three paragraph of OGM messages, the relevant messages will be heard automatically in the follows situations:... -
Page 40: Line Reservation
1. If the Ext is at Direct-Dialing-Out mode, you should input: * # 9. 2. Internal call also can be picked up. Operation2: Format: # 3 + Ext . number (Indirect-Dialing-Out mode) Description: Allows you to answer the calling that is ringing at the certain Ext. ... -
Page 41: Transfer To One Certain Exts.group
hold). Whoever hang up (A or B), the system will transfer outside caller to the other. 2. A does not hang up and B does not answer A ,A can pat the hook will restore the connection with C.O. line and stop ringing B. 3. -
Page 42: R Key Function
2、Answer incoming waiting call by # 9 and take back the first one by # 9 again can be repeatable as long as the you like for CO.line, but for doorphone you can only switch one time. 3、The waiting incoming call beep(prompt beep) are different for the door phone call 4、and the CO.line call ;... -
Page 43: Set & Clear Other Ext. Call Forwarding Through Programming Extensions
1. There may be following 2 cases after a call is transferred from A to B. a. A does not hang up and B picks up his handset. Then communication amount A B and C.O. line is established, whoever hang up (A or B), the system will transfer outside call to another one. -
Page 44: Call Forwarding
Explanation: Clear any settings of call forwarding for all Ext. whether directly forwarding setting or busy (nobody available) forwarding setting. Format: # 28NTT Explanation: to set No.N Ext. call transfer to external number talking time (TT = 01-99, units: 10 seconds) The default setting is TT=09, total 90s(80s talking time,10s alarm time ) Description: <abcd>... -
Page 45: Clear Setting Call Forwarding Directly
4.12.2 Clear Setting Call Forwarding Directly Format: # 81 # then hang up Description: Clear setting call forwarding directly of this extension. Note: 1.If the Ext is at Direct-Dialing-Out mode, you should input: * # 81. 2.Allow you to cancel this function with format #80 (refer to 4.17.) 4.12.3 Call Forwarding When Ext is Busy or Nobody Available Before you can setting this function,you must use #81# and #82# (or #80)to cancel all the function of call forwarding setting . -
Page 46: Inquiry Functions
same as extension C to call the external number. And Extension A stop ringing. II、When External user K to call extension A, the system will forward to (directly/ busy/nobody available) external number M, after connected, 2 external numbers user can talk. When the talking time is beyond the setting time (#84TT setting,default is 80s) ,then the system will send 10 seconds time DUDUDU alarm , at that time each external can press * to proceed the conversation(90s). -
Page 47: Reporting Of Pbx System Version
Description: After input the command and hang down, telephone will ring, and the time will be displayed in your caller identify telephone. Format: # 66 Description: After input the command and hang down, telephone will ring, and the date will be displayed in your caller identify telephone. 4.13.3 Reporting of PBX System Version Format: # 64 Description:... -
Page 48: Clear Don't Disturb
Description: If “Don’t Disturb” is set for the extension, then this extension will not ring. If the Ext is at Direct-Dialing-Out mode, you should input: *# 83 4.15.2 Clear Don’t Disturb Format: Pick-up the handset Description: To cancel “Don’t disturb’ function, you just pick up the handset. -
Page 49: Chap5 Maintenance&Troubleshooting
Chap5 Maintenance&Troubleshooting 5.1 Outgoing calls can’t be made 1). C.O. line is set to special Extension; 2). Extension hangs up improperly; 3). CPU and internal data is disorder caused by unstable power. 4). Call restriction class is 6. 5.2 Outside calls can’t dial in 1). -
Page 50: Chap 6 Glossaries
Chap 6 Glossaries Programming extension------Extension No.601, 602, 603, 604 EFGH --------------------------4 digits of programming password N----------------------------------Series number of the extensions (1-8 with corresponding input ports 1-8) (one digits) abcd------------------------------Number of the extension(1-8999,except for the digits with the first digit of 0 or 9,outward code of special trunk line, in equal length)is accordance with N. -
Page 51: Chap 7 Default Settings
Chap 7 Default Settings ●C.O. line: 206/308 are in Disable status. ● Operating mode: All C.O. line in Operator mode, ● Dialing out mode: in Indirect-Dialing-Out mode, dialing “9” for outgoing ● Original EXT number: 601 to 608 and Operator: Ext. 602 ●Intercom CID number not add digits ●... -
Page 52: Chap 8 System Programming & Operation Instruction
Chap 8 System Programming & Operation Instruction 8.1Index of Basic Operation Indirect-Dialing-Out mode Direct-Dialing-Out No. Description Command mode 1 Set to day status in manual mode # 2 0 *# 2 0 Set to Night status in manual # 2 1 *# 2 1 mode 9 + desired number... -
Page 53: Index Of System Programming
press# (when hear busy press # (when 19 CO line/Extesion booking tone) hear busy tone) Automatic Reporting of Ext # 61 *# 61 number (voice) Reporting of Ext number for caller # 62 *# 62 ID phone 22 Connect with Operator Directly Priority Access and Monitoring # 7 M * # 7 M... -
Page 54: External Transfer Mode
function disable weekend mode 0 4 8 1 # function from Monday 04900 # Weekend mode setting Sunday as work day set week W as work day 0 4 9 0 W # from Monday 0 4 9 1 0 # Sunday as weekend day set week W as weekend 0 4 9 1 W #... - Page 55 Transfer to operator mode 1616# ringing extension System option for Call back the extension 162# transfer to a no answer Don’t call back 163# Line break when busy 165# Transfer to operator 1650# Dialing Extension Busy process in send prompt tone to the 1655# auto-attendant extension...
- Page 56 Direct-Dialing-Out mode for Ext.N 2 N 0 # Indirect-Dialing-Out mode for Ext.N 2N1 # Direct-Dialing-Out mode for all the Exts. 20 # Indirect-Dialing-Out mode for all the Exts 21 # Del all member in the first Exts. Group 390# Add member in the first Exts.Group 390 N …...
-
Page 57: Appendix I Abbreviated-Dialing
doorphone clear the first doorphone 8000# clear the second 8100# doorphone Clear all extensions assigned to the doorphones Assign Ext. N to be the ring extensions when the 82N# doorphone calling The Exts number return to the default setting 9000 # To change the first Exts.Group number to new number 990abcd# "abcd"... -
Page 58: Appendix Ii Auto Fax Detect Function
Appendix II Auto FAX Detect function This function allow the system detect the incoming fax call, and automatic transfer to the Fax extension. 2.1 Programming setting Format: 470# disable fax detecting function 470N# setting ext.N is fax and disable fax detecting function 471K# setting detected fax signal number, that is the system will maintain the signal when detected number K... - Page 59 function disable, the system treat all C.O. line as normal trunk line. Format: 0710# Description: Routing function enable and In Auto-select the least-cost routing model Format: 0711# Description: Routing function disable, also cancel the system In Auto-select the least-cost routing model Format: 0720# Description: Routing function enable and the system In Manual-select the least-cost routing model...
-
Page 60: Operating Instruction
Remark:1. K=1, 2…..8 (K can’t be outgoing code 9 or 0) 2. K can’t be same as the first digit of extension number Setting the certain numbers for Routing to Special trunk line (In Auto-select the least-cost routing model) Format: Description: Clear all the certain numbers for Routing to Special trunk line .We recommend the user to use this format before setting the certain numbers for routing, which can clear the previous storage. -
Page 61: Appendix Iv Ip Dialing Function
Appendix IV IP dialing function IP-dialing means when the extension make a outward call, then the system will add IP prefix number automatically before dialing telephone. This system allow you to set two groups IP number, each number correspond to any C.O. Lines 4.1 Programming setting The follows format should be in programming status: 4.2 Enable/Disable IP Dialing function,... -
Page 62: Appendix Vi Door-Phone Functions
Step2: setting all trunk lines as the Normal trunk line, into programming status, input 0760 #; Step3: Setting the prefix number of LCR, for example dial 0-prefix is long-distance, then into programming status, input 08 #, 08010 #, after this setting 0 is set as a special number (already included 00 for International call) Step4: Setting set Normal C.O. -
Page 63: Doorphone Ringing Extensions Assignment
Default: not set doorphone 5.2.2 Doorphone ringing Extensions Assignment Format: 8 2 # Description: Clear all extensions assigned to the doorphones . Format: 8 2 N# Description: Assign Ext. N to be the ring extensions when the doorphone calling NOTE:1、In default setting: Ext.601 &Ext.602 is assigned to all doorphone call. -
Page 64: Door Phone Call & Door Opener
1095 Budapest, Mester utca 34. 1141 Budapest, Fogarasi út 77. Tel.: *218-5542, 215-9771, 215-7550, Tel.: *220-7940, 220-7814, 220-7959, 216-7017, 216-7018 Fax: 218-5542 220-8881, 364-3428 Fax: 220-7940 Mobil: 30 940-1970, 20 949-2688 Mobil: 30 531-5454, 30 939-9989 E-mail: delton@delton. hu Web: www.delton.hu www. excelltel.hu...
Need help?
Do you have a question about the MK-208 and is the answer not in the manual?
Questions and answers